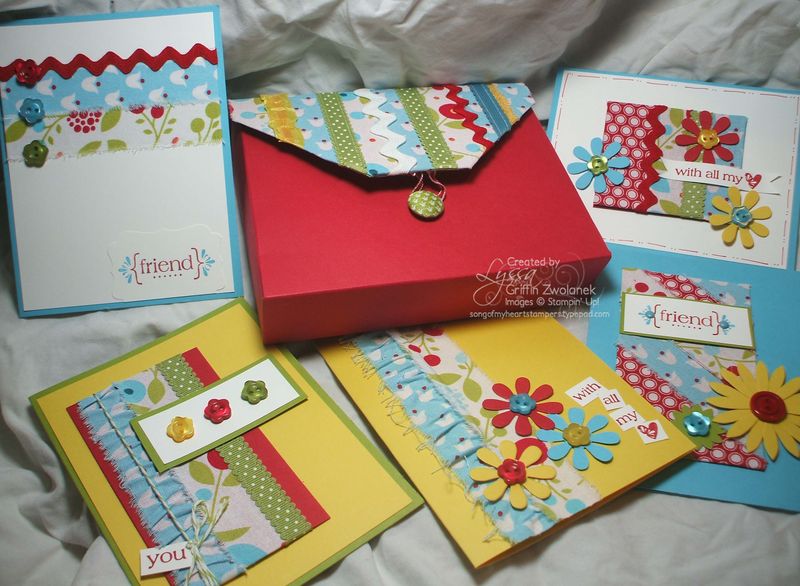
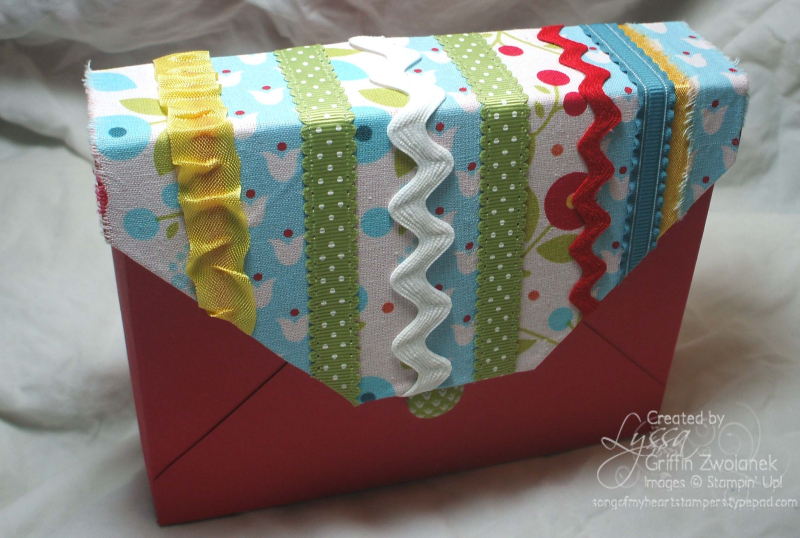
Think fabric belongs in the sewing room, not the stamp room? Think again! This is the perfect project for those of you who are thinking of jumping on the textiles trend in papercrafting! I created this stationery box and card set with the new Stampin' Up Summer Smooches product suite, the With All My Heart stamp set, the Bolds family of cardstock, inks, and embellishments, and the Blossom Party die for the Big Shot.That stamp set is retiring on May 31st, but you can order the Summer Smooches line beginning June 1st, 2012.
I'll walk you through making the box, and then talk about each of the fabric-embellished cards individually in another post. The box was originally the brainchild of my talented demo friend Jackie Topa–thanks for the inspiration, girlfriend!
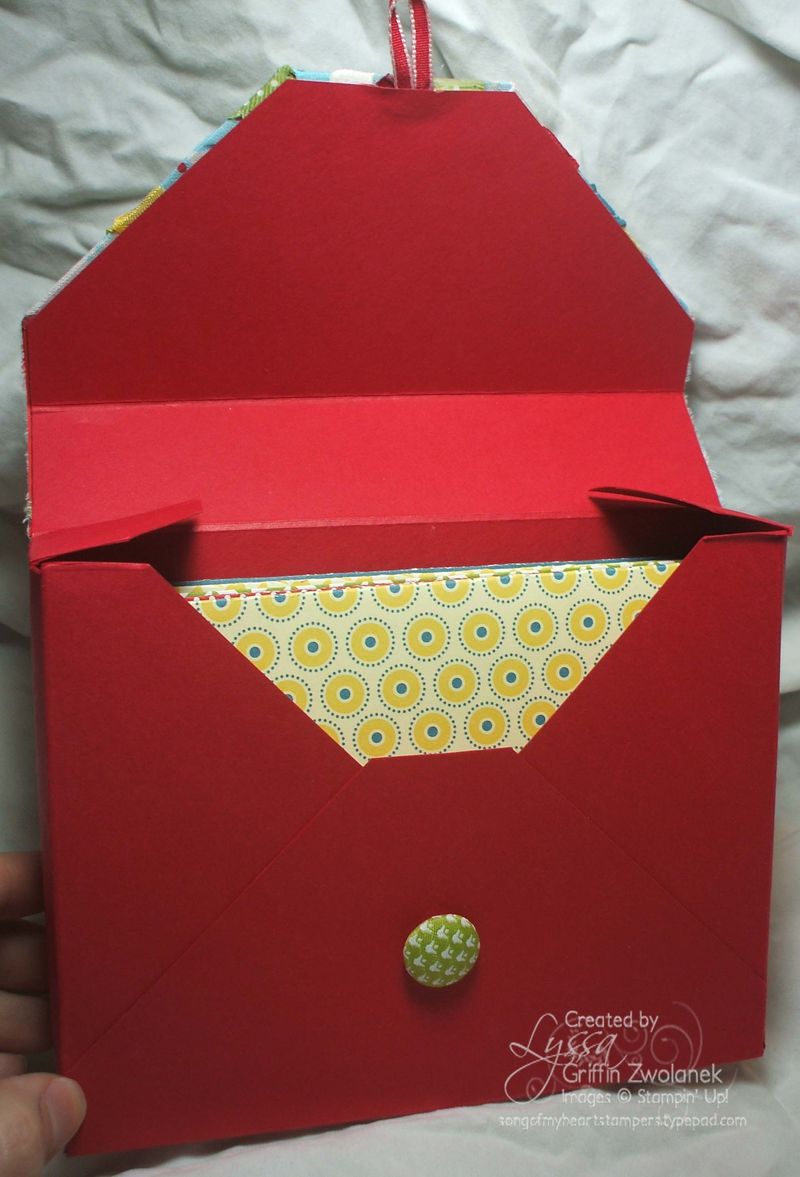
To begin, you'll need the Simply Scored board with the new Diagonal Attachment, one sheet of 12×12 cardstock, Sticky Strip, scissors, and a button or brad and small loop of ribbon for a fastener (or a Velcro dot works, too). All of these items can be ordered on my shopping website: www.lyssa.stampinup.net
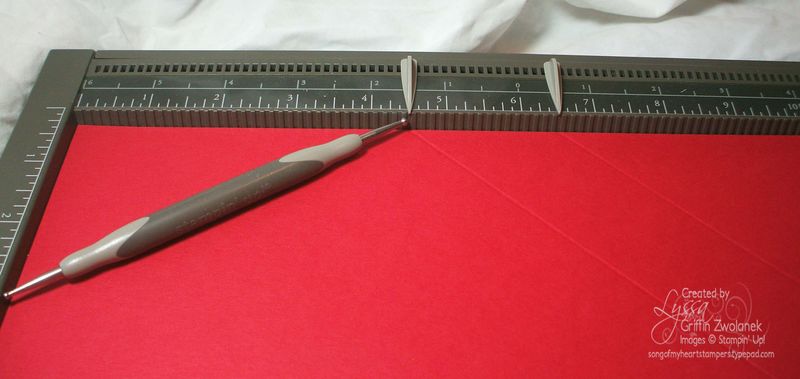
Start by trimming your 12×12 down to 11×11. With the Diagonal Attachment in place on your Simply Scored, score at 4.5 and 6.5 inches on the top sidebar, and 4.5 and 6.5 inches on the left hand sidebar.
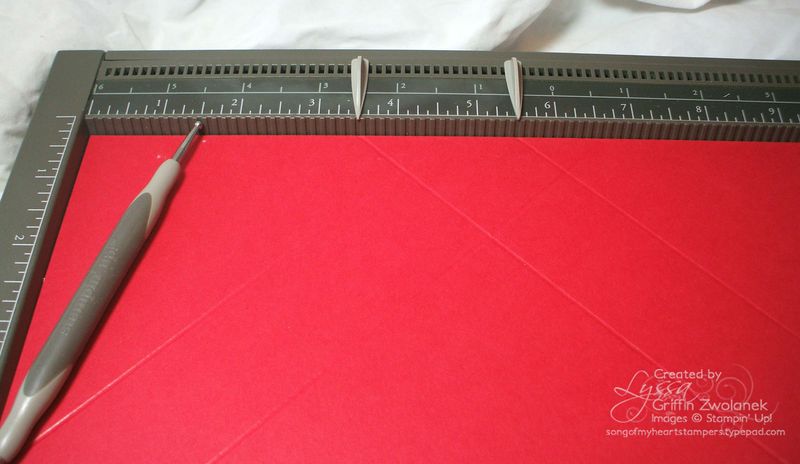
Turn the cardstock 90 degrees (doesn't matter which direction) and score at 3.5 and 5.5 on the top bar and 3.5 and 5.5 on the left hand side bar.
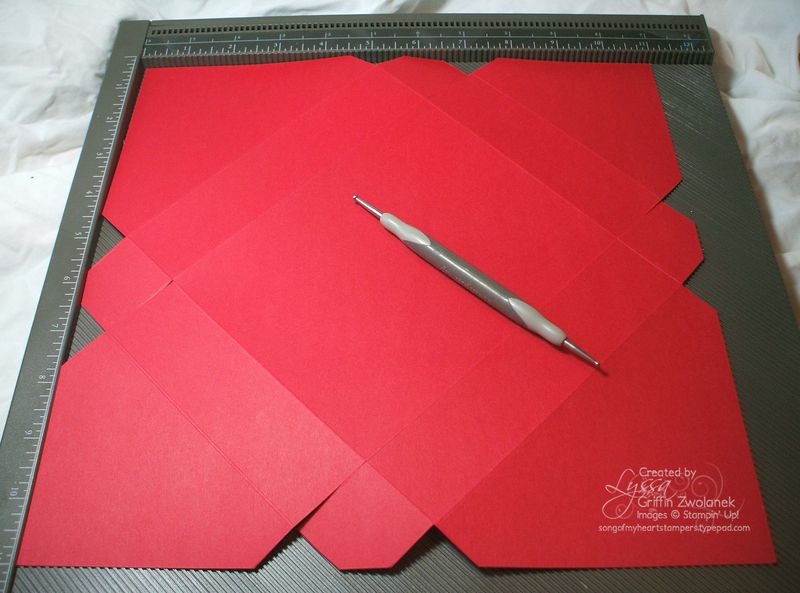
Then just snip up the folds to the scored lines, creating notches and leaving flaps as shown above. Fold three sides in to form the box, and use Sticky Strip (highly reccomended) or other strong adhesive to secure. Add your button/brad and loop closure, and embellish as desired!
For my box, I created a second, false lid from scrap cardstock exactly the same size as the one on the box, and covered it with Multipurpose Adhesive Sheet. I laid torn strips of Summer Smooches fabric side by side until the lid was covered. I wrapped the ends around and under so that the edges had a nice finished look.
I can hear your gears turning–no, that's not a new embellishment–it's just rick rack I had leftover from making Natalie's Summer Smooches outfit. I did use Island Indigo ruffled ribbon, Old Olive polka-dotted scallop grosgrain, and Daffodil Delight seam binding, though. Unfortunately, the cute fabric covered brads that went with the Summer Smooches line are all sold out, but of course you can just use a button or even make your own fabric-covered one, if you don't mind a little sewing.
Now, don't forget to go look at the post with the matching cards!
If you enjoyed this FREE photo tutorial, please leave a comment below! An amazing amount of time and effort that goes into a good online tutorial, not to mention the time spent designing and creating. Take a moment to leave some love! Thanks for visiting.



Beautiful!! Thanks for sharing:)
Oh, how lovely…. I will be giving this one a go when I get a spare moment. Thank you so much for sharing and please keep doing what you’re doing – you’re awesome!!
Luv Lynne
xxx
Thanks for the great ideas Lyssa
Thank you for posting this. This is absolutely awesome and you use the SU fabric so creatively … first for your cute daughter’s outfits, and now on cards.
This is so cool that I may switch what I’m doing for my fabric swap at convention!
Looks great – thanks for sharing.
I read your blog everyday and love looking at all of your creations! Thank you for posting this tutorial.
Thanks for the inspiration of using fabric on cards – love it! Do you find the Multipurpose Adhesive Sheet is the best (or only) adhesive to use for fabric on paper?
Love your ideas, and will be making some of these for loved ones.
Love your blog…thanks for the inspiration!
Wow, great job on the tutorial. I need to go find my SU fabric!!
Love the tutorial and the box and cards. This gift would be like giving someone a box of sunshine! So cool. Thanks for the time and energy you invested to share.
I saw this on Jackie’s blog and have wanted to make one but just haven’t had the time – yet… I do like how you made the closure for this envelope box. Great idea!!!
So cute!
I simply love your creations and to provide a free tutorial is so generous of you. Thanks so much for all the inspiration you provide to us and for kindly sharing with us the how to’s!
Love this! Great gift idea! Thank you for sharing this tutorial with us! Love your blog!Very helpful and most of all very inspirational!
This is amazing – thank you for the tutorial!!
Amazing … thanks fo sharing!
This is SUCH a great project!!! Thank you so much for sharing!
I really really like this your work is wonderful. I always check you out. Thanks for sharing with us.
What a great idea and the colors are wonderful. Thanks so much for sharing.