Hey, everyone! Welcome to another edition of "A Simply Scored Christmas," a 2011 blog series where we are celebrating the wonderful addition of the Simply Scored tool to the Stampin' Up product line! Every day until the 15th there will be a photo tutorial or mini-tutorial featuring the Simply Scord. As always, you can purchase everything you see here on my shopping site, www.lyssa.stampinup.net
Today's project is a great little box made with the help of the Movers & Shapers die for the Big Shot! To give you an idea of the dimensions, it is a little bigger than an Altoids tin. It has a fun little window in the top done with the die, but if you do not have the die, I will give you measurements to make your own at home as well. However, the die is great fun and very versatile!
To begin, you need the Big Shot and the Movers & Shapers Curly Label XL die, a Shapers punch window (I used the Scalloped Oval), cardstock, the Simply Scored board, sticky Strip, and stamps, ink, punches and other fun stuff to gussy it up.
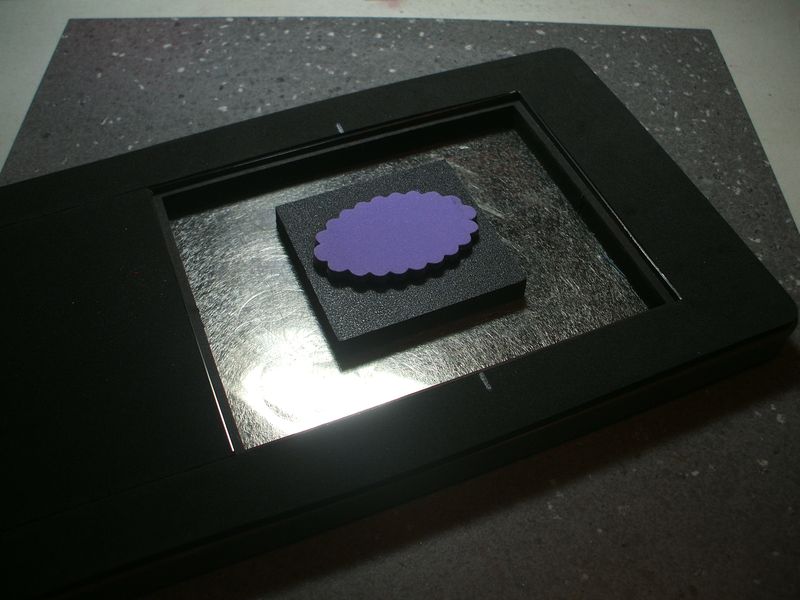
Start by positioning your Shaper in the direct center of the card-front opening of the Movers & Shapers die. TIP: I made two small marks with a white gel pen to help me find the center–it's at 2.75 inches on the long sides and 2 and 1/8 inches on the short side. Place your cardstock over the top and run it through the machine using the correct "sandwich."
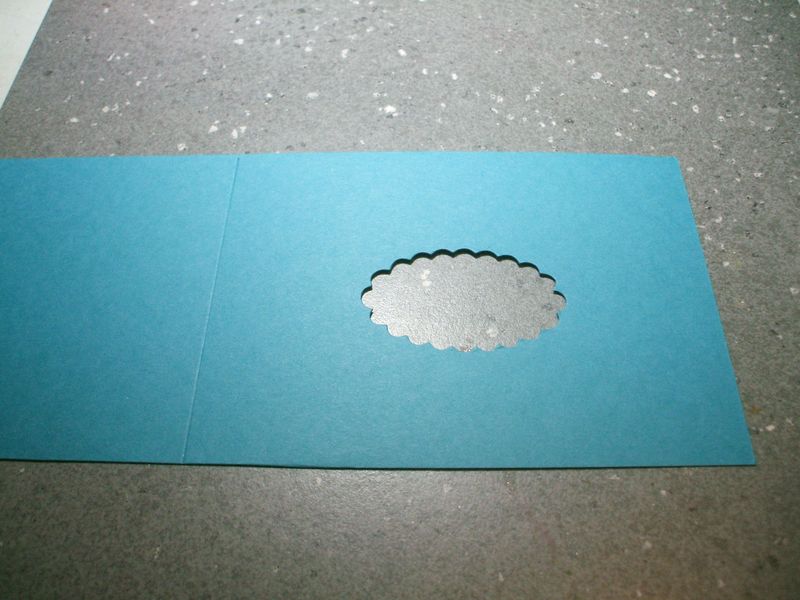
Love the Movers & Shapers and how it lets you have complete control over where the window goes! However, if you don't own it, you can still make this easy box. Just cut a 4.25×11 piece of cardstock and score it at 5.5 on the long side. Use a punch or other die to make a window in one of the panels.
Now you're all caught up with the rest of us, and can continue on from here.
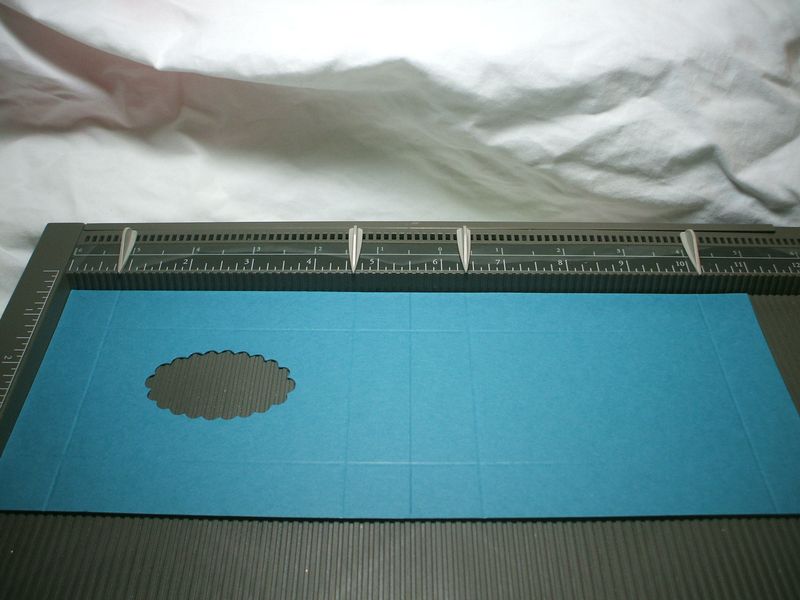
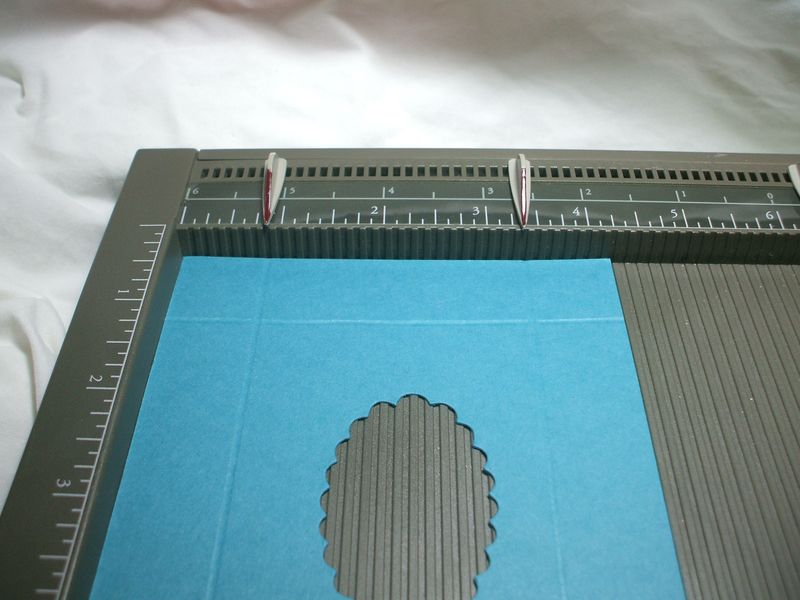
Score at 7/8 inch, 4 and 5/8 inch, 6 and 3/8 inch and 10 and 1/8 inch on the long side (as shown above with the exclusive Simply Scored place markers). Turn the cardstock 90 degrees and score at 7/8 inch and 3 and 3/8 inches (shown below).
Pausing a second to point out a great TIP for using your Simply Scored board to its maximum potential! See how, in the photo above, I have two dark red place markers? I bought an extra pack of place markers and used red nail polish on them. Now I can set all the place markers for both the long AND the short sides of a project at the same time, and just remember to do only the red markers and not the gray ones on the short side. it is such a time saver!
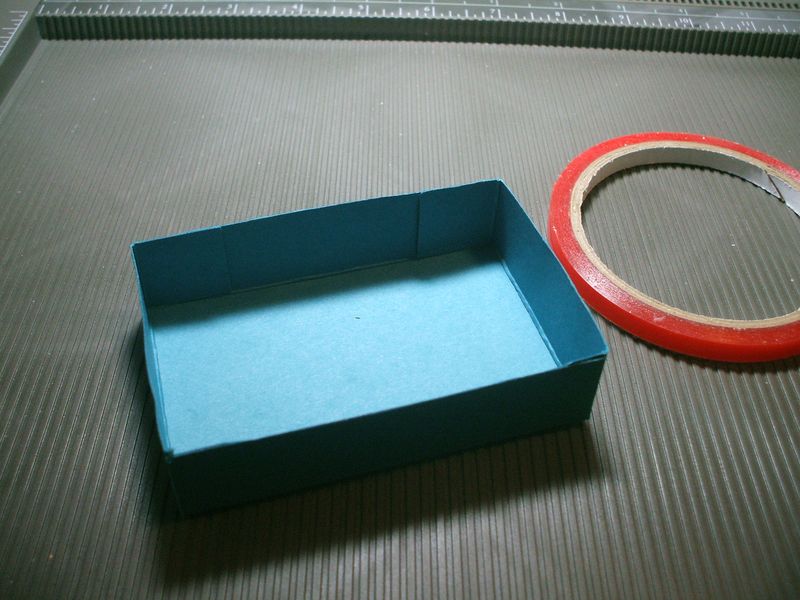
Ok, back to the box. Now you can slice the two box halves apart on that 5.5 inch score line originally made by the Movers & Shapers die. Snip up to the folds as shown below, and create the boxes just like you normally would, using Sticky Strip for the best adhesivity. I think I just invented that word. It works.
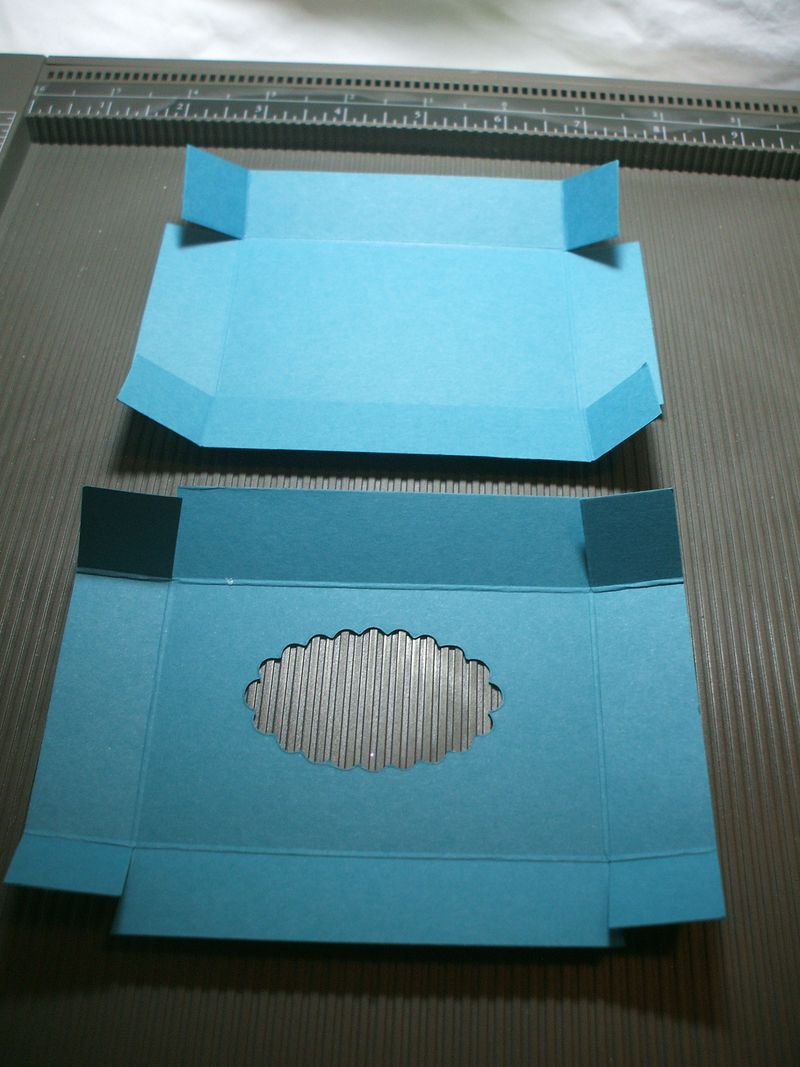
I would suggest making the bottom first, and then assembling the top around the bottom, so you can be sure you are getting a snug fit, but not too snug. You want the lid to be loose enough to come off without prying, but not so loose that you spill the contents.
I adhered a window sheet scrap to my Movers & Shapers window, and embellished the box with the coordinating Oval and Scallop Oval punches, some ribbon and a Mini Library Clip, but you can do whatever makes you happy!
What makes ME happy is hearing about how much you are loving "A Simply Scored Christmas." Thank you to everyone who has left a comment thus far–you have totally made my day! I hope you will join me again tomorrow (and bring a friend!) as I show you how to make the easiest flip-fold album ever–one that is so convenient and quick, it is sure to become a go-to favorite when you need a gift. Happy stamping!



I just discover your blog. I love your “A Simply Scored Christmas” Thank you for sharing! Can’t wait till the next one
Greetings from Germany
Margret
très jolie boite et merci pour le tuto