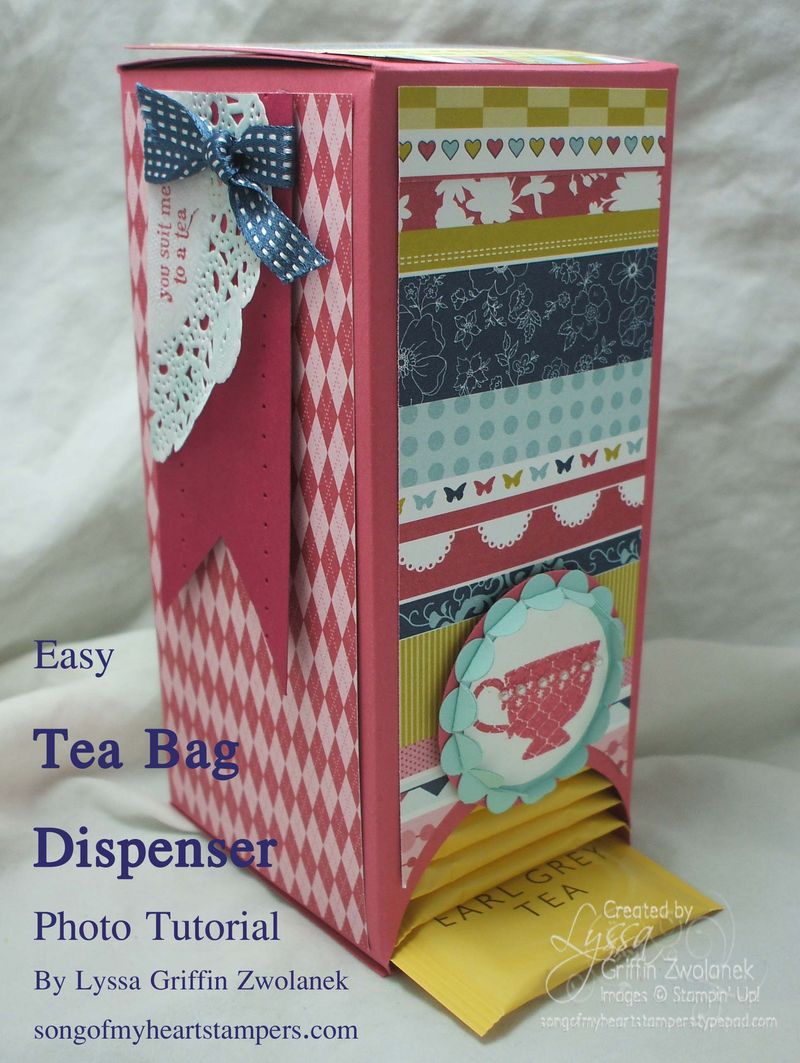
I'm soooo happy to have my computer back that I created a photo tutorial today to celebrate! As always, this tutorial is FREE. I'm just happy to give back to the fantastic community of papercrafters. Please leave a comment if you appreciate all the free inspiration you find at Song of My Heart Stampers, and I'd be honored to help you out if you don't have a Stampin' Up demonstrator. You can find everything I use in my tutorials (plus a whole lot more!) on my shopping website: www.lyssa.stampinup.net
Ready to make this adorable tea bag dispenser project today? Me too! All you'll need is a sheet of 12×11.5 inch cardstock, Sticky Strip or other strong adhesive, a 2.5 inch circle punch, and the Simply Scored board or other scoring tool.
Score your 12×11.5 inch cardstock at .5 inch, 3, 6, and 8.5 inches on the 11.5 inch side, as shown. 
Then rotate it 90 degrees and score at 3 inches and 9 inches, as shown below.

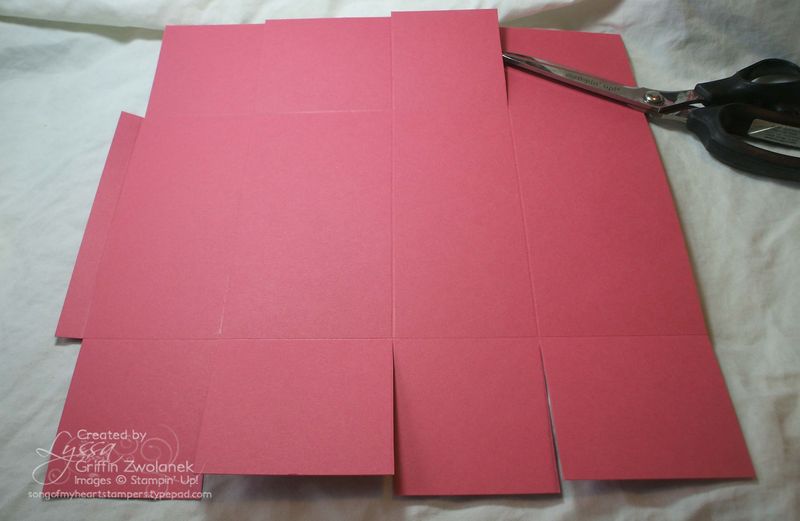
Once you've completed the scoring, snip up to the fold from the bottom edge, and down to the fold from the top. Snip out and discard the extra corners of the flap (shown on the far left). You should have a half-inch flap and four main panels.
Now we're going to cut off the bottom flap from the third panel, as shown below.
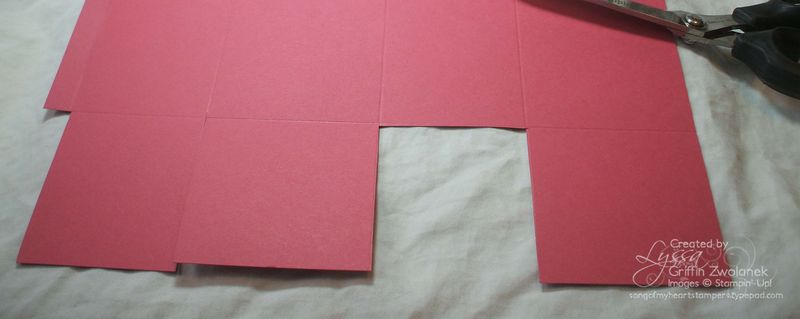
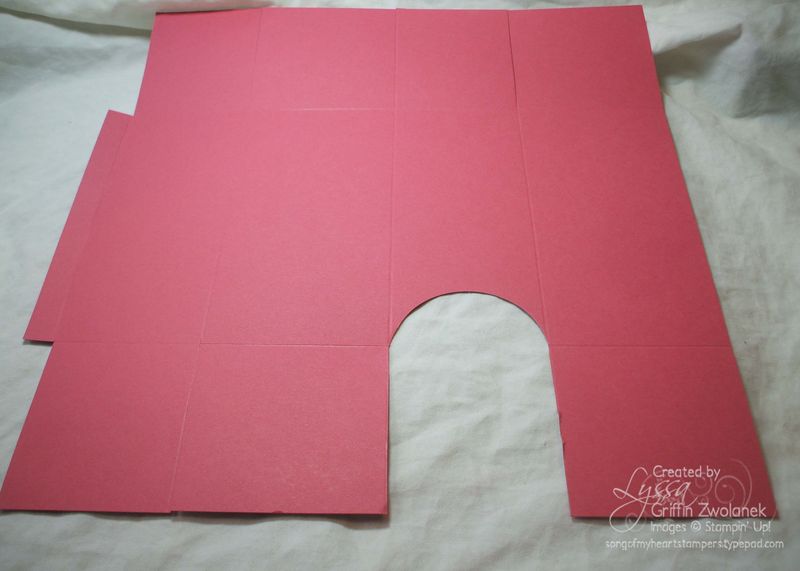
There is JUST enough room to squeeze your 2.5 inch circle punch into that space created by removing the flap, and punch out a half circle. This will be the little slot from which your tea bags are dispensed.
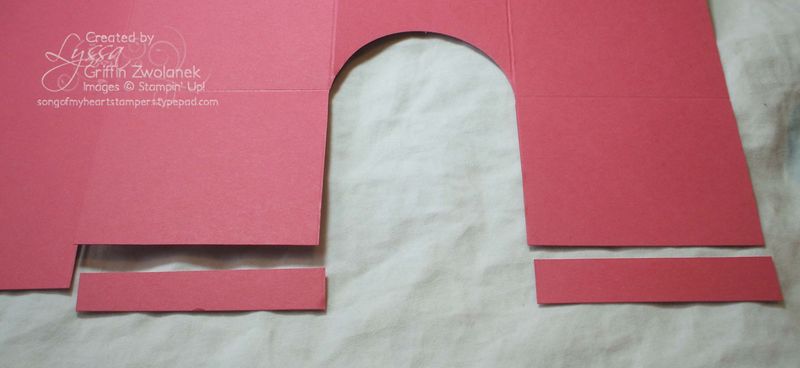
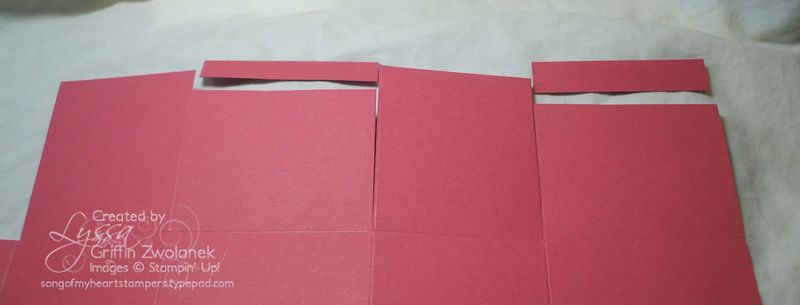
We're almost done, but there is one more thing that must be completed before our box comes together. Because the dispenser is a rectangle and not a square, the flaps must be trimmed on two of the panels. So on panels 2 and 4, you will need to trim off a half inch, as shown above (bottom flaps) and below (top flaps shown).
Now you're ready to use Sticky Strip to close the long side flap and fold your box up. I used Sticky Strip on the bottomof my dispenser as well (shown below) but I used a little self-adhesive Velcro to fasten the top of my dispenser, so that it can easily be reloaded from the top.

There you go! Pretty quick and cute, eh? No complicated measurements, no patterns to trace–just the magic of scoring and Sticky Strip. If you have a project you'd like to see done as a photo tutorial here at Song of My Heart Stampers, drop me a line at zwolaneks@att.net and I will take a looksee.



Thank you for sharing for free. I appreciate it very much.
I DO love all the freely shared inspiration :)Thank you for sharing your talent with all of us.
Also that scallop thingy is AWESOME! I love this tutorial, as a bona fide tea addict!
xxoo
Oh Lyssa!
How adorable! Jon LOVES tea – I am SO making him a manly themed one of these!!! What a GREAT gift for ANYONE who loves tea!! 🙂
mmm… tea…
Lyssa I sure appreciate all you offer on your site for free! You really are an inspiration and you always have wonderful eye candy and ideas for us. Good Bless and may you continue to inspire us with your generosity and creativity. ps…I also love your comments and insites you offer on scs demo forum.
Gotta tell you… based on my “love” for tea, I have an entirely different approach to disposing– um– dispensing tea…
Thanks for your generosity. I will certainly be making one of these!
I love this! My husband and I are HUGE tea drinkers and our daughters love it, too. He takes the bags to work and this sweet little dispenser would be wonderful (although I will make it more masculine for him). I also have a friend I volunteer at my girls’ school with and this will be a great little “I like you!” gift (can you believe she doesn’t eat sweets?!?!). Lyssa, I really love that you share all this with us. It keeps me inspired!
Oh My! Lyssa, I was just thinking the other day that I need a cute tea bag dispneser! Thanks so much for the tutorial- can’t wait to try it out!
Lyssa, this is wonderful! I’d seen one somewhere and wanted to make it but didn’t see any instructions. You are so sweet to share your instructions with us freely.
You truly are an inspiration to me and so many others out here!
Thank you!!
A thousand thank yous for this tutorial…my daughter’s 5th grade teacher loves tea and this will be a perfect end of the year thank you gift for her. I truly appreciate your generosity and incredible talent. I’m a fellow demo and I so appreciate all that you share…freely. Blessings to you!
I could K.I.S.S. you right now! I have oogled dispensers like this on many a blog and craft site and nearly caved at paying for the tutorial. So glad I was patient. I love playing with paper and rely on others for the engineering eye to figure out how to construct the item. Thanks for sharing your creativity Lyssa.
Lyssa this is just so cute!!! Thanks so much for sharing your ideas.
Thanks for sharing Lyssa!!!!!!!!! Once again you inspire me creativity 🙂 Will be doing my own spin on this and using it for tonight’s demonstration 🙂