
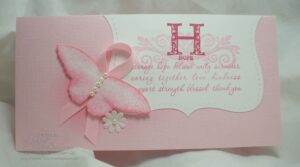
This is one of my favorite cards I have made in a long time. The combination of Pink Pirouette and Soft Suede is irresistible, and perfect for this vintage-looking rose card. I just kind of did it by accident, but here's how you can get this cool effect at home:
Run a card background (4×5.25 inches) through the Big Shot with the Manhattan Flower embossing folder. Mount on a darker colored card. Sponge the raised embossed areas of the roses with the darker ink color so they stand out even more. Fill all the raised segments with a thin coat of Crystal Effects and set aside to dry (about two hours, maybe less).
When it is dry, you can sponge more ink on the parts of the card that are not under the enamel. It's kind of like emboss resist, only with Crystal Effects, come to think of it. In this case, the roses are a lighter pink hue than the rest of the sponged card. It looks like vintage celluloid box or a 1920's hand mirror.
Then decorate the card as you wish. I used the yummy new Polka Dotted Soft Suede ribbon, a hat pin and pearls from the Pretties Kit, a silk flower and large Clear Rhinestone Brad from the same kit, and some faux fibers made by shaving an extremely thin slice of cardstock off with your scissors. The fibers really make the card, I think.

Wow, Lyssa, you’ve done a beautiful job. I can’t wait to try this out – love the embossed/enamelled look.
All those in favor of making Pink Pirouette a Genuine Full Time Stampin’ Up! color say aye.
Aye!
This is truly stunning – you are super clever. I too can’t wait to try this. We don’t have the Big Shot in Australia yet (!), so will see how I go with embossing. Thank you for sharing!
Take care and keep creaing,
Lisa
Really catching design! I’ll have to give this eye-catching technique a try! Just lovely!
this totally ROCKS Lyssa! love it! thanks for sharing ~ yet again!
Lee
:o)