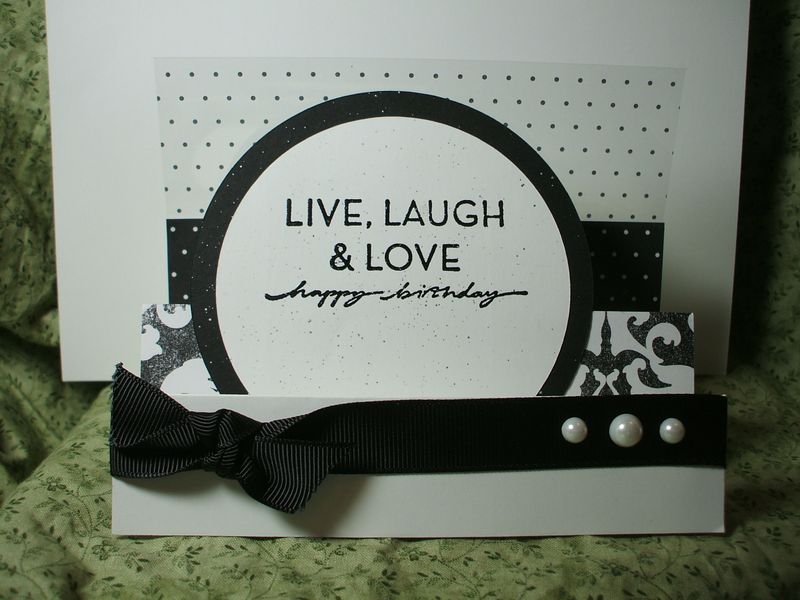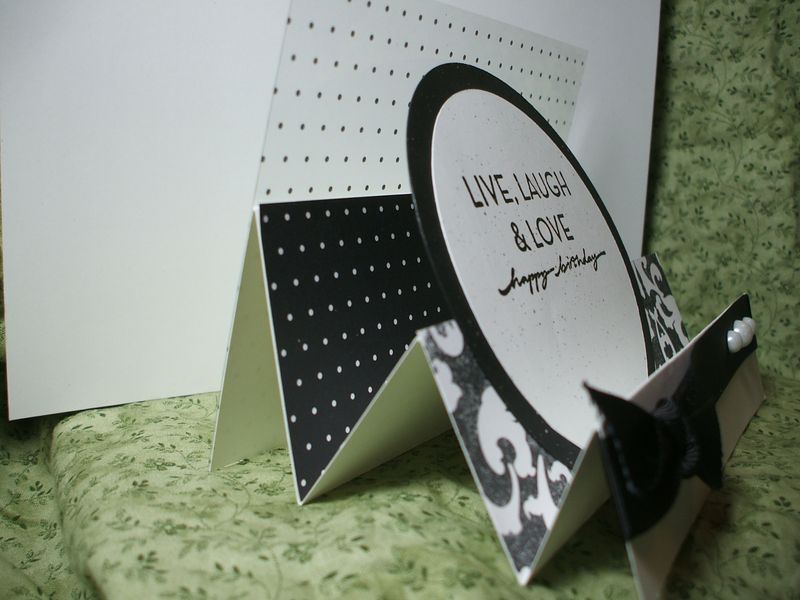
Do I ever have a cool card to show you today! This is called a stair-step card and it is really unusual. The back is clear on this one, so I have a pice of white cardstock behind it to help it show up against my backdrop fabric. Below is a photo from the side view.
You can also make it without the flat piece on the last "mountain," if you want. I had this crazy cool polka-dotted window sheet from the Night & Day pack, so I put it on mine. It folds perfectly flat for mailing in a regular sized medium envelope–use the Clear Translucent envelopes for a real WOW!
We made this one with Night & Day DSP in my Incredible Cards Club, and in Cottage Wall papers instead at my Creative Cards Club. Everybody got to try the new Circle Scissors Plus and Glass Mat, and learn some tips on getting the most out of that amazing tool.
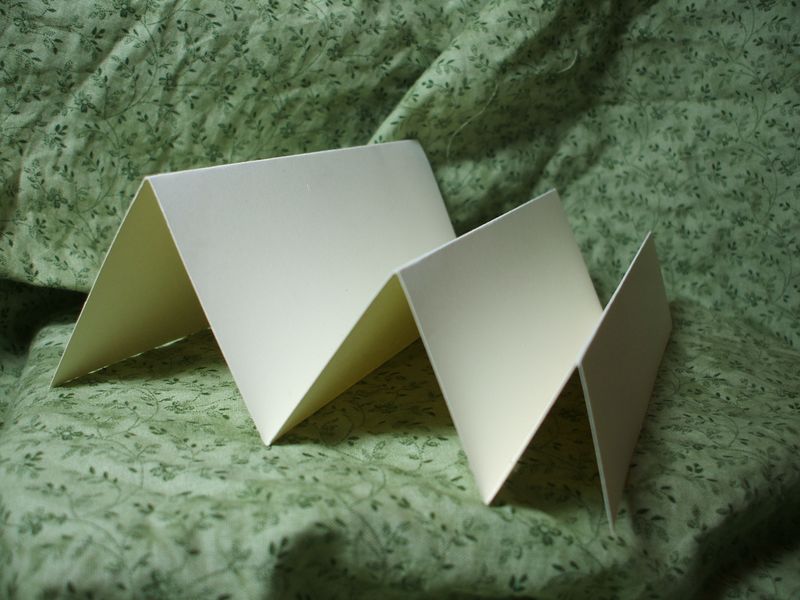
To begin–cut a cardstock base (here Whisper White) to 5.5×10.5 inches. You can get one out of a sheet of 8.5×11, or two from 12×12. I recommend the 12×12 if you have it. Score that at 1.25, 2.5, 4.25, 6, and 8.25 inches, and then fold into an accordion as pictured below:
If you want a backing piece on your card like I did with the acetate window sheet, cut it to 4×5.5 (yes, 4.25 would be the normal card measurement, but if you trim it to four inches, you can get six card backs out of one piece of 12×12 window sheet.)
Then the fun begins–you can decorate this any way you want. I used my cool Circle Scissor Plus to whip out two coordinating circles in Basic Black and Whisper White and stamped and embossed a saying from "On Your Birthday" in black embossing powder for my focal point. I have also seen the Top Note used for this piece (trimmed down a tad if using vertically instead of horizontally).
If you want to cover some of the "mountain sides" with DSP, the middle panel measures 5.5×1.75 tall and the middle panel is 5.5×2.25 tall. I left my front foremost plain and tied wide Basic Black grosgrain ribbon around it, with three halfback pearls from the Pretties Kit, attached with mini glue dots, for accent.
Last but not least, I spattered the whole project with a ZIG Painty pen whacked sharply against a bone folder. Messy but cool! You can do it with a paint brush and the new shimmer paints from Stampin' Up, too, just make sure you have only a teensy weensy bit of paint on the brush and practice on scratch paper first.
So there you are–something a little different, not hard at all. These stair step cards make really great party invitations AND you can even make photo cards out of them–substitute a cardstock-framed photo for the circle in the sample above. Then your photo card can sit up on someone's desk and remind them of you all day. 


Great card! I just started a fancy folds club last month and this card is on my list of cards to cover in the next 6 months. I love what you did with the window sheet on the back. Thanks for sharing!!
I enjoyed making this card in club. I always look forward to the things you dream up!!!
I’ve just made this, and love it! Thank you so much for the tutorial, it was inspirational!