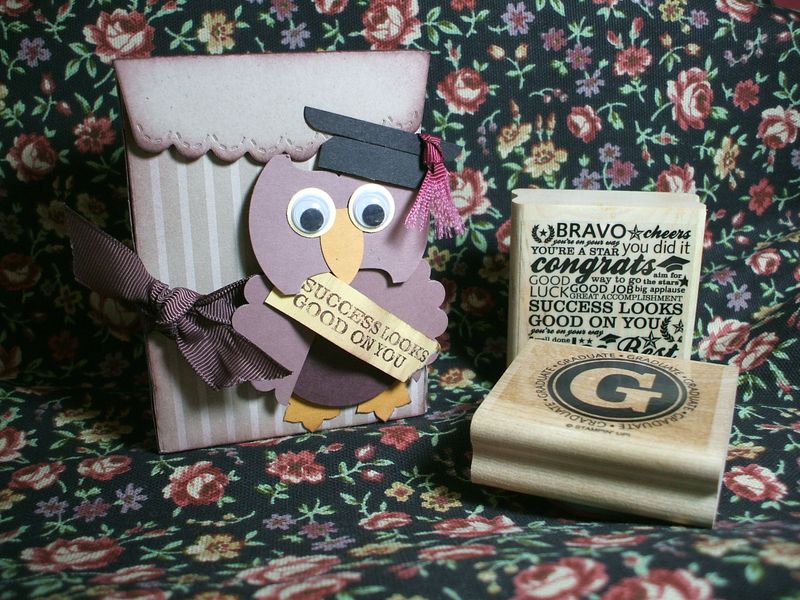
Ok! If you are a returning visitor who found my blog during the Bon Voyage Blog Hop, welcome back! Thanks so much for participating, and don't forget to go back and visit the site you've bookmarked for tutorials like this one, that expand on the cute projects you saw. Also, be sure to come visit us at www.stampinaddicts.com –it's for demos and non-demos alike!
I promised a tutorial on the Scallop Envelope Tall Box and here it is! You will need three pieces of 6×6 double-sided paper–2 for the box and one for the lid. In my sample below I used Basic Gray sheets from the Hostess Patterns Pack–super easy as they are already 6×6!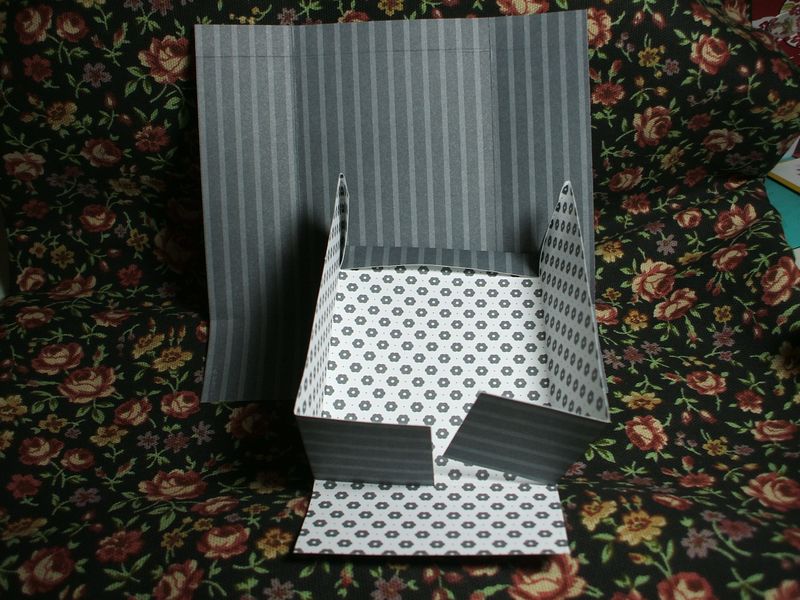
Score the two box pieces as follows: 1.5 inches from three sides, and .5 inch from the top edge. Fold over that top edge and adhere down. Then trim up the score line on the bottom corners as shown. Crease on all scores with the bone folder for nice sharp folds. 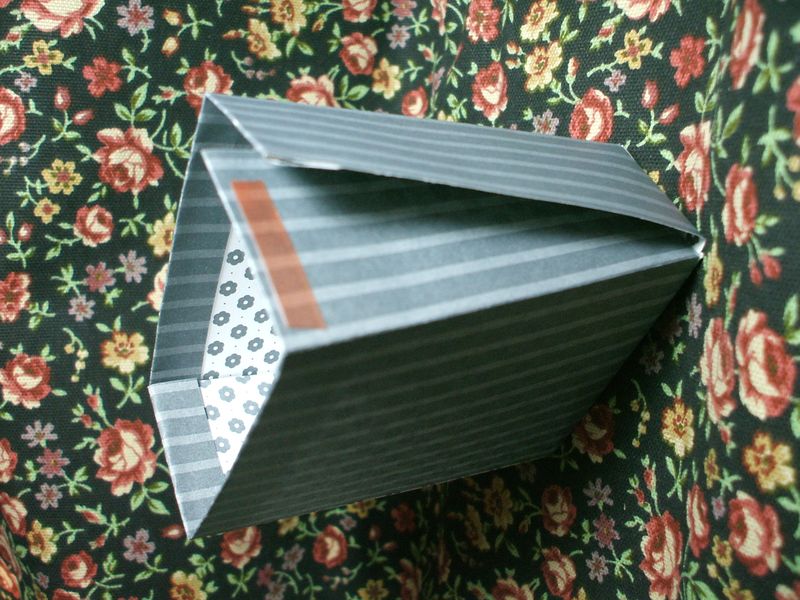
Then adhere the two halves of the box with Sticky Strip or other very strong adhesive (mere SNAIL won't hold this). You have a sturdy, reinforced bag that will hold about a cup or so of candies. At this point you can turn it into a super cute tote bag by adding ribbon or paper handles. Or continue on to add the Scallop Envelope lid.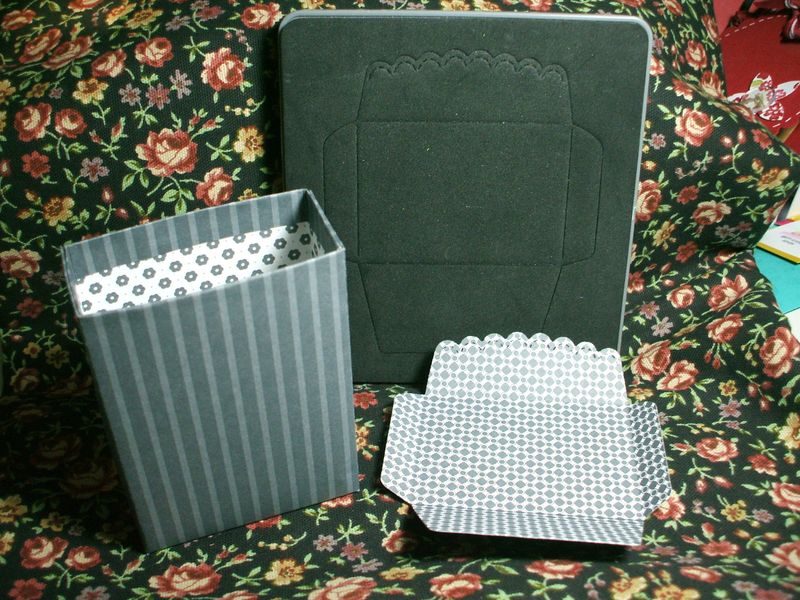
Run your third piece of DSP (or coordinating solid color cardstock) through the Big Shot with the cute and exclusive Stampin' Up Scallop Envelope die. You'll see that it is too large for the top of the box, so trim it as seen below: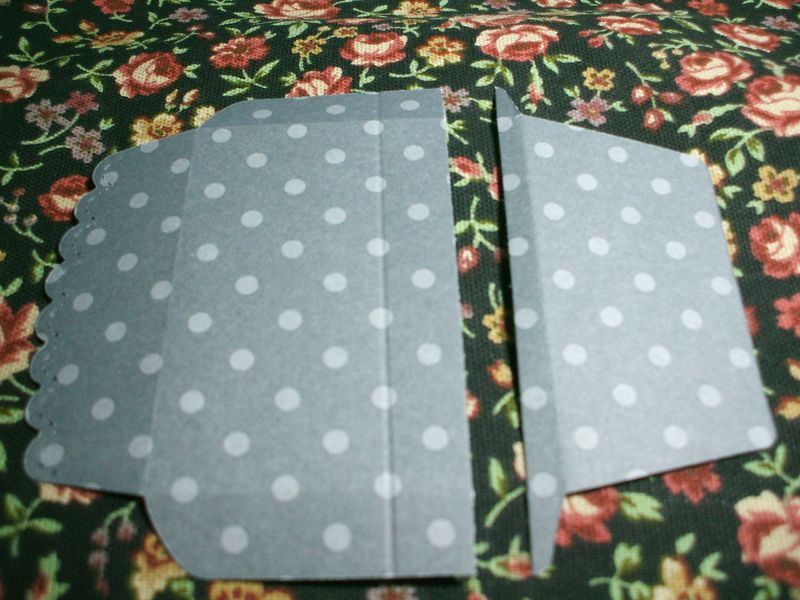
The top of the envelope where the flap begins should be on the two-inch mark–slice off the rest, then move it to score it half an inch from the new bottom edge. Then trim off the corners as shown below, and adhere that new back flap you made to the back side of your box. Tuck the side flaps in as you close the lid with the scalloped edge hanging off the front. You can close it with ribbon or with a Velcro self-adhesive dot–or even a magnet closure if you want to get fancy!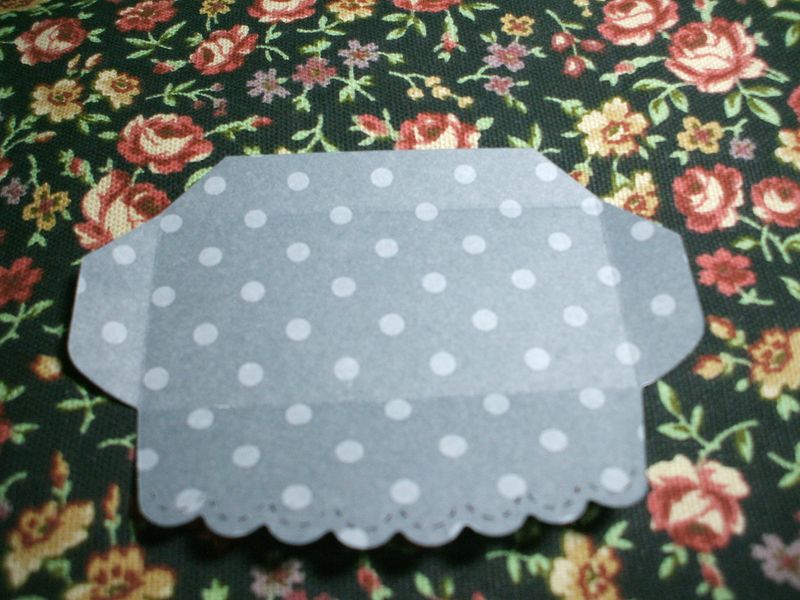
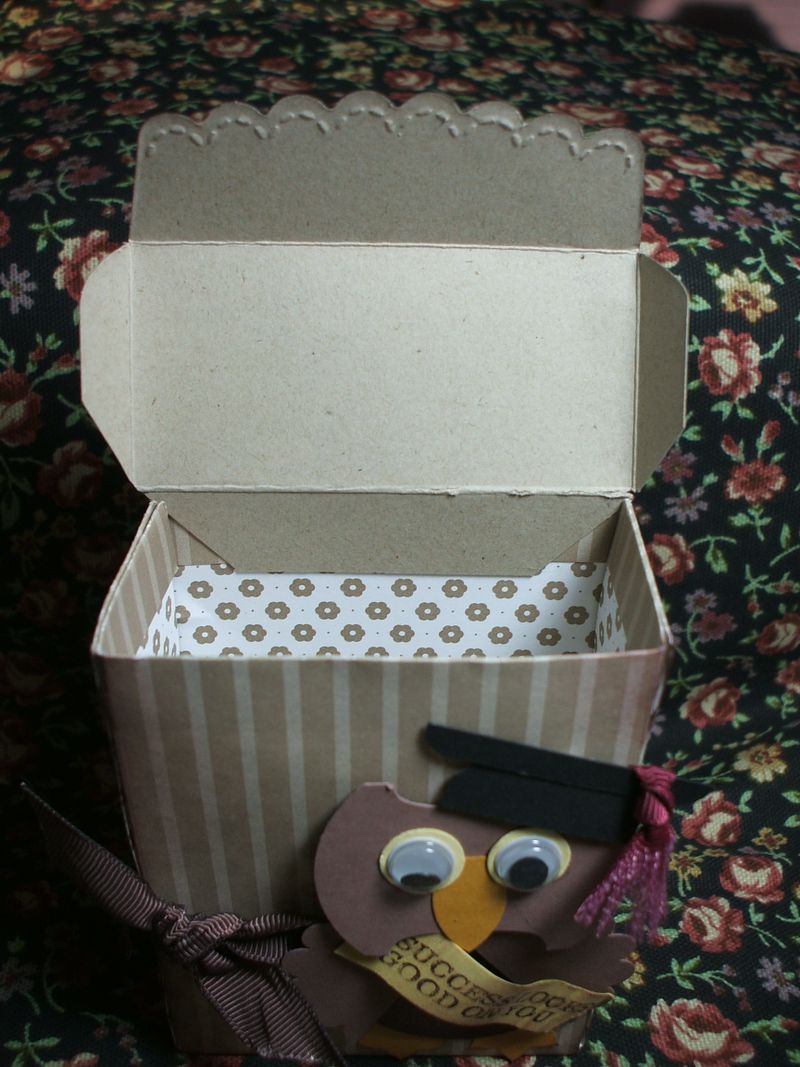
There you go! Easy and cute, and terribly addicting to make, especially if you have that hostess Prints Pack so you don't even have to cut the DSP. Another great reason you HAVE to have that adorable Scallop Envelope die, too.
Oooh, oooh, another cool thing! This box just looks adorable sandwiched (lid-less) between two Top Note die cuts. Trim off the bottom edge so it will sit flat on the table. Add a ribbon handle with brads, and a punched or stamped focal point for decoration. Super classy!


Oh, I love this! Thanks for the tutorial!
This is just too cute. Thanks for making it so easy Lyssa!
Thanks for the Tutorial. This looks like lots and lots of fun. Great tip too on using it with the Top Note die.
Blessings – Jean
This is so cute! Thanks for the tutorial!