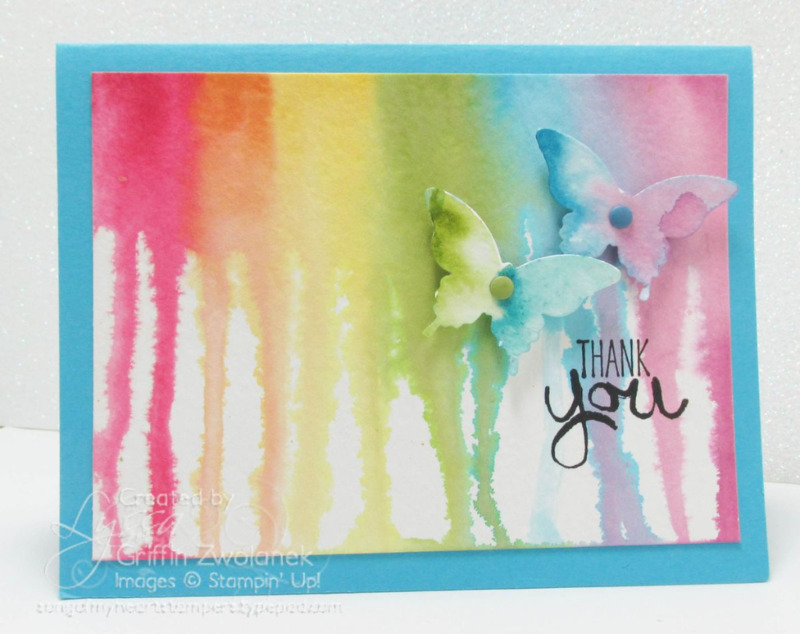
Last week I was just into messy techniques, don't ask me why! I revisited this great Watercolor Drip Technique tutorial from 2014 to make a rainbow drip card that just makes me really happy. There is just something about those shades, in that particular order. And the rainbow's symbol of promise is perfect for spring, a season of renewal and hope.
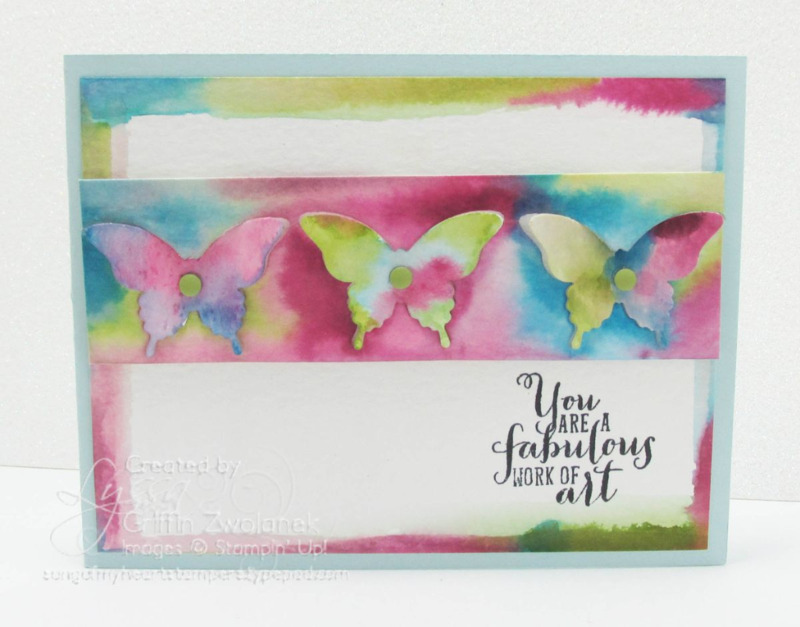
Well I don't like to make a mess for just one thing at a time–multiple messes are always better than lonely little messes!–so I made this next one at the same session. The colors got a little muddy, but it's still pretty; just different. Watercoloring is a little different every single time!
This Triple Butterfly Watercolor card was quite easy to do. The background is watercolor paper, only painted around the edges. The center strip is also watercolor paper, wetted down and randomly dripped all over with Rich Razzleberry, Old Olive and Tempting Turquoise ink refills, using my Aqua Painter pens.
I waited until the piece was dry and then punched out three butterflies in a row. Then I inserted the punched butterflies back into the strip in a different "hole" than where they were originally punched from, so that their colors wouldn't match their surrounding. Simple and Cute! You should totally try it. Watercolor Dripping and this triple butterfly watercolored technique are way easier than you'd think!


So clever, I love it! Butterflies back into different punch holes, genius!
This looks so much fun to do! I am in a hurry but when I have more time I will check this out and probably try my hand at this! Both cards are great and I love the sentiment you chose for the second one though the Thank You will probably go on most of my cards. The colors do remind me of spring! Thanks for bringing it back!