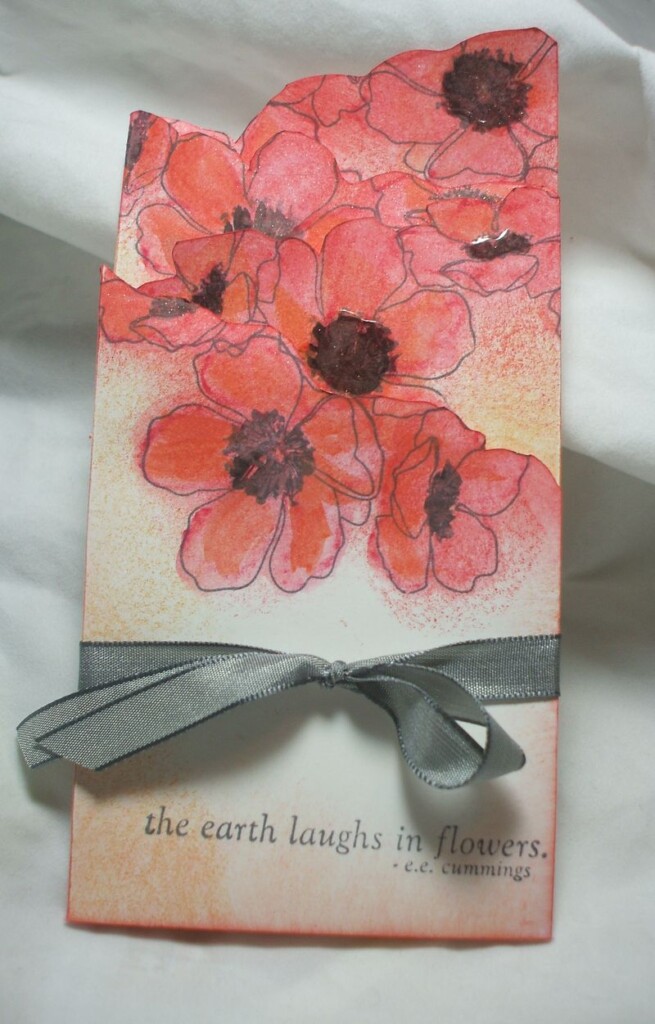
Today's tutorial is in honor of my mom, whose birthday is today! Happy birthday, sweet one! Love you. Can't top celebrating your birthday last year on the Stampin' Up South Caribbean incentive trip cruise, but I hope you like the present I sent you.
To make this card, which is totally awesome and SO easy, you'll need a piece of 6×12 Whisper White cardstock, scoring tools, ribbon, and stamps and ink of choice. This card fits perfectly in one of our Small Open-End envelopes on page 171.
I used a sneak peek from the Summer Mini JUST to torture you all! Hee hee! This is the Fabulous Florets set done in Poppy Parade and Peach Parfait, with Basic Gray.
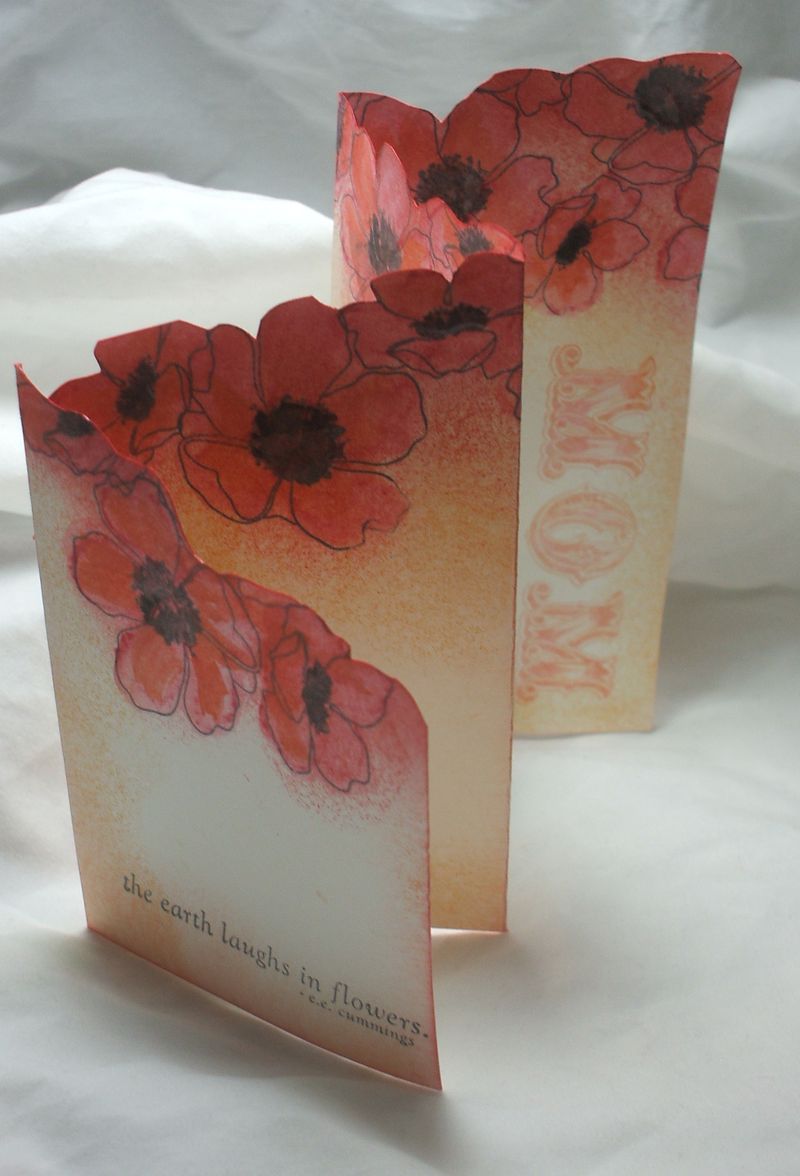
Here is a photo of the card opened. The large graphic "Mom" stamp is from Messages for Mom, from the main Idea Book & Catalog (page 50).
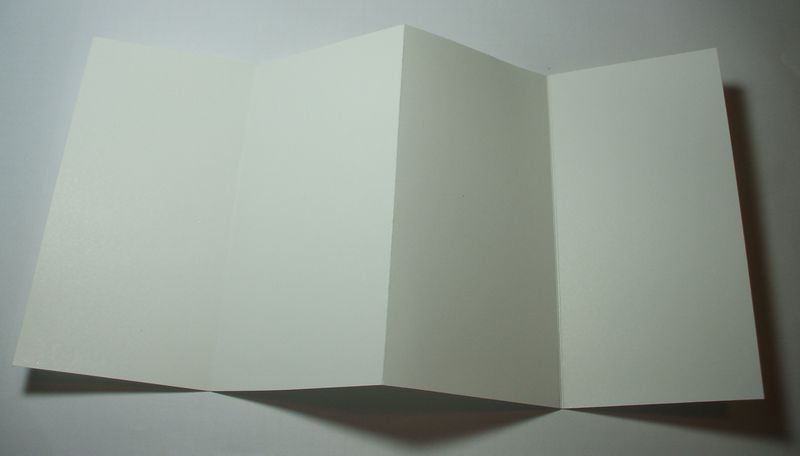
So here we go! This is so easy–you're going to love it! Take your 6×12 inch Whisper White and score it at 3, 6, and 9 inches into a quick accordion.
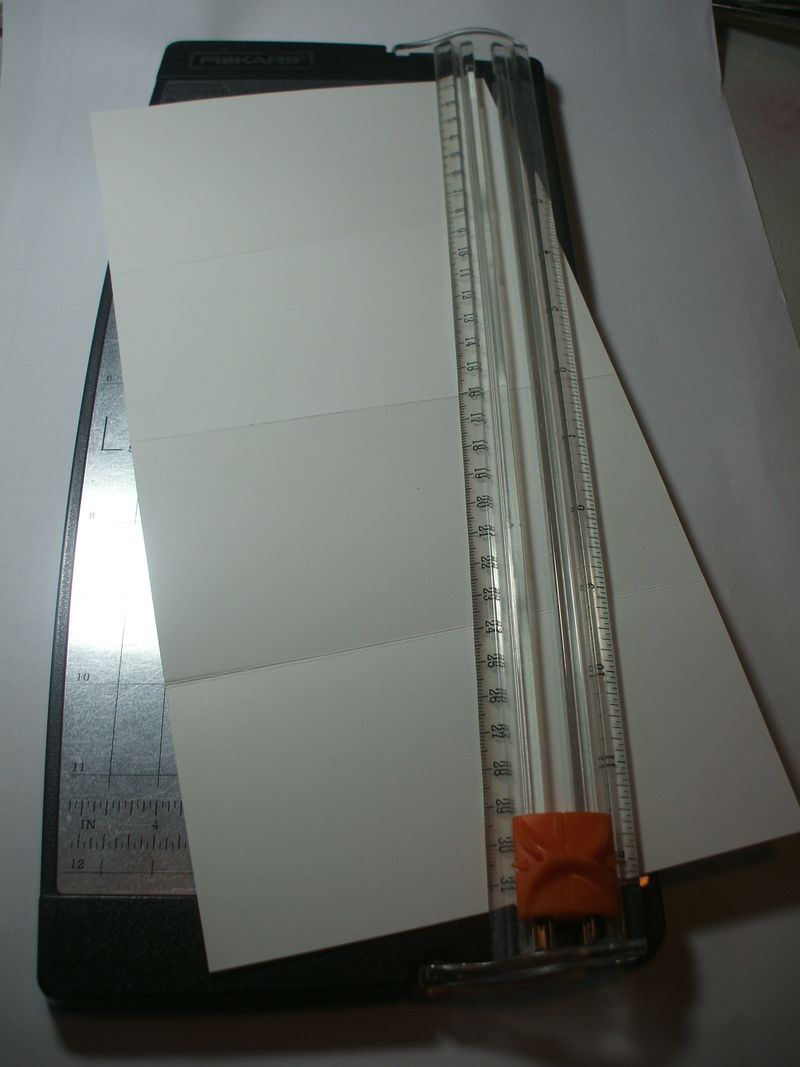
Next, put it in your Paper Trimmer as shown (doesn't matter which side faces up at this point), with the corner in one end and the cardstock pushed as far in as it will go at that angle (you'll see what I mean when you try it). Move the blade to perform the cut.
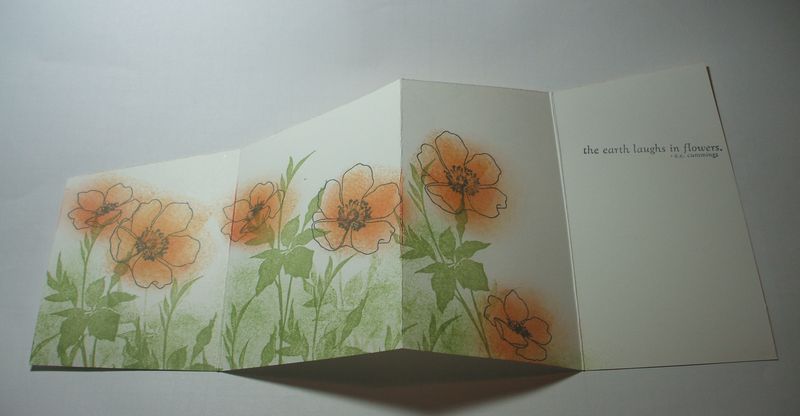
Now as you fold it along the score lines, you will see a definite front and back side, and then you can stamp it accordingly. Now, for the top card in this post I just stamped the poppy heads all along the upper slope of the card (both sides). For this one, I stamped the leaf stem along the bottom, with the poppy heads (using a sponge to very roughly add bold color). They both look cool.
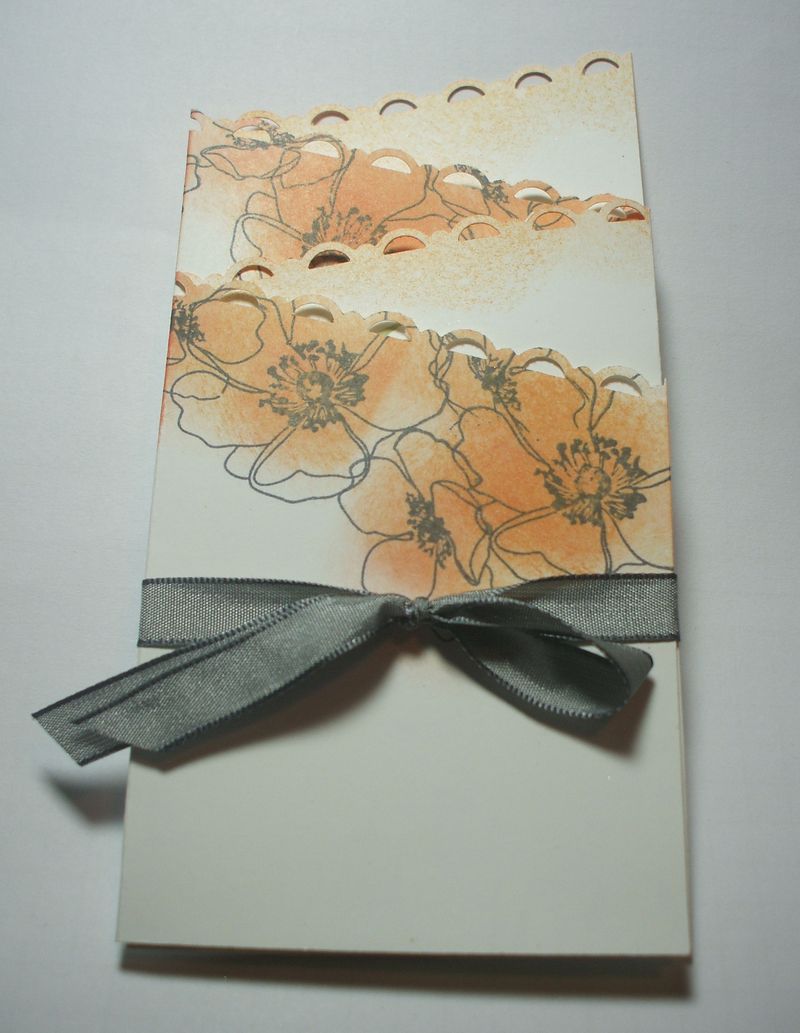
For this one, I only stamped along the edge of the back side of the card, so that when it was folded shut, you had a cool, almost inter-woven look of the plain side and the stamped side. I also used the Scallop Trim Border punch along that top edge as well. So you'll want to play with the stamping, taking care to make sure that any words stamped will not accidentally appear when the card is closed.
Hope you have fun with this super-easy cut, and a neato-different shape of card. It's fun to shake things up now and again! Let me know if you need the long open-end envelopes, and after May 1st, you can order Fabulous Florets from the Summer Mini Catalog, and start playing with the poppies, too.



Wow! What a terrif card – I’m sure your Mom will love it! Would make a lovely Mother’s Day card.
Lyssa,
Love this idea. Can’t wait to try it myself. Thanks for sharing.
Gladys
Love this! Thanks for posting it!