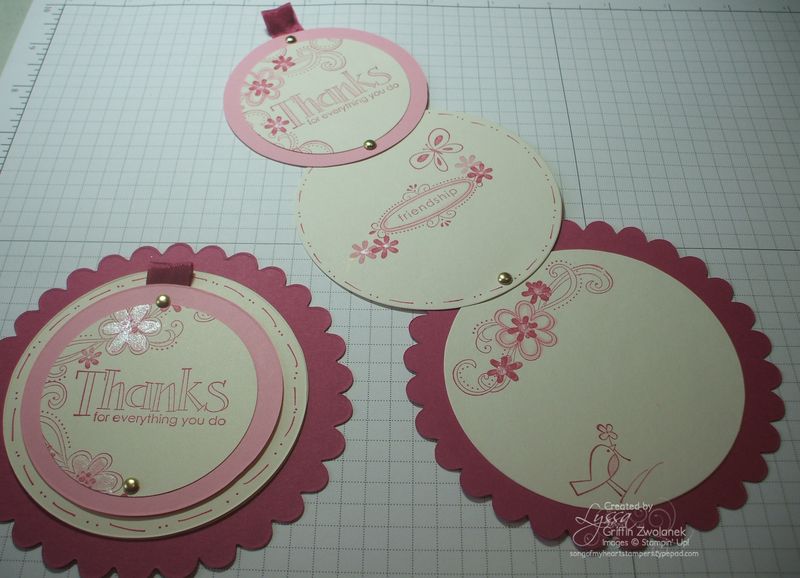
I know I promised a loooooooong time ago to get you a quick and easy photo tutorial on this card–and it has finally happened! Saturday was the first Saturday since 2011 started that I did not have a single obligation, not stamping, not church, not anything!! It was so nice. I got my table cleared off (you can see the table!) and I got a lot of piddly little projects done. I also spent a delightful hour turning old swap fronts into full cards and thinking about all the cool people I have met over the past six years. April is my SU anniversary month!
So, here is the Telescoping Circles Card Photo Tutorial. You'll need colored and neutral cardstock, brads, a 1/16th inch hole punch, ribbon, stamps and ink to decorate, and several Big Shot dies (or the Circle Scissors Plus works, too.
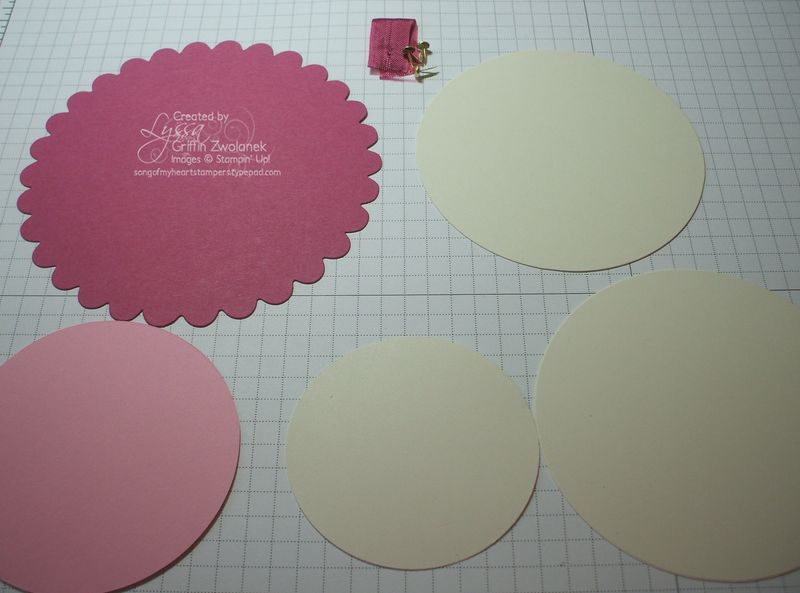
You'll need a colored base–the Scallop Circle die cut for the Big Shot; TWO of the 3.5 inch circle die cuts from the 2011 Occasions Mini Catalog in a neutral; one 3 inch circle (also Occasions Mini Catalog) in a colored cardstock; and one 2.5 inch circle punch in a neutral cardstock. I'm using Rose Red for the base, Pretty in Pink for the other color, and Very Vanilla for everything else.
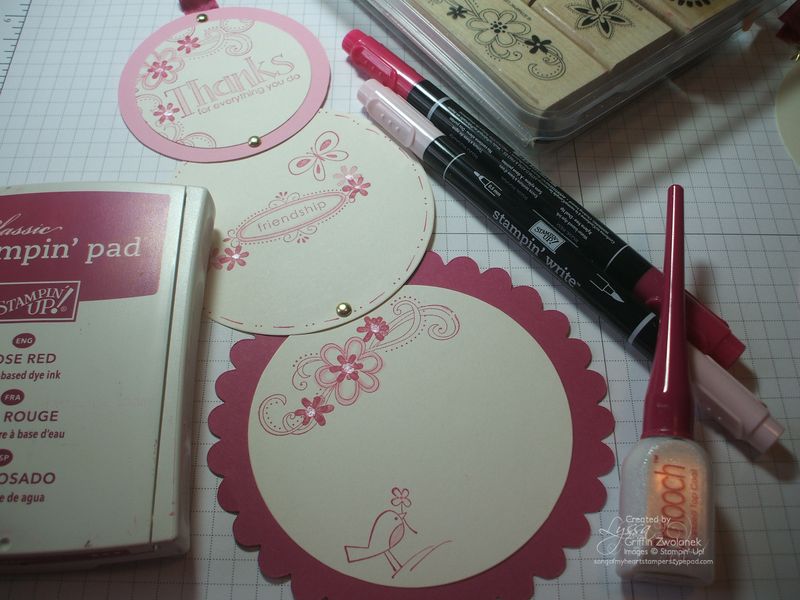
If you want to stamp it now before assembling, knock yourself out. Well, not literally… my son and I spent portions of yesterday on a cold cement floor–him when breaking off his two front teeth and biting almost through his lip, and me when I saw the gaping holes and had to lay down so I didn't pass out… so let's not use that unfortunate phrase… how about GO FOR IT!
I used the super-cute Thanks for Everything set with Rose Red ink, doodling with markers and blinged up with Illuminate Smooch Accent Ink. But to minimize distractions, I left my sample blank for the next few steps.
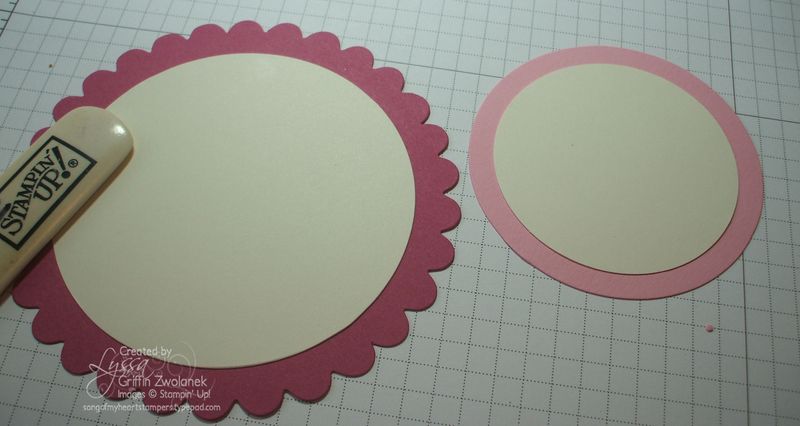
Adhere one of the 3.5 inch circles to the Scallop Circle base. Then affix (or adhese, according to my friends Theresa and Brenda) the 2.5 inch circle punch to the 3 inch circle. Next, layer the second 3.5 inch circle on top of the Scallop Circle piece and punch a 1/16th inch hole for the brad as shown below, through all three layers.
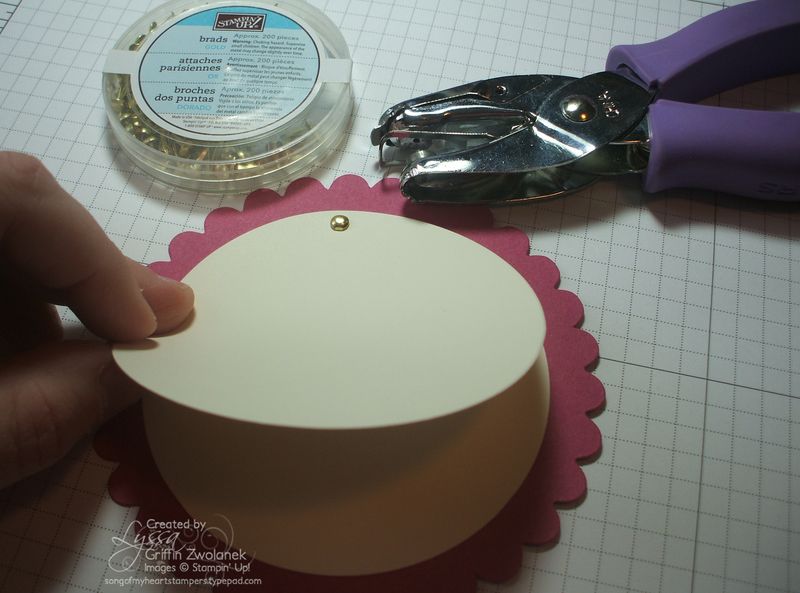
The upper circle layer should only be attached with that single brad, no adhesive.
Next, layer your final circle directly centered on top of that stack of circles.
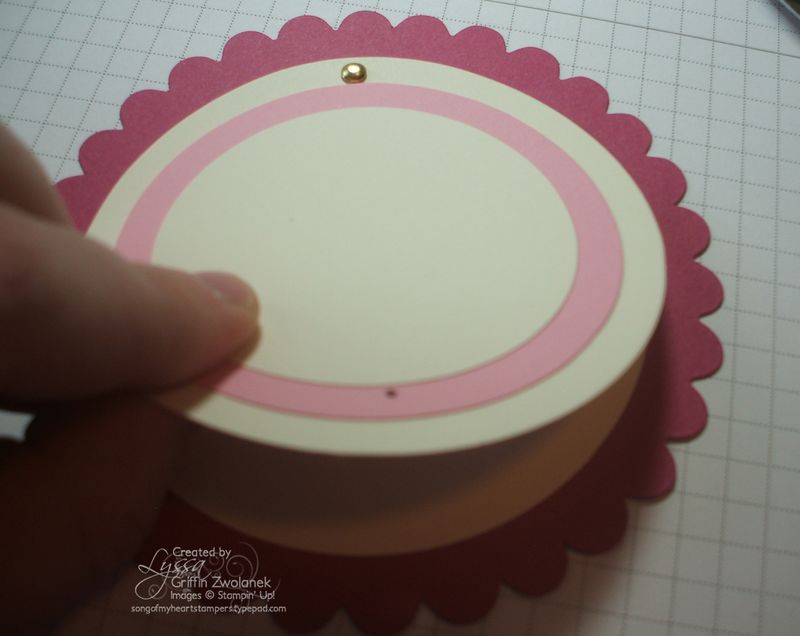
Punch the hole for the brad ONLY THROUGH the top layer and the middle, single circle layer. Do not punch all the way through all five layers to the back of the Scallop Circle, or your brad will seal everything shut quite tidily. Take your time and make sure it is directly across from the other brad attaching the back two layers, or your card will open wonky.
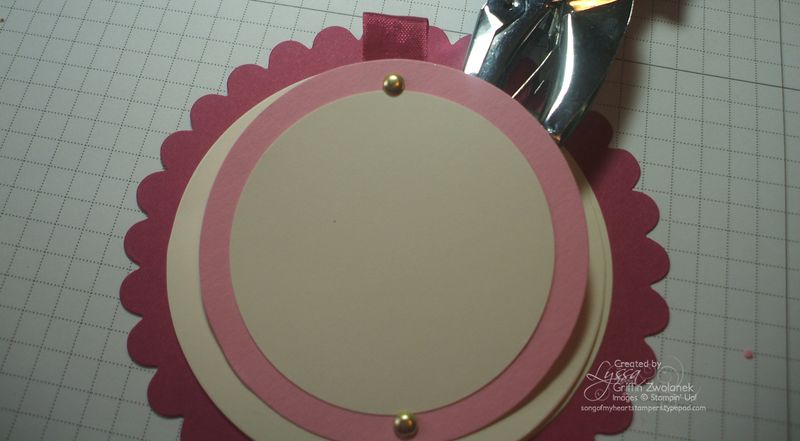
The final touch is adding a little ribbon pull, which you should put directly across from the previous brad. I used a little fold of Rose Red seam binding ribbon for mine, but you could punch a larger hole and tie a little knot of ribbon or even use the Round Tab punch. ONLY punch through that top-most layer, or again, you risk sealing the whole thing shut.
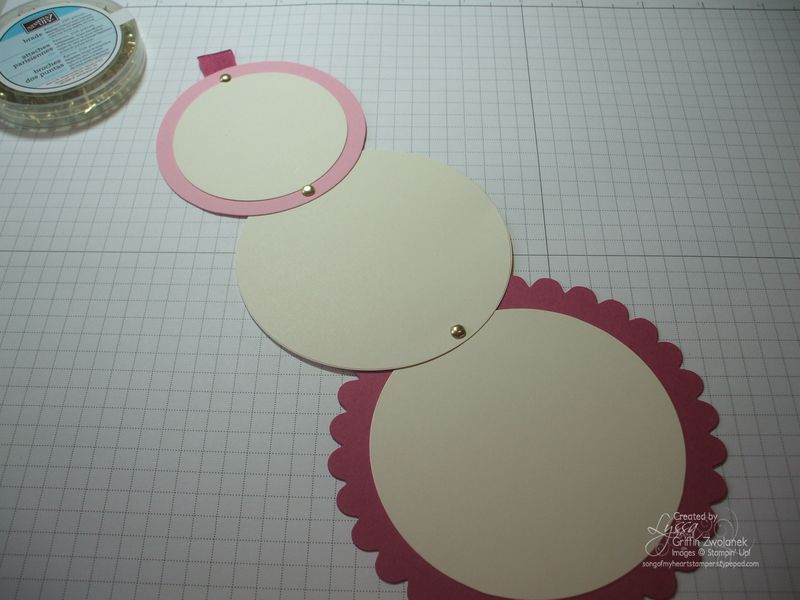
Once you see how the mechanism works, these cards are really easy and wonderfully fun both to make and to give. I hope you WILL try it–and let me know if you need to order any of the Big Shot dies you'll need! Or you can order in a flash, and check out the Clearance Rack along the way, at my shopping website, www.lyssa.stampinup.net
Happy telescoping!



Adhese. It’s the way to go! Thanks for making me feel famous TWICE in your blog recently! 😉
Thank you so much for taking the time to put this tutorial together, Lyssa! I promise not to break any teeth in the making of my version 😉 Hope your son is doing ok!
Oh dear, hope your son is feeling better Lyssa. Thanks so much for sharing this fantasic idea – it looks so great. I haven’t seen one before, so I must add it to my long list of things I must try.
Hope you have a happy day. Inky wishes, Di
Hope your son is doing better! (been there, done that AND survived…my son is 29 years old and handsome as ever!!) This telescoping card is very cute…your pink cs circles can be replaced with DP for a twist! thanks for sharing your creativity and inspiration!!
Thanks for doing this tutorial. I love this card!
Thanks so much for doing this tutorial Lyssa and what a fab card project. Just in the midst of trying one myself – and just had to find a non-video tutorial. ( yup I am the strange one that cannot cope with video tutorials!!) So glad to have found your blog as I believe you are the ever-so-clever originator!! Cheers….
Amanda, I am not the originator and neither is Margaret Van Vliet, whom I got the Leadership swap from. Unfortunately the name of the original creator of this cute idea seems to be lost to history! But I am glad you liked the photo tutorial–I don’t like the video ones either : )
Thanks so much for the super simple tutorial. Love it!