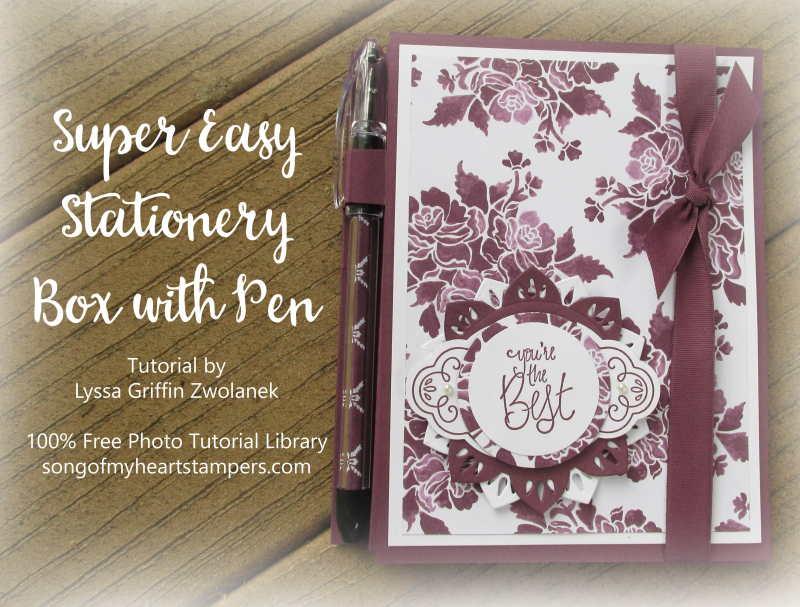
Thank you so much for the lovely comments you left about my new stationery box project! If you missed the original post, click here. You were so excited, it made me excited to work on the instructions for you. I am delighted to provide a really fun addition to the 100% Free Photo Tutorial Library, the Super Easy Stationery Box with Pen.
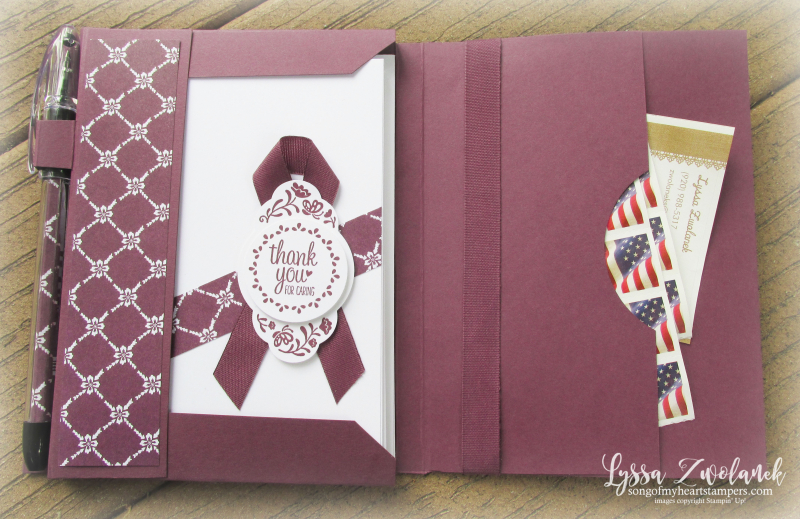
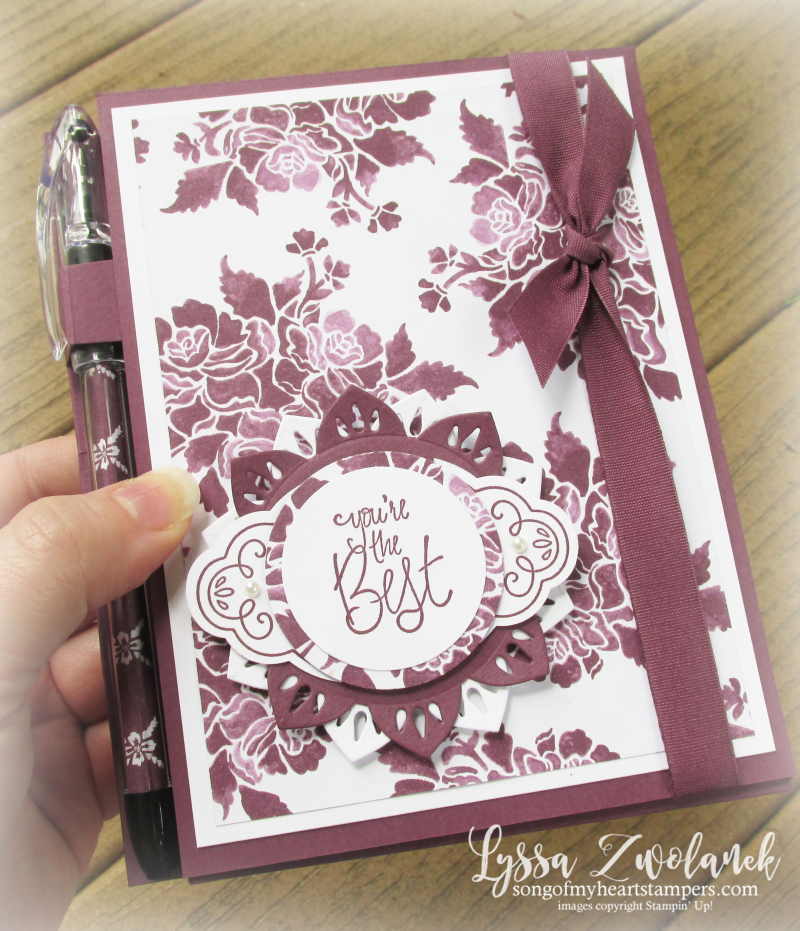
There are lots of stationery boxes out there, but this one has a fun built-in pen holder and is super-economical, paper-wise. Here's the inside–this box holds four cards and envelopes, comes with the matching pen, and sports an interior pocket to include labels and postage stamps. Closes with magnets or a self-adhesive velcro dot.
Ready to make it? Let's begin! You will need to gather:
- one 8.5 x 11 inch sheet of cardstock
- an additional piece of the same, measuring 6 x 4.5 inches
- Simply Scored Board or other scoring tools
- Tear & Tape or other very strong adhesive such as Tombow Multi
- patterned paper and coordinating cardstock for matting
- large circle or oval punch or die-cut to form a wide notch
- stamps, ink, punches or die cuts plus ribbon to embellish
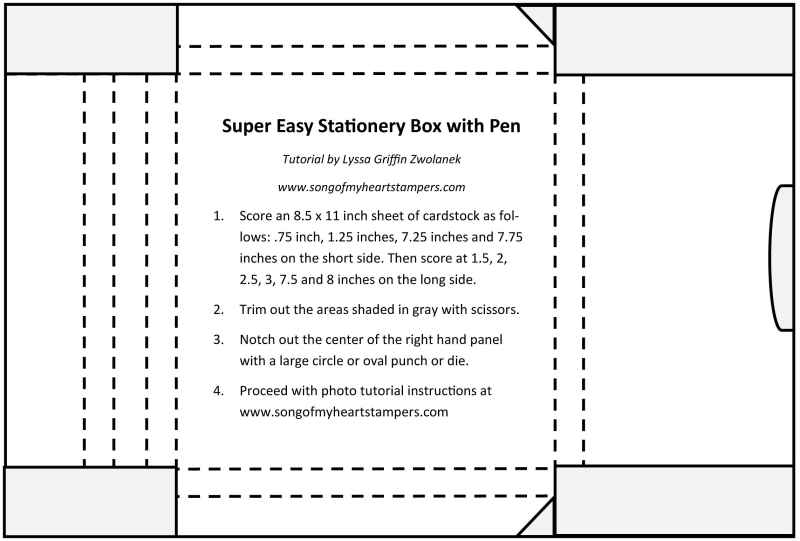
I created a quick scoring and trimming guide that you will want to print or save. Download Scoring Guide
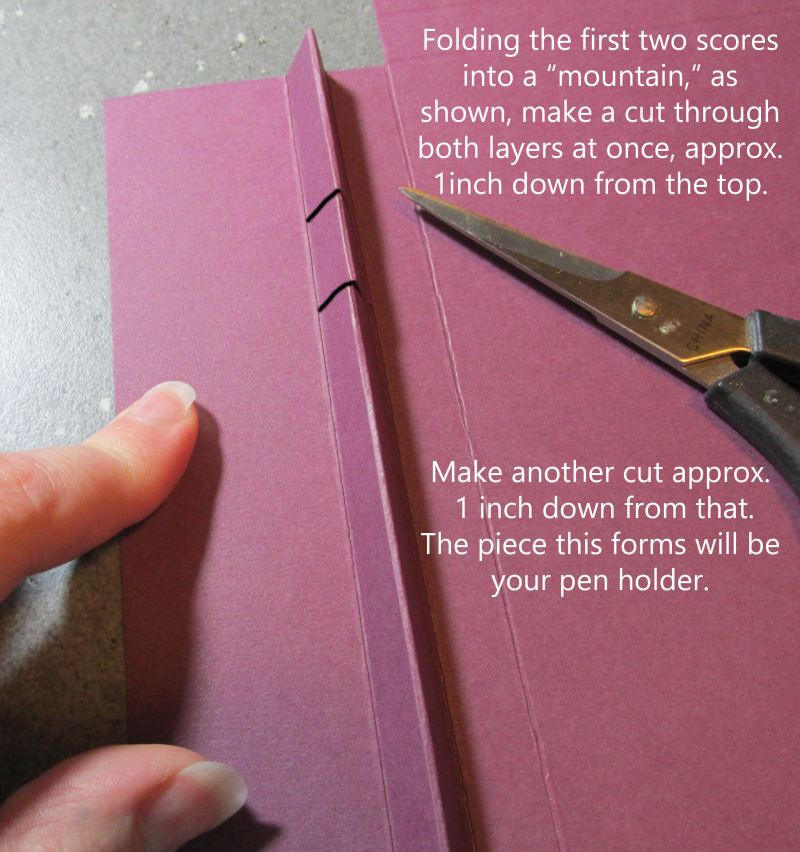
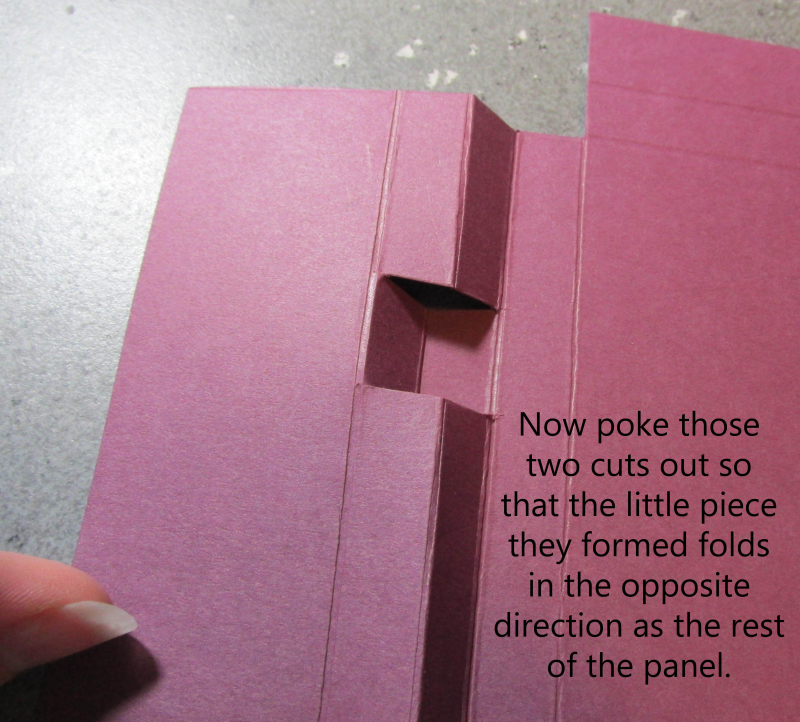
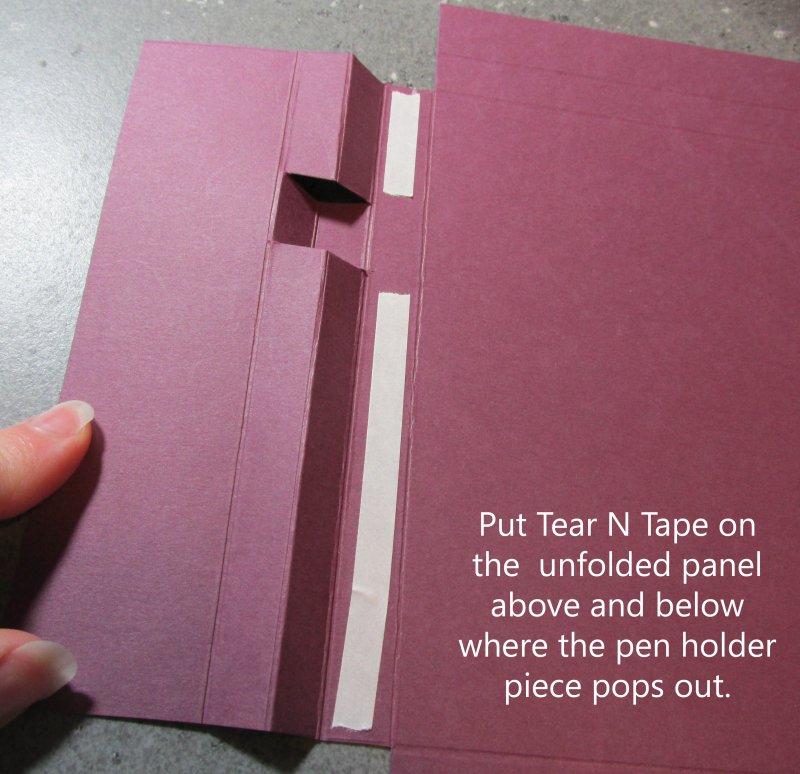
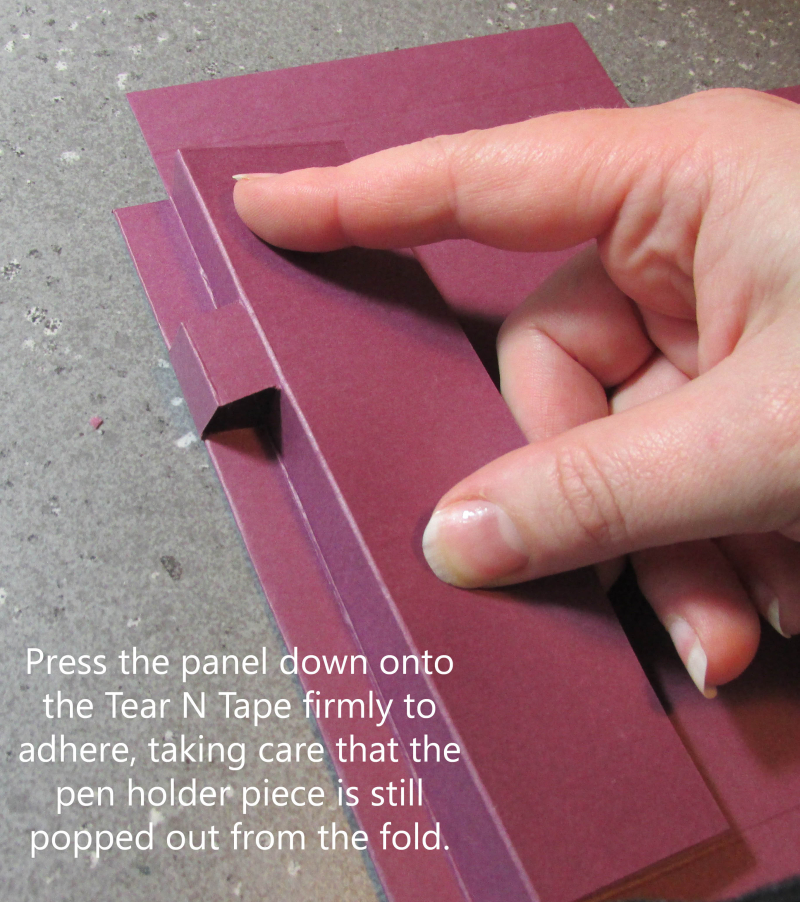
Once you have your cardstock sheet scored and trimmed out and notched as shown above, we'll begin on the left hand side of the box (this is the side with four scores running vertically up and down, shown on the left in the scoring guide).
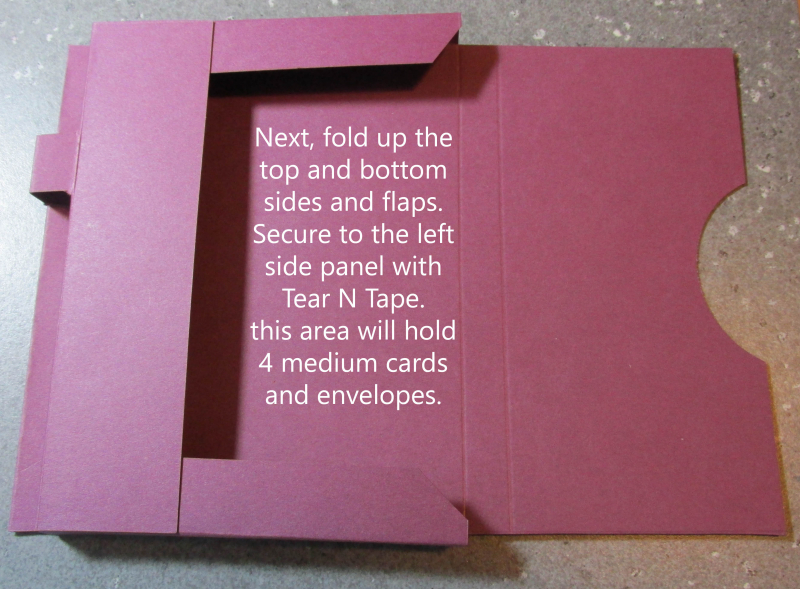
Now that the pen holder is done (that was the only hard part!) we turn our attention to the other three sides of the box. Be sure to crease all folds sharply and professionally with a bone folder, and use very strong adhesive, for best results.
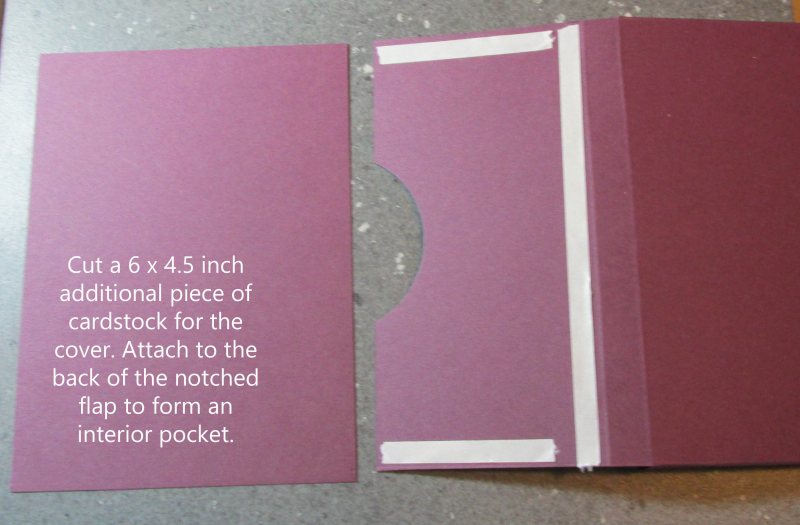
The postage stamp pocket is formed with the cover panel is adhered to close the box. Make sure you are putting the adhesive on the correct side of the notched panel so that it forms an inside–not outside–pocket!
TA DA! That's it! The basic box is done. Now you'll want to add your magnetic closures or velcro dots, as preferred, to hold the cover closed. If you're decorating the stationery set with pretty patterned paper, here's your measurements:
- cut one 4 x 5.5 inches Designer Series Paper (cover panel)
- cut one 4.25 x 5.75 inches cardstock (cover mat)
- cut one 1.25 x 5.75 inch strip (inside panel)
Note: the pens I use are Pentel R.S.V.P. clear-body pens–Dollar Tree has them in two-packs for a buck. Simply unscrew the end, remove the ink tube, and insert a tightly-rolled piece of patterned paper measuring approximately 1 x 3 inches inside. Put the pen back together and you have an elegant look to match whatever project you are pulling together!
I hope you're enjoyed this elegant little project! I'd be so pleased if you left me a comment letting me know you plan to try it. And if I can assist you in ordering a Simply Scored or any of the Stampin' Up! stamps and papers shown here, it would be my delight to do so. Shop Stampin Up with Lyssa Now
Thanks for checking out the 100% Free Photo Tutorial Library and making Song of My Heart a regular part of your day!



I love this little set, thank you for the awesome tutorial Lyssa! I’m excited to make up a few of these to have on hand as last-minute gifts, and I think they’ll be perfect for the admins in my hubby’s office too. Can’t wait until we can order the gorgeous new products you showcased as well – only 10 more sleeps 🙂
I love your stationery set with pen tutorial and I hope to try it in a class in the near future. I follow your website often and find your work is very helpful as a demonstrator. Thank you so much for the excellent instructions. Hugs~ Denise
Love your stationary set, guide for making is awesome. I just found your blog but will be coming back often. A hobby demo but love to share ideas and projects with several friends, this will be a sure item to share.
Joys in Jesus, Seletta
C’est une réalisation formidable et je te remercie beaucoup pour ce très gentil partage!
Amitiés.
I’m a new follower too, but I plan to regularly ‘stalk’ you…you are fun, talented, and sweet! And I love the daily Bible verse! Thanks for a great tutorial!
A great tutorial Lyssa! You put so much time into your cards & tutorials. I always look forward to seeing your e-mails. Thanks for telling us where to get the pens.
Yay Lyssa! This is amazing & soooo sweeeeeet! Thank you for this… can’t wait to give it a go!
This is amazing and so cute!!! Love the paper you used and of course the touch of the pen
You got me on this one. And Dollar Tree is just around the corner… Eager to make a variety of these! * hugs * =)
Hi Lyssa,
thankyou so much for this tutorial, I love it. I have recently signed up to this blog, and I absolutely love looking at all the new projects.
Can I ask one question………how many projects do you email out per week??
I am definitely going to try this one.
thanks again so much
kind regards
Giselle
Hi Giselle! Thanks for the kind comments about my blog! As far as emails, I have one, once-a-week email that covers all the happenings, plus one sneak peek of something that hasn’t been shared anywhere else. It’s free to subscribe and comes with a free gift of Cheat Sheets Collection #1. Hope that helps!
Thanks Lyssa, for sharing your picture tutorial. I can’t wait to give this one a try. Love it!
Wow! This is such a neat idea! Thanks so much for sharing your cute project. I may even attempt to make a couple! Love the color you used. Can you share which color it is? Thanks again!
Disregard my question on the color. Just saw your original post! You are very creative and kind to share with others! Thanks again!
You just blow me away! This is a great tutorial.. Thanks Lyssa!
Hugs.
Thank you so much for sharing your beautiful work. I am a fellow demonstrator however I enjoy checking out new ideas from other demonstrators that are not afraid to share. Great Blessings come to those that pay it forward.