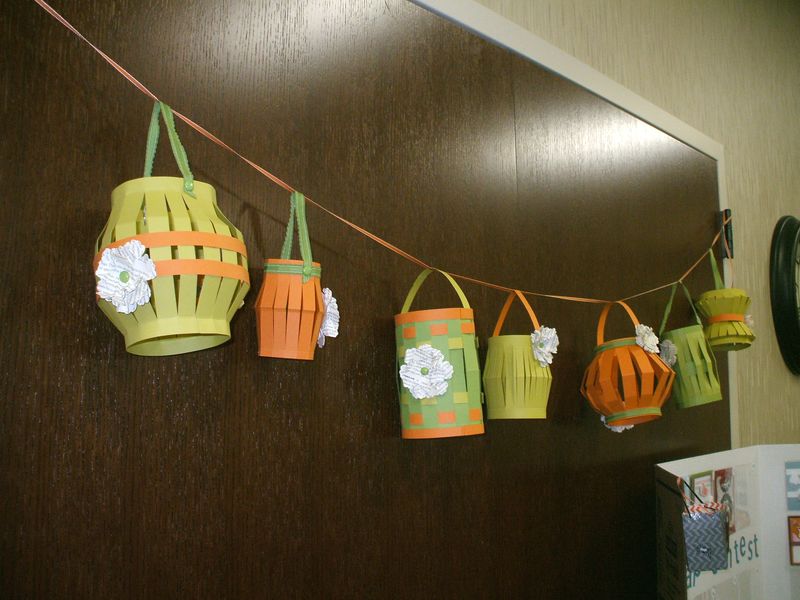
I'm at a scrapbooking retreat this weekend, but I've scheduled another fun and FREE tutorial for your enjoyment, this one on the paper lanterns that so many of you liked in my post about the October SOMH demo team meeting. I am delighted that it went over so well, and happy to provide you all with the basic instructions. The variations on this lantern are practically endless! So grab your Simply Scored tool, Sticky Strip, amd some 6×12 inch pieces of cardstock, and let's get started!
Be sure to bookmark this page or pin me to your Pinterest board so you have this idea handy for your next party! You can store these lanterns flat for future use, too, depending on the adhesive used.
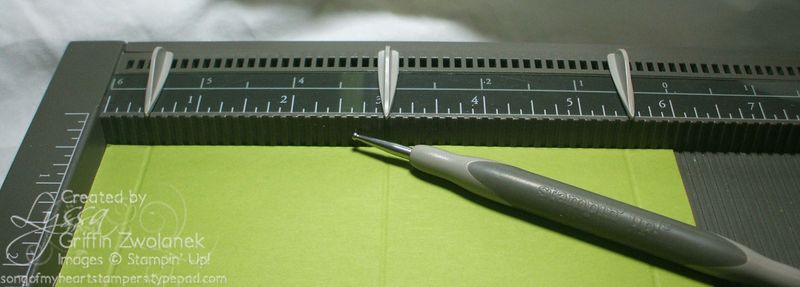
To start, score your 6×12 inch cardstock at .5, 3, and 5.5 inches on the short side.
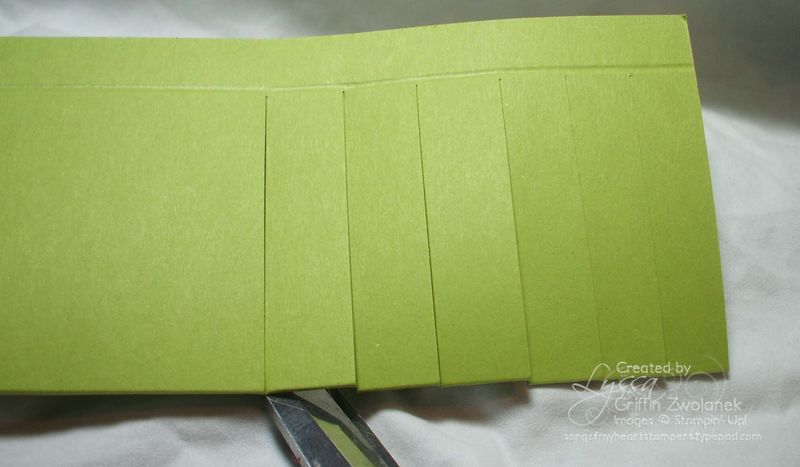
Fold the cardstock in half on the center 3-inch score line. Then, take your scissors and snip from the FOLDED edge up to to the score lines, about every half inch. (Note to control freaks: you do not need to measure this. It will be ok. I promise.)
When you finish making all those half-inch slices, and open the cardstock back up, it should look like this:
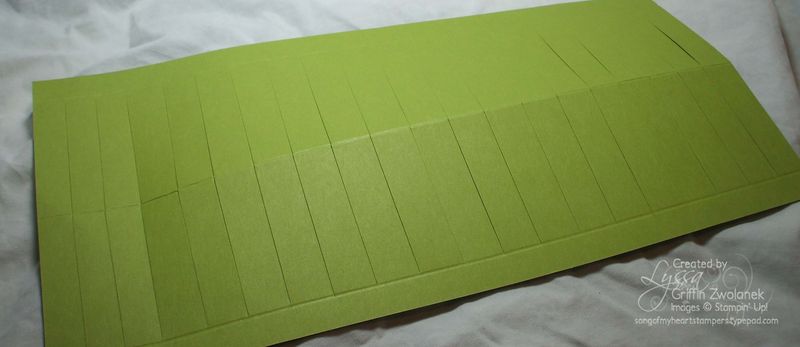
Now just add Sticky Strip along one of the short sides, and bend it around to form a cylinder. If you want to store these flat later, you might want to use Mini Glue Dots instead.
When you press down on the top of the cylinder, it will bend again on that center score line, as well as the upper and lower score lines, and the strips you cut will separate out and look really cool.
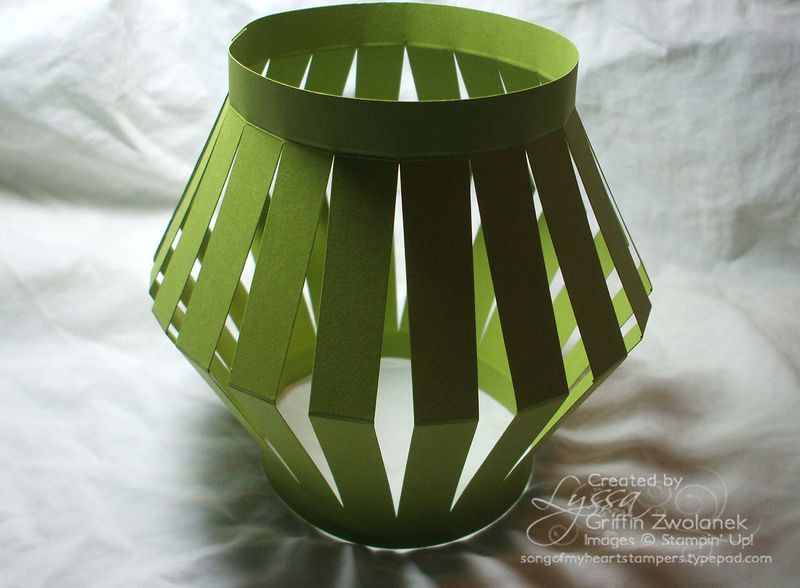
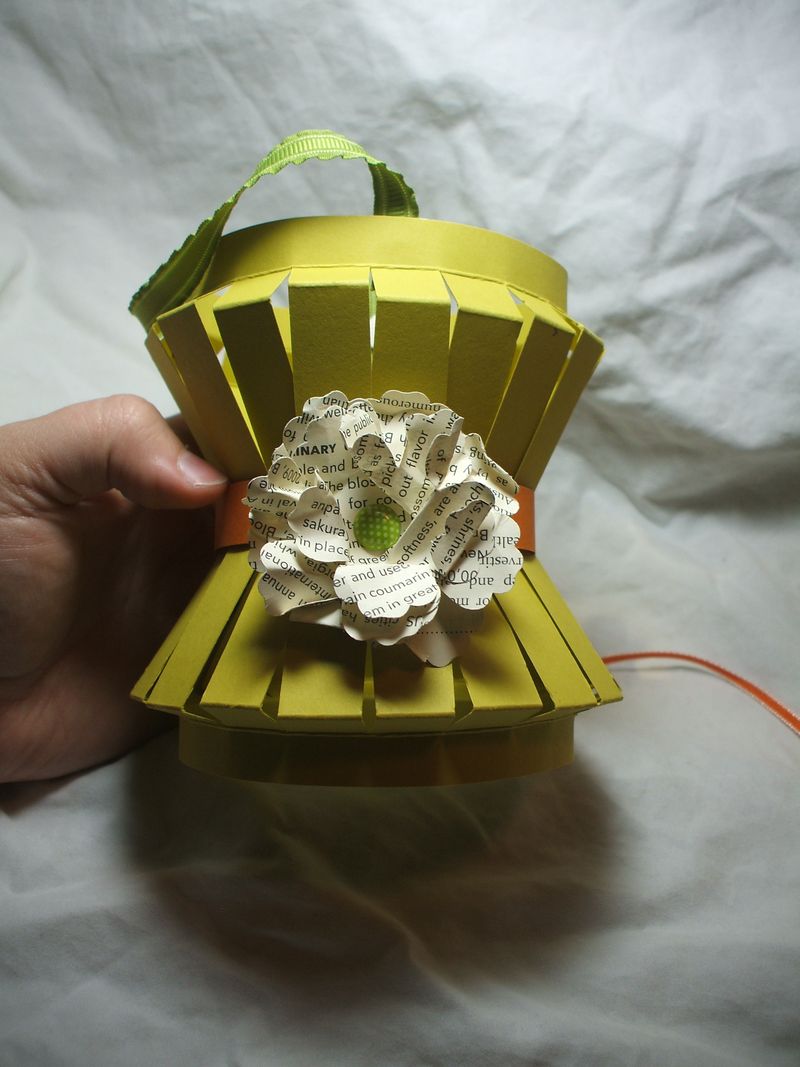
The rest is just embellishing! Add a handle with a cardstock strip or ribbons… add contrasting colored bands or weave DSP strips through the staves… make scrunch punch paper flowers… the sky's the limit! You can get vastly different looks by adding a score line or two, as well. Here's a couple variations on the theme.
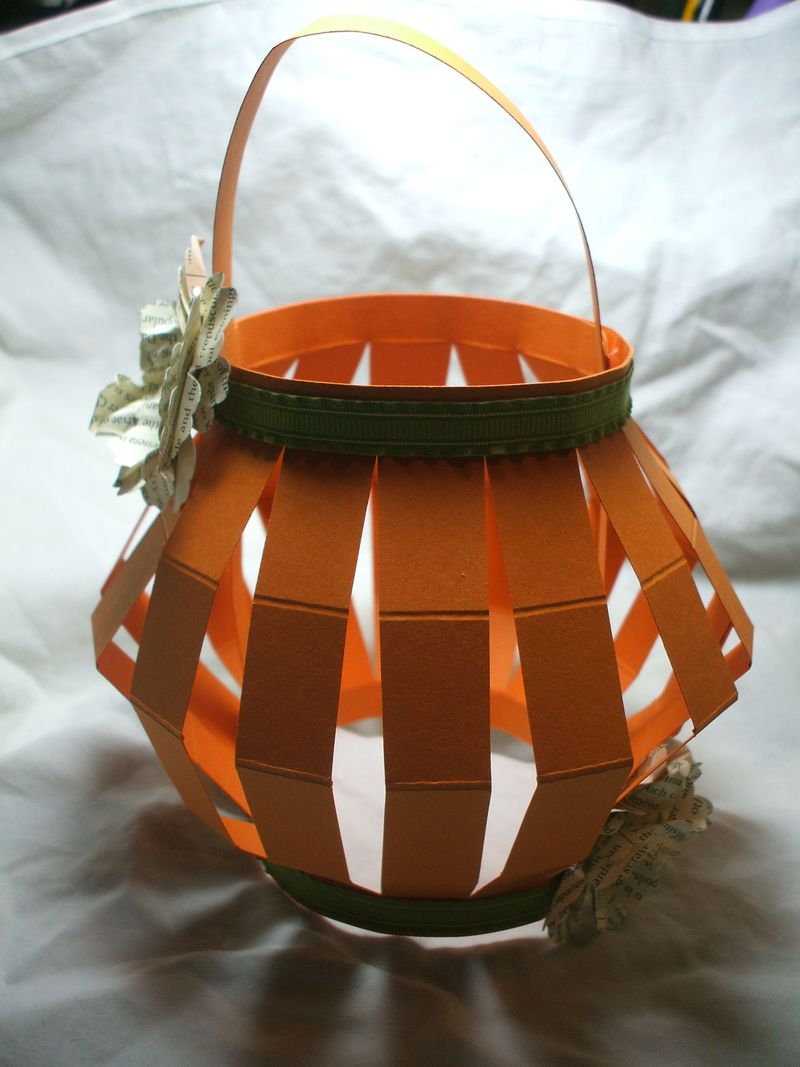
This pumpkin-themed lantern has two extra scores in the center area, allowing the staves to bend outward more gradually and resulting in a shorter, rounder shape. You can also leave it unfolded and not bent at all on that center score, resulting in a taller, skinnier lantern like the one below.
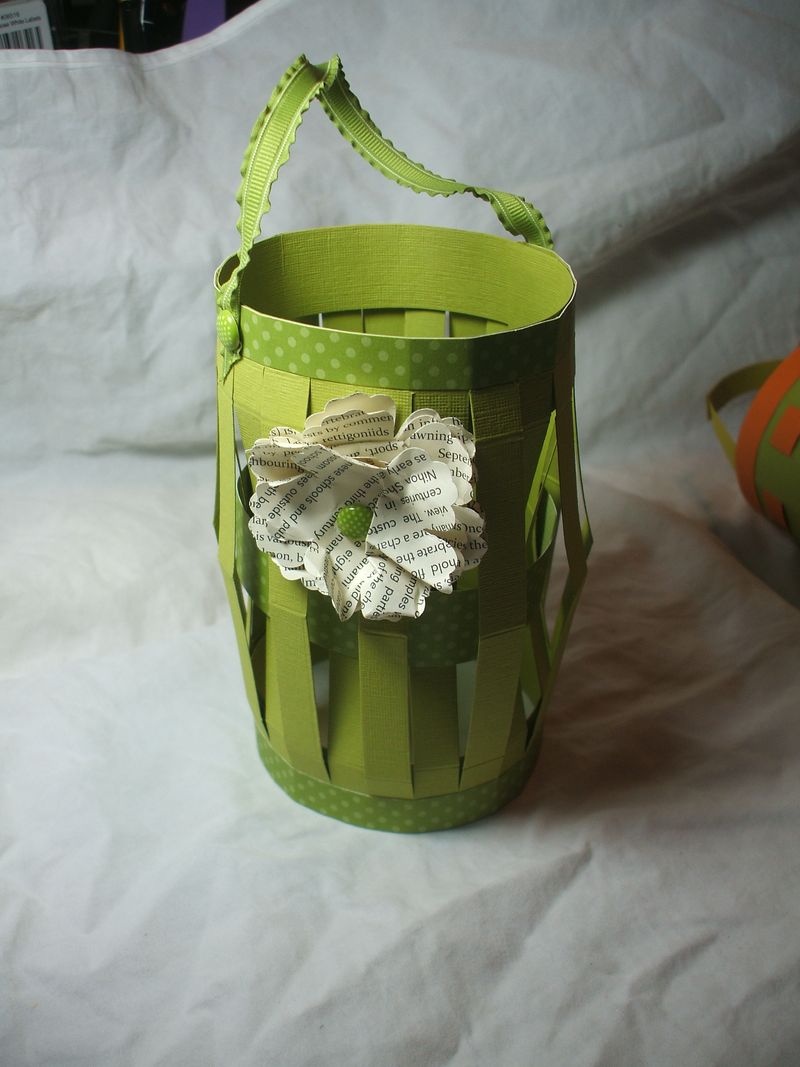
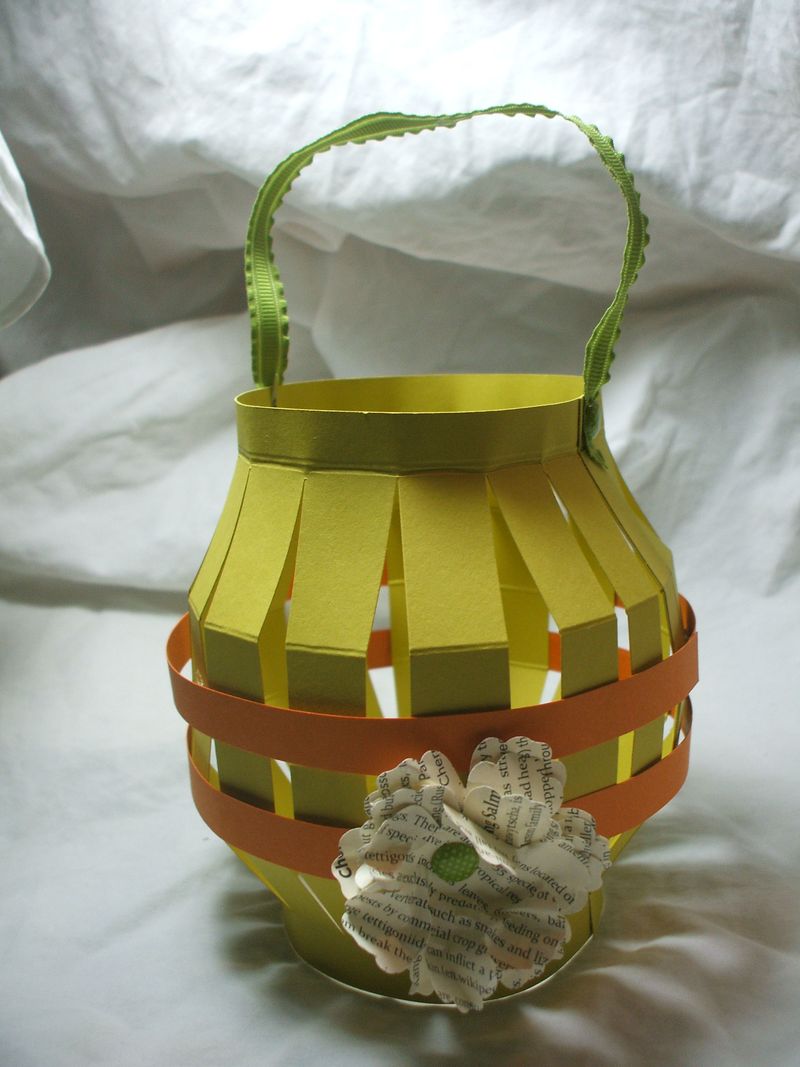
This Summer Starfruit one has two extra scores and two added bands of color… and the one below (my favorite) has two extra score lines up by the top and bottom edge, and the "waist" nipped into this hourglass shape with the addition of a tight belly band.
Ok, federal regulations require me to mention that you should NOT use real candles in these lanterns… use the batter-operated tea-lights, or string these along regular white Christmas lights. For day-time parties, they really don't need to be lit at all. They add so much color and interest to a party!
I hope you like this easy idea! You can make all different sizes, too, provided you start with cardstock that is twice as wide as it is tall (for instance, 4×8, 5×10, etc). Leave me a comment if you enjoy FREE photo tutorials with easy, practical projects that real people might actually make : )



Wonderfully creative ideas! The tutorials really help people like me that are not architectually minded. Thanks so much, Lyssa.
Federal regulations! T-hee! You crack me up! This was super fun at the meeting, and a well-written set of instructions to get folks started! Thanks for sharing!
I love these. I was hoping you’d post some instructions. I’m going to make a bunch for Christmas to decorate with. I loved the easy waterfall card from yesterday, too. We have 3 sponsor kids in Swaziland and 1 in Sri Lanka through World Vision and they LOVE getting stuff like this – I’m going to make them some using your method!
These are so cool and easy, Lyssa! Thanks so much for your awesome free picture tutorial. Your tutorials are so easy. I might have to measure out those 1/2 inch marks though. lol And I’m sure there is some fool somewhere who thought real candles would be a great idea in there! 🙂 Thanks again for sharing!