Some annoying things have happened lately (not to mention my STILL-ongoing toothache after three crowns last week) and I am putting into practice my new resolution to turn negative energy into positive energy by channeling it into productivity. So I have decided it is time for a little TUTORIAL BLITZ! Watch for three great ideas coming to you this week, just in time for Valentine's Day! All my tutorials always have been and always will be free of charge. Enjoy!
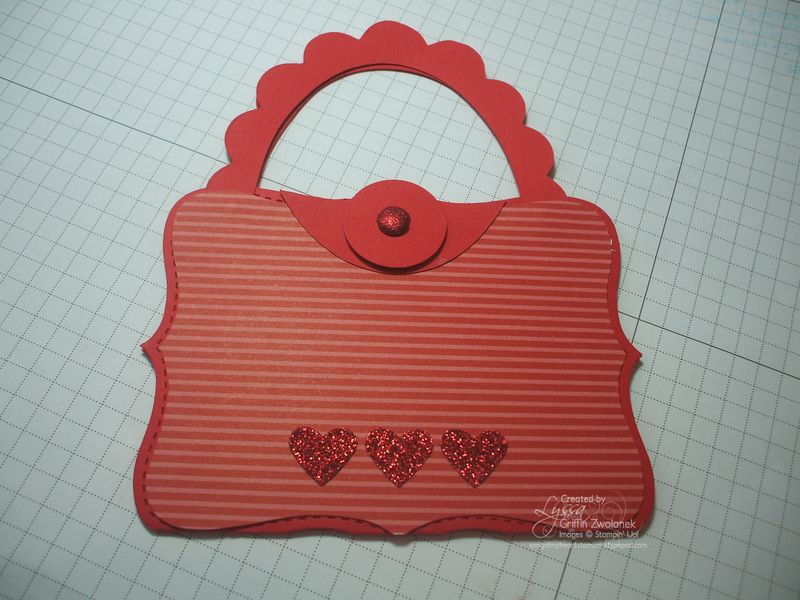
Today we'll be quickly running through how to make this adorable little Top Note purse on the Big Shot, shown to me by my adopted downline Julie Lamont and featured at my Big Shot Club last month. So put on your sneaks, 'cause we're gonna fly through this one! Ready…. Set…. GO! Wait… go eat some chocolate first. It's ok. It's this new thing I heard of called carbo-loading.
You'll need a regular card sized piece of CS (5.5×8.5), folded in half, a card front sized piece of cardstock and one of DSP (4.25×5.5), a quarter of a self-adhesive Velcro dot, and fun embellishment-y type stuff like stamps, ink, punches, Glitter Brads, Glimmer Paper, etc.
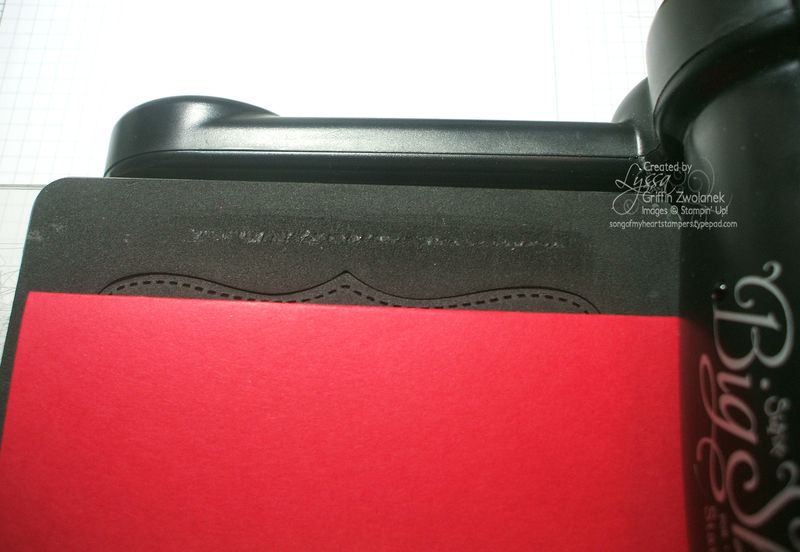
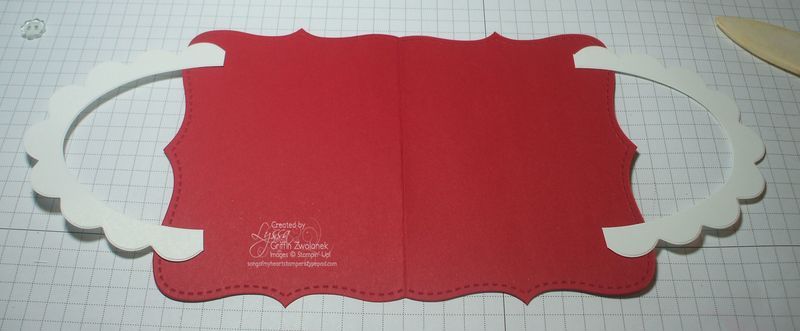
Line up the folded edge (important: check that it is the folded edge) of your card on the Top Note die. Pull it back from the edge just enough so that it will not be cutting the entire shape out. Run it through the machine. When it comes out it should look like this:
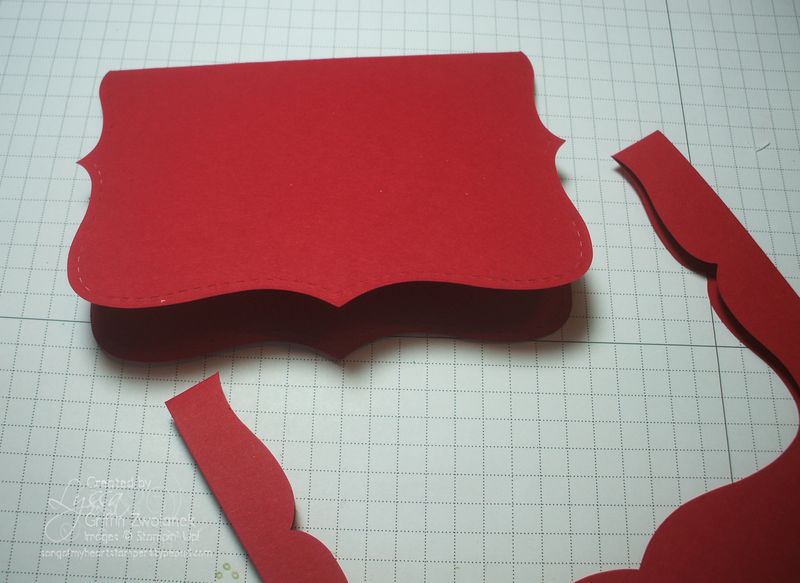
You can do this with lots of different dies, by the way! Click here to see a Butterfly card made on the same principle.
If you're going to stamp the purse, now's the time. Knock yourself out.
Next, run the cardfront sized piece of DSP through and make a full Top Note. Cut around it, following the stitching, to make it smaller than the regular size Top Note, and adhere to purse base. And the crowd goes wild!
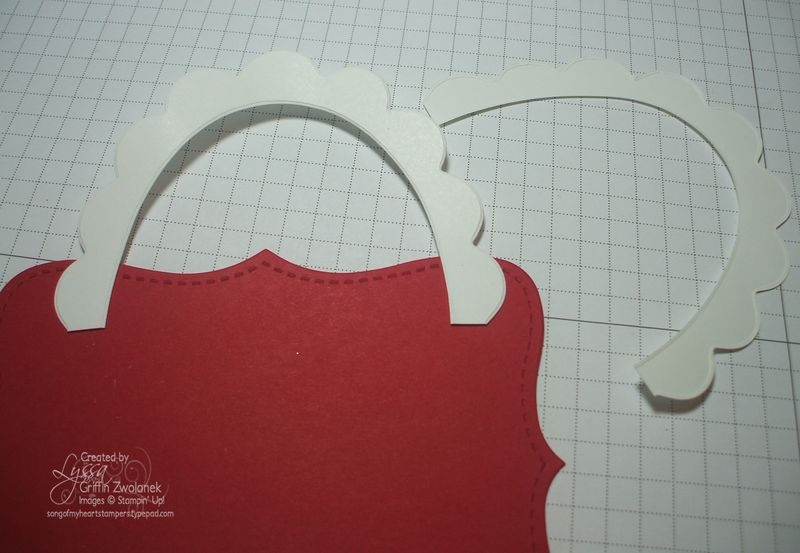
Next, cut the handle out of the cardfront sized piece of cardstock, using the Oval Scallop Frame die for the Big Shot. Fold it in half and you will see just where to cut it to make two perfect handles. I attached mine with Mini Glue Dots, my fave quick adhesive. Adhere one where you want it, then hold the second, glue dots facing up, lined up to it, as you close the purse down on top.
We're nearing the finish line! Now attach the little quarter-circle of Velcro to one side of the inside, peel off the back and close the purse so it will adhere in the perfect spot on the other side.
Now all that's left is embellishing that bad boy… here's a quick little accent you can add to the front of the purse for a "flap."
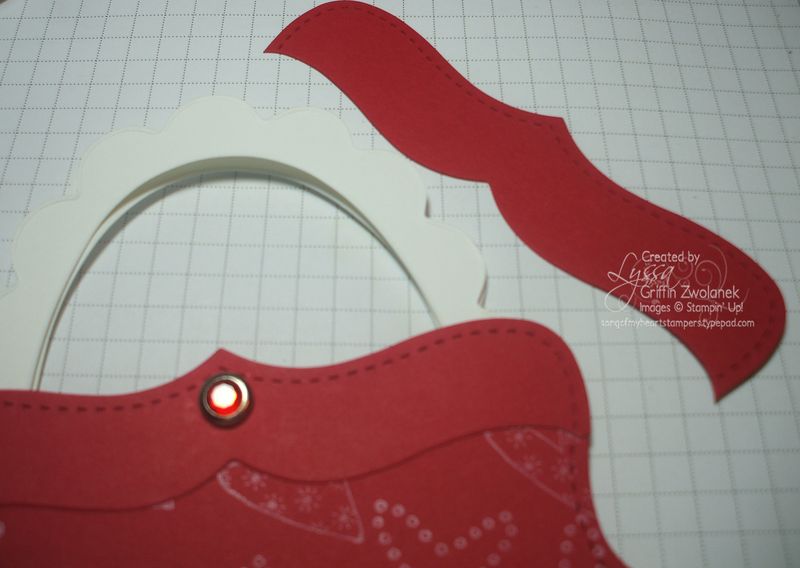
I ran the scrap left over from cutting the Top Note shape out through the machine again, to cut this neat flourishy swirl out. That gives you a place to cover the backs of any brads you use for the "clasp."
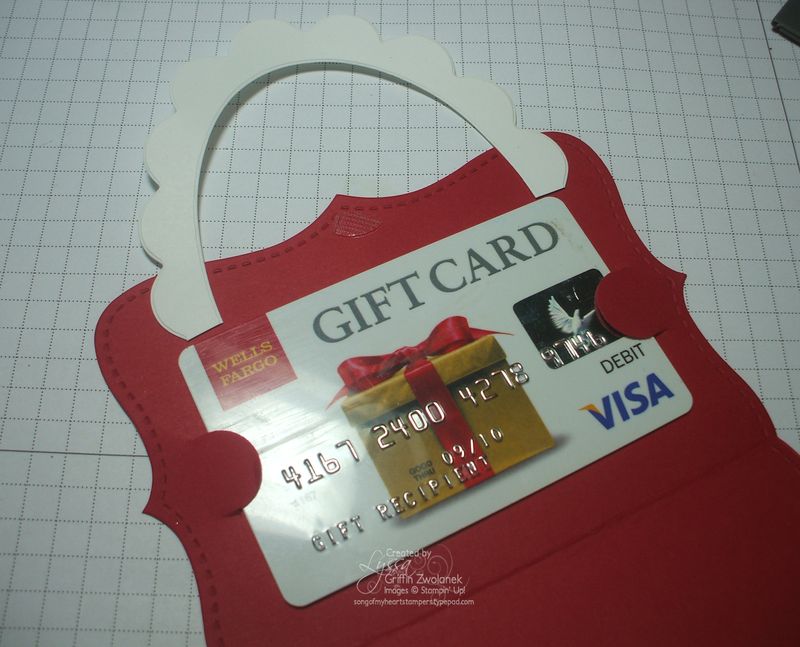
And lookie here, you can turn this into a gift card holder if you want:
How's that for a photo finish? Congrats! You won first place! Give yourself a pat on the back and go put your feet up. Don't forget to rehydrate–and take a little dark chocolate (for your heart, natch).


That is absolutely the cutest purse I’ve seen yet from a Top Note–and very versatile!!!!
Sorry about the toothache, but thank you SO much for working through the pain to post this!
Great project Lyssa. Did you use the (what’s it called) – the slot punch – to hold the gift card. Or are those small circles adhered on there?
Wow – hope those crowns feel better soon.
Wow, your (tooth) pain is our pleasure! Great project and easy-to-follow tutorial — thanks so much! (Don’t you just wish you could leave your mouth with the dentist then go pick it up when they’re all done? Just like your car??) Hope you feel all better very soon.
Thank you for sharing your tutorial. This purse is so darling. Some of my special friends will be getting gift cards in this purse.
Great idea great tutorial!