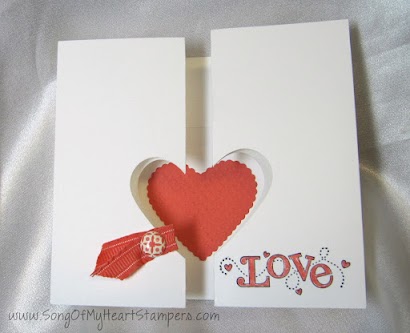
Happy Leap Day! Promised you a quick photo tutorial of this punch-windowed double-door card we made at my last demonstrator meeting and I finally got around to snapping the pics today, after a delightful breakfast with my handsome hubby, who had an unexpected day off.
I encourage you to try this quick and fun card–the recipients will be delighted when they get it, and it's super easy to make. I have made a bunch to trade as swaps at the Stampin' Up conference in Milwaukee on the 10th–so excited!
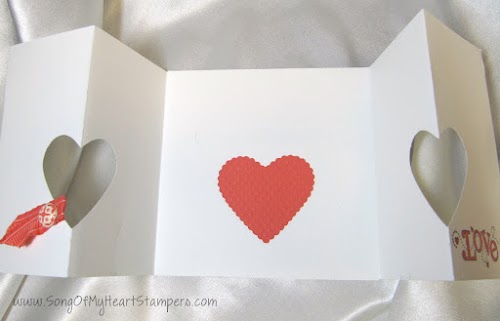
Here's a photo of it open. We're also going to see a gift card holder version, too.
To begin, you'll need TWO pieces of cardstock that measure 4.25×8.5. This means you can get one card from a sheet of cardstock. I trim my 8.5xll to 8.5 square, then in half at 4.25. You'll also need your Simply Scored board, a large punch (I used the Full Heart punch, but any punch with a definite mid-point will do), and for the gift card version, a Word Window punch; plus stamps, ink and embellishments.
I used Basic Gray ink and the Outlined Occasions set you can get for free right now during Sale A Bration! And likewise the free Everyday Enchantment brads, along with Calypso Coral cardstock, marker and ruffled ribbon.
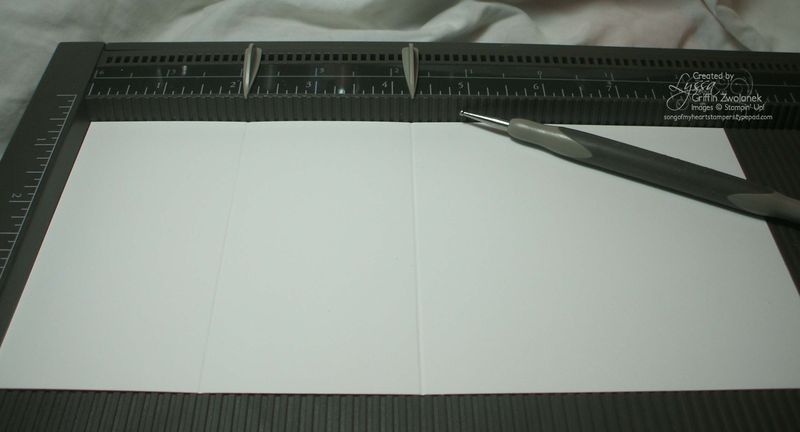
Score your cardstock on the long side at 2 and 1/8 inches, and 4.25 inches. Repeat with the second piece. Then, fold on the score lines as shown below:
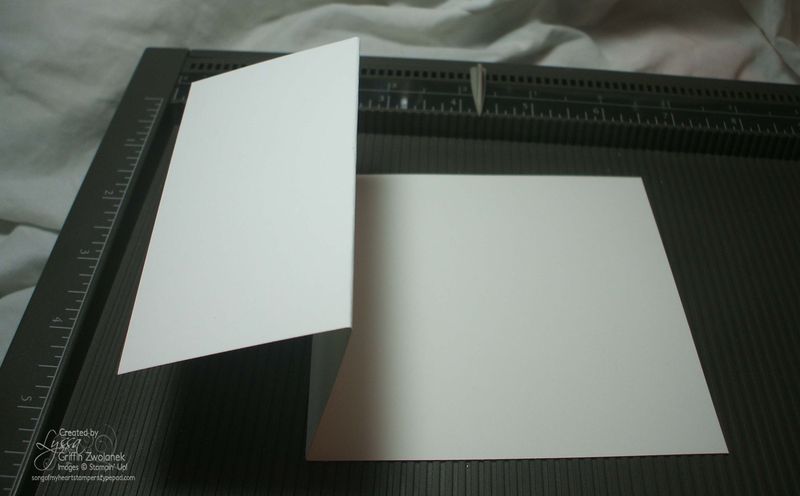
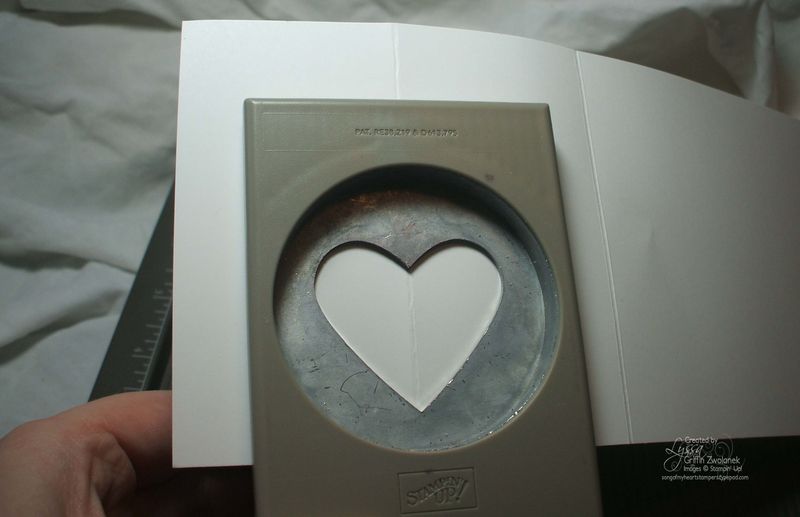
We're going to work on the left hand side door, and then you can just repeat the simple steps for the right hand side. Center your punch over the first score mark (2 and 1/8 inch), pushing your punch ALL the way in as far as it will go. NOTE: If you don't push the punch in all the way, both times, your punched windows may not meet in the middle. That's not cool! So push it in all the way, center it on the scored line, and punch.
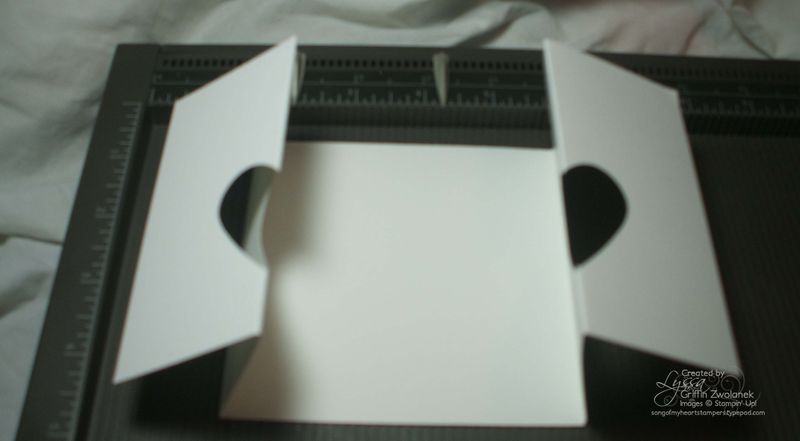
After you've done the right hand side as well, you can put the two halves together with SNAIL adhesive. If you were careful to push the punch in all the way, and centered the punch, you should have a perfect heart window (or whatever punch you're using). If your scoring was a dab off, you may find you need to trim one back piece or the other two allow the two halves of the window to butt up against each other perfectly. It was hard to get the card to lay flat and fully closed for photographing, but you'll see what I mean when you make it.
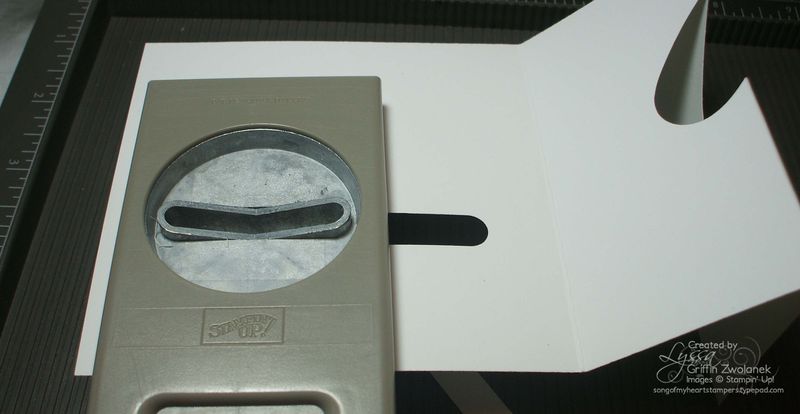
VARIATION: If you want to make yours a gift card holder, punch the Word Window through the back of ONE of the two halves. Again, push the punch in as far as it will go, to ensure that it is straight and deep enough. Slide the punch over and punch again to lengthen the opening so it is long enough for your gift card. Then, attach the two halves together using Sticky Strip instead of regular SNAIL adhesive, since the gift card will put tension on the layers.
Easy-peasy! Hope you'll leave me a note below if you plan to try this card, and feel free to send in special requests. No super-involved, mega-time-consuming ones, please. The over-the-top things are pretty to look at, but I try to post mostly truly practical projects that ordinary people would actually make! Spread the word to your stampin and scrappin' buddies that there are over 50 different photo tutorials to be found at Song of My Heart Stampers, and they are always free for your inspiration.



I loved making this as one of our 4 Make n Takes at the last meeting!!!! Awesome group!
But, I will have to come up with an awesome card to SWAP you for one of these, as I messed mine up…I didn’t punch the slot for the gift card from the top, so the slot on mine is right where the heart should be. DUH! Wanted to mention it to others who give this a try punch the heart from the BOTTOM and the slot from the top!
Loving this idea and think I might give it a try…. thank you so much for sharing your wonderful creativity
Lyssa, thanks once again for a SUPER CUTE tutorial. If it’s ok with you, I’d like to use this in a Fancy Folds class soon, credit to you, of course!!
genius! super idea. gotta give it a try!
and thank you so much for all your inspiration and your tutorials. love them!
Thank you for this simple explanation Lyssa. The stamp “you’re a gem” must have been made with you in mind! hehe!
so simple and yet so effective! tfs