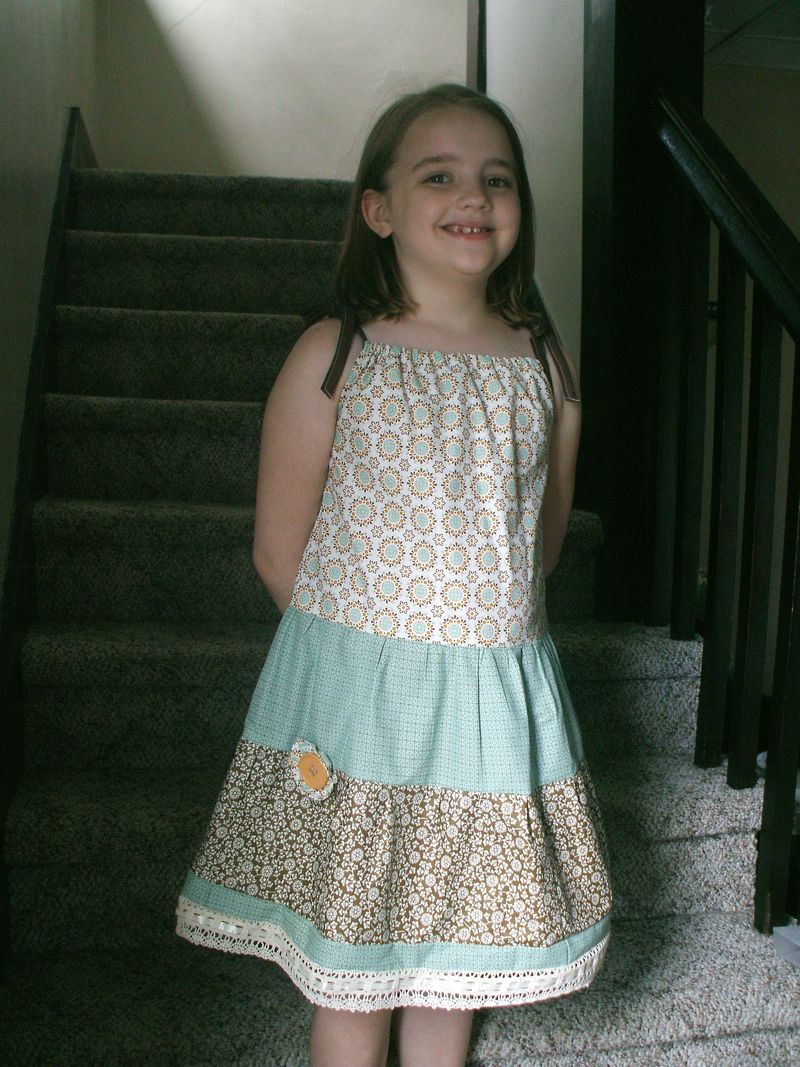
Let us all take a moment to see how adorable my little model is, before we move on to today's tutorial! Welcome to the next installment of my 2011 Back to School Tutorial Blitz! I set a challenge for myself to make a whole dress out of just one package of Stampin' Up's Designer Series Fabric–not just a baby dress, either, but one that fits a going-on-eight-year-old girl! I think I succeeded–and you can, too, with just simple sewing (I don't know any other kind!) and a free hour one evening.
NOTE: I'll apologize right off the bat as this is my first step-by-step sewing tutorial and I am sure portions will be unclear and I will probably use the wrong technical terms. I will amend/clarify the instructions as necessary, should a more experienced seamstress care to leave me a comment or shoot me an email!
To begin, you'll need: one package of Designer Series Fabric (I used Spice Cake from 2011 Holiday Mini Catalog); one package (3 yards) of coordinating bias tape/edge binding; one Designer Button; 1/4 inch wide elastic; three yards of trim for the hem as desired.
Here's how Stampin' Up fabric comes– and the way it is folded is SO convenient for this project–it enables us not to have to do ANY measuring! WOW! You'll see what I mean.
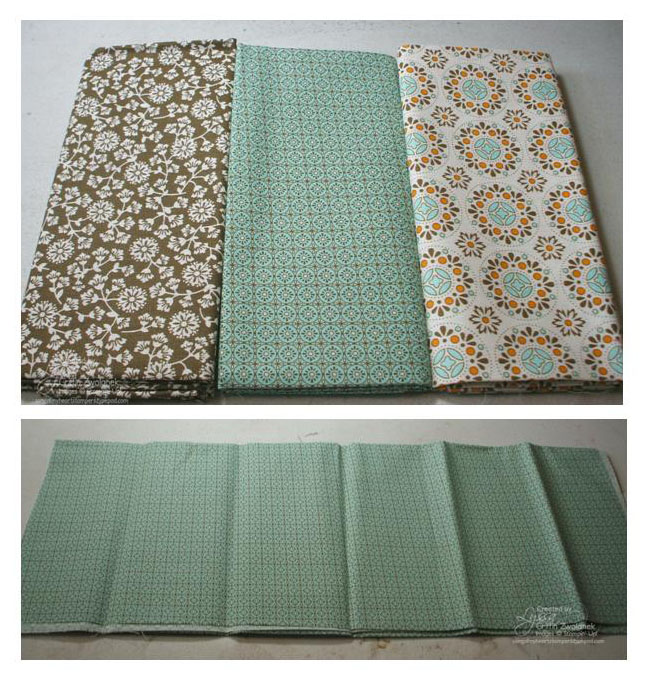
Unfolded, each piece looks like this, four layers thick. If you cut down the horizontal folds as shown below, you will wind up with four even strips of fabric, 18 inches wide by about 7 inches tall.
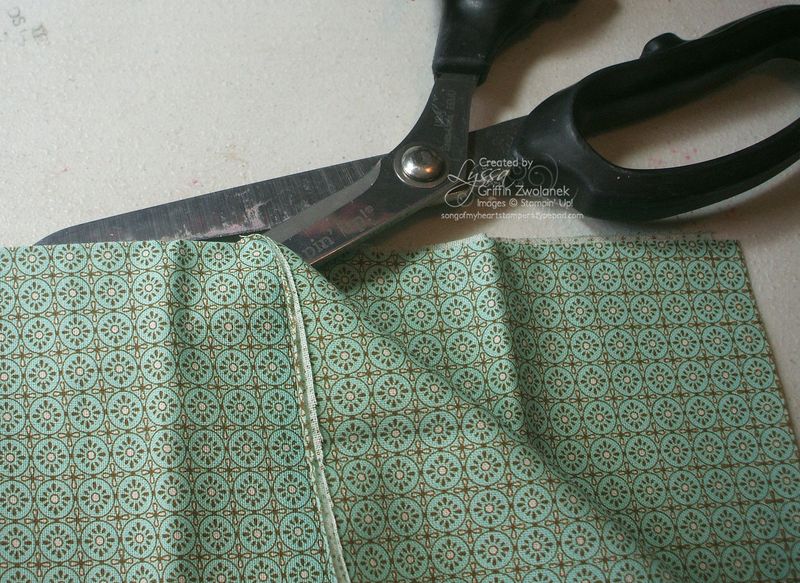
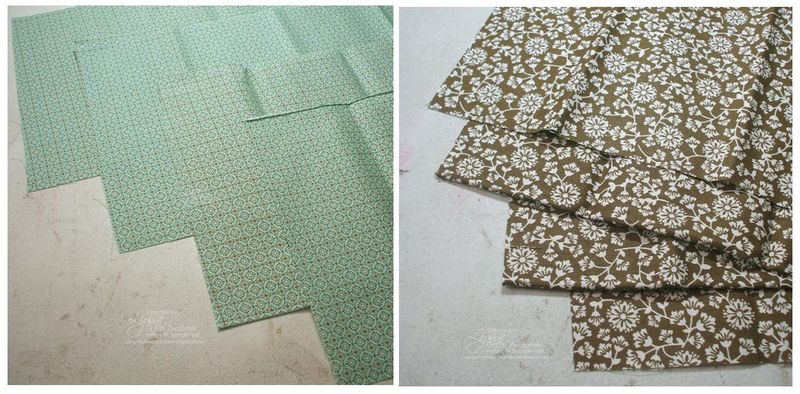
Do that with two of your fabric pieces, but not the third. The third is going to be the top of your dress. How your arrange your three fabrics is totally up to you–have fun choosing which pattern to be the top, middle and bottom!
Set those strips aside for right now and we'll get the top out of the way first. Open up that third piece of fabric so that it has only one fold, across the top. Then fold it in half so the fold is on the right hand side. That fold will be the center front of the dress.
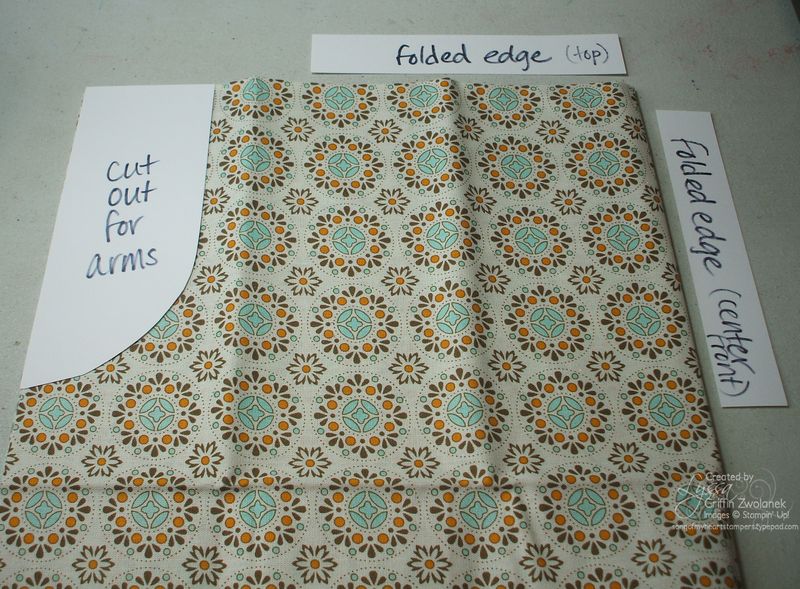
You're going to need to notch a little out for the arms, as shown here. Again, see how the way the fabric was packaged is helping us here? It kind of makes a grid. Super easy to find the halfway point and helpful later with gathering.
TIP: we are literally going to use EVERY scrap of the package of fabric. That notched-out piece is going to make you a CUTE little flower embellishment for your dress! Sew right sides together along the curved edges. Turn right-side out, press, and gather along the unsewn edge with a needle and thread as shown below left.
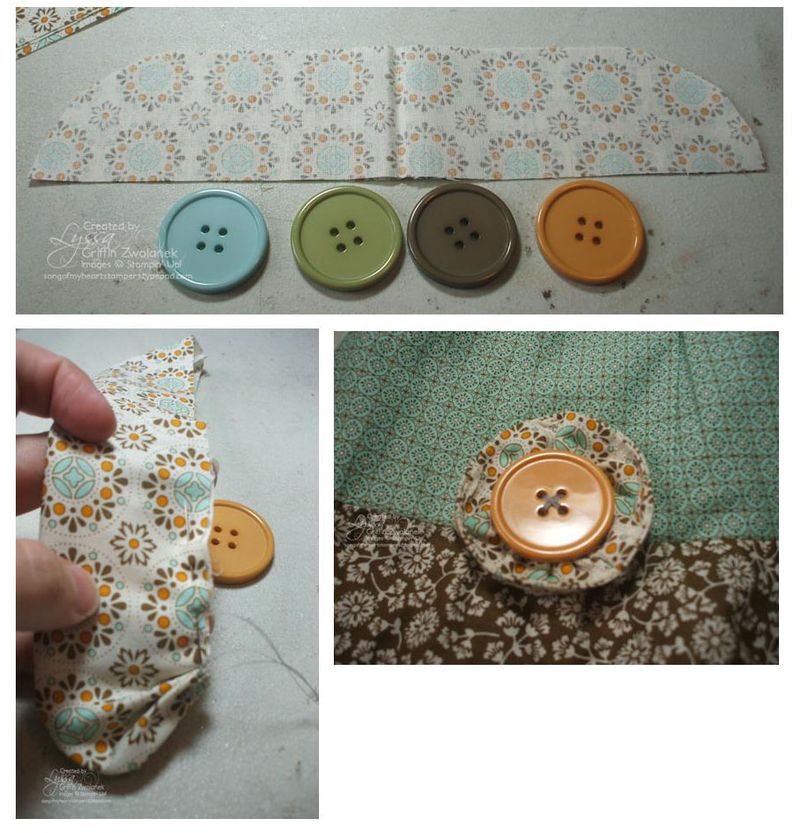
Once you have the flower gathered up and knotted, add a large, fun button. I used the More Mustard one from the Spice Cake collection in the Holiday Mini Catalog. You can see the other three colors in the above photo. You can put your finished flower anywhere you want–I chose to sew mine on the left of the skirt right where the flounces joined, but you could make it into a matching hair barrette, too. Ok, back to the dress–
AFTER you have cut out the arm notch, then slice the top (neck) of the dress open along that top fold. If you do this previous to cutting the notch, you will be left with four pretty much useless pieces instead of two useable strips to make the flower.
Next, sew a casing across the top on both sides, front and back. It needs to be wide enough that you can get your elastic threaded through–about 1/4 inch turned down and then 3/4 of an inch fold over again and sewn near the edge is sufficient.
The photo below shows an easy way to do the elastic. Cut two pieces the width of your little girl's chest from under-arm to under arm. Then put a safety pin on one end of the elastic to thread it through, and safety pin the other end to the dress so the end doesn't get lost and you have to start over. Ask me how I know! 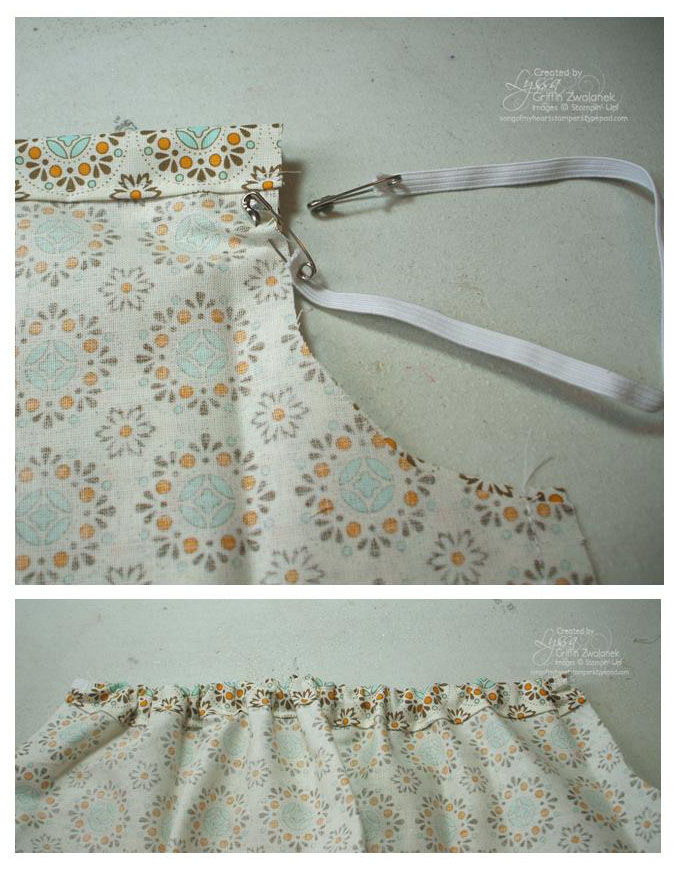
When you have threaded the elastic through the casing, stitch a little bit on each end so it will stay put while you are working with it. Trim off any elastic that sticks out.
Now sew up the two sides under your arm notches. You can really see the top coming together.
That wasn't so bad, was it? Here's the only remaining technical part–you can do it! Open your 3-yard bias tape package and cut it in half. You should probably take a second to iron the kinks out. Then you're going to sew it around each arm notch and leave the two ends for tying at the shoulder.
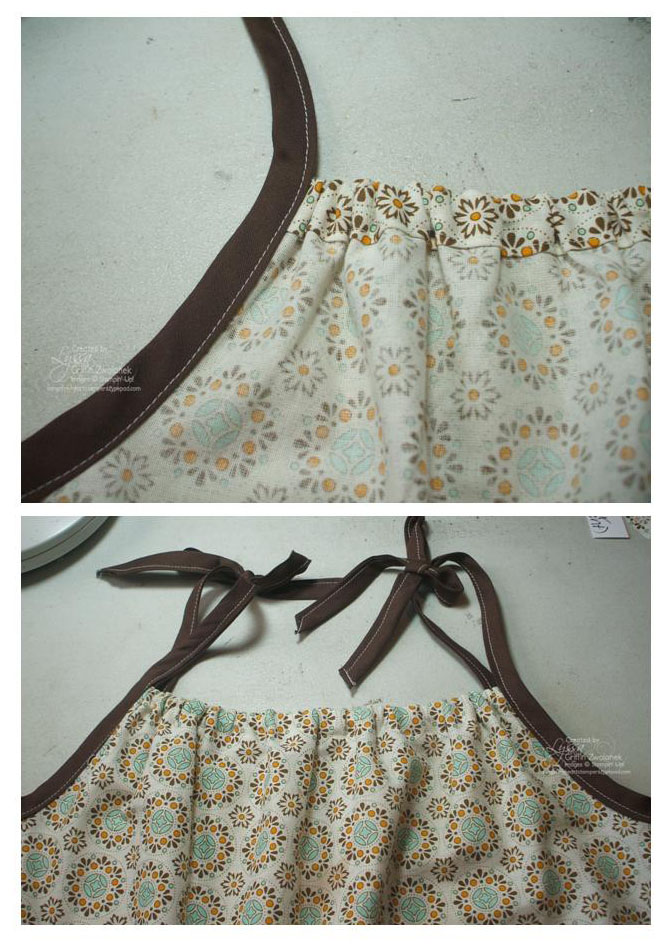
You can definitely use pins here if you want to, but I just started from the center of the bias tape and the underarm seam, and sewed up the front and all the way to the tip of the bias tape/edge binding, and then started again from the under arm and sewed all the way up the back and to the other tip of the edge binding/bias tape. Hey, if I can do it, anyone can!
There! The top is all done! And if you need more assistance on those last couple steps because my instructions were dorky, I got the idea for the elastic top of the dress from a free video on You Tube from Nancy's Notions, which you might find helpful.
Now all we need to do is attach the skirt flounces and we're on the home stretch. Remember how we cut the other two pieces of fabric into four even strips? Take your middle color and sew THREE (not four) of those strips end to end to end–that's right, one long circle. Gather one edge and sew around the base of the top, making sure you have right sides together (ahem. We won't talk about that).
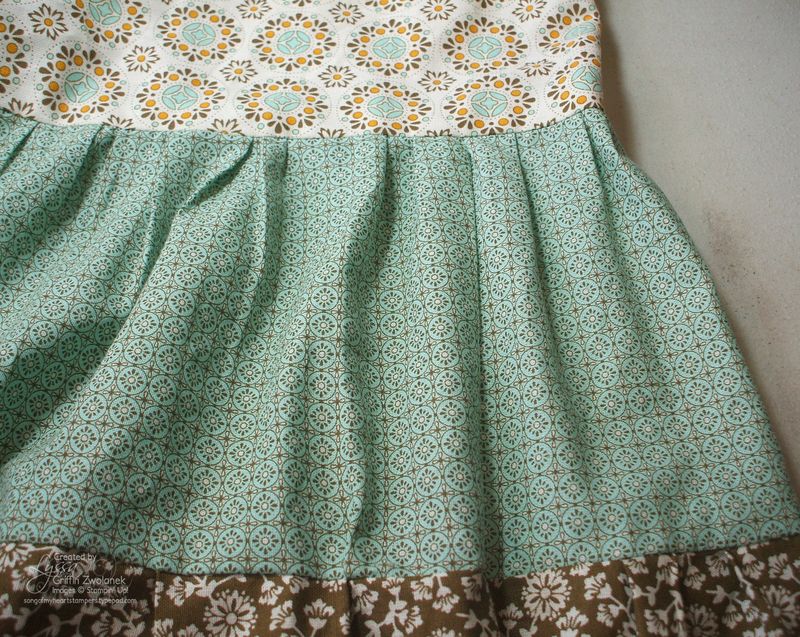
Then repeat with the bottom color, only this time use all FOUR strips of fabric, so that there is plenty to gather up for an even wider ruffle sewn around the bottom edge of the middle color. Your lucky little girl will LOVE it!
Then take that final strip of the middle color (the only piece of fabric remaining from the entire package!) and cut it into four even, long strips. Sew those together end to end as well. If you are not going to add any lace to the bottom of the dress (my baby is getting SO tall!), you can use that to edge the hem. I needed all the length I could get, so I just sewed it to the bottom edge and then added a $3 spool of 3-inch wide off-white crocheted lace from Walmart.
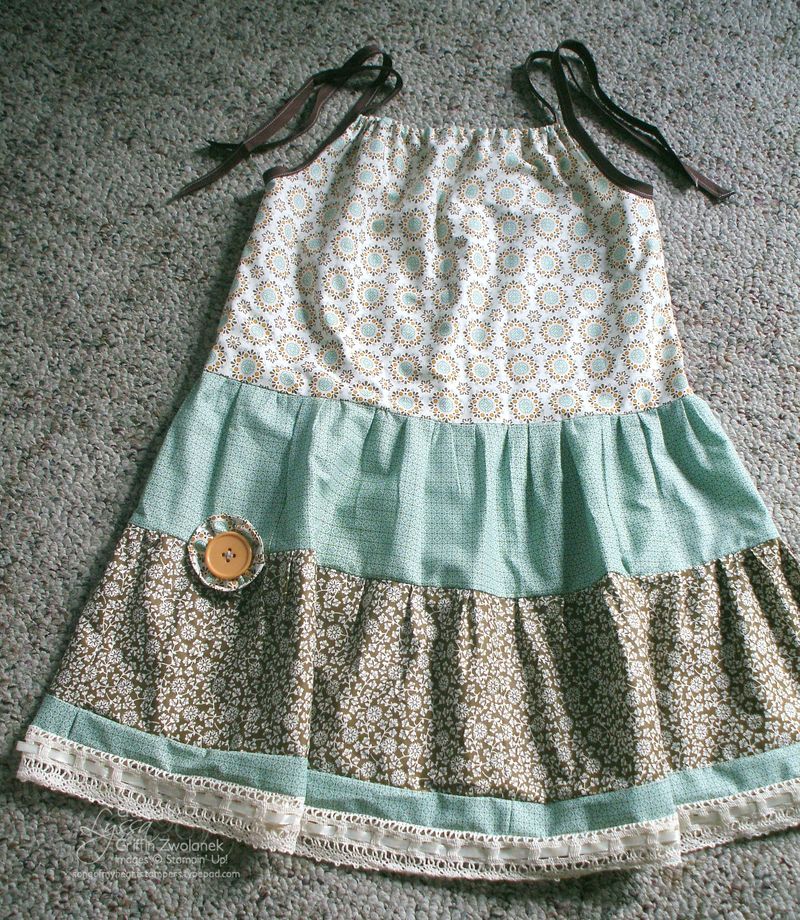
All done! Isn't that cute? Hope you enjoyed this tutorial, and will make a point of returning all this week for more of my Back to School Tutorial Blitz, too. You can see all of Stampin' Up's new fabric line and accessories on my shopping website, www.lyssa.stampinup.net, and if you decide to make one of these One-Hour, One-Package Dresses, I would love it if you'd leave a comment with a link to your creation, below!
Happy stamping–and sewing!


SO CUTE! Now all I need is a little cutie to sew for….
Lyssa, this is so adorable! I am going to have my mom try to make my four-year-old something similar (because I don’t sew AT ALL)! One question- does the completed dress twirl? This is a very important feature to my girlie girl. 🙂
Lyssa, what a cute dress and so easy. I love this too because if your girl is a bit older and taller you could always just pair with some leggings for a very fun tunic type top. If you are even a small adult you could do this for a top.
thanks for sharing.
Very nice, Lyssa! I love making dresses and skirts like this. It eliminates all the annoying time spent on cutting out patterns.:-)
I love this dress! To bad all the little ones in my life are grandsons!
I really enjoy looking at your blog every day. I always find something to take from you, whether it be a tip, trick or some of “Lyssa’s Thoughts!”
Marla, it twirls like a “cupcake,” not a “pancake”–does that make sense? That took me right back to grade school : )
If you really want it to twirl, I would get two packages of the fabric and at one or two of the strips to lengthen the flounces so they are more heavily gathered. And then since you would have extra fabric–better make matching hair clips, a purse and clip on bows for the flip flops : )
That is THE CUTEST DRESS & MODEL I have seen!!!!! Wow, if only I could sew, you might have just sold me on these fabrics! 🙂
For someone with very minimal sewing experience this looks like a “easy” project. Most of all LOVE the cute model! Thanks for sharing!
Wow Lyssa, You are amazing!!! I love it!
This is sew adorable…thanks for posting to the thread on SCS! You model is beautiful and the dress pattern is too cute!
This is fantastic. I love how it turned out, thank you for the step by step.
I concur, Lyssa you are amazing. So wonderful to see Natalie looking simply divine in her new dress.
W.O.W – I have just caught up on reading your blog and love, love, love all your fabric crafting. Fabric is my first love, so I am so happy SU! have it now. This dress and your model are beautiful.
What a beautiful dress! Sewing is something I never got into. I actually still don’t want to do it, but I can really appreciate those that are good at it. Great job!
Wow! This is amazing, you are “sew” clever…..lol Love it!
Vicki x