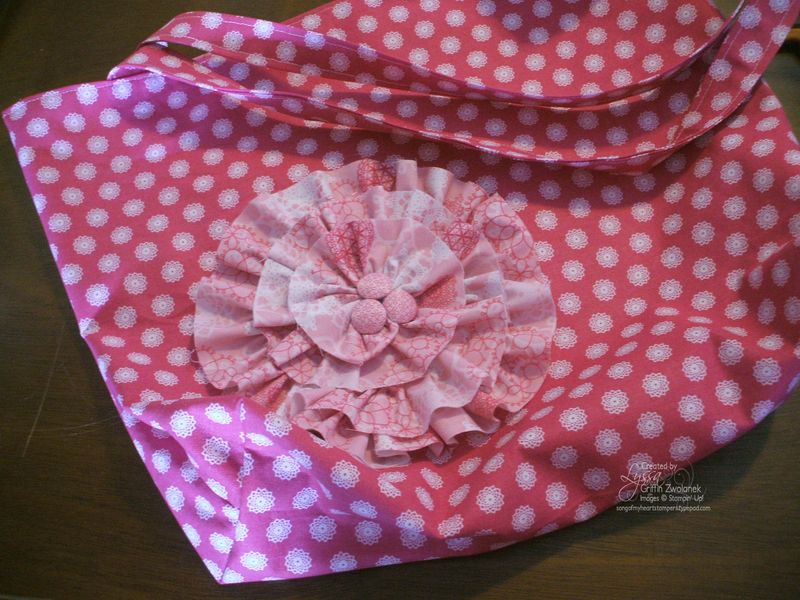
It's my birthday today and since I'm stuck home with a sick kid and can't go out shopping or to redeem my free massage (thanks, Michelle!) I decided to sew this morning. And because I'm a total workaholic and can't ever seem to totally unplug, I was listening to a Stampin' Up webinar at the same time : ) But after I got this tote made, I decided to try an awesome new flower I saw in this month's issue of Stampin' Success. Never heard of it? It's a demonstrator-only monthly magazine from Stampin' Up, and it rocks! Ask me today for a FREE SAMPLE ISSUE!
The flower is SOOOO easy you probably don't even need a tutorial, but some of us learn better with pictures, right? So here we go. To start with, I cut long strips of Flirtatious Designer Series Fabric (one of the free choices right now during Sale A Bration 2012!!) and backed them with iron-on light interfacing. This will give your flower some sturdiness, but it also prevents it from ravelling too much, which you will be VERY glad you did over time when you don't have to pick off a bazillion and eight threads that shed all over!
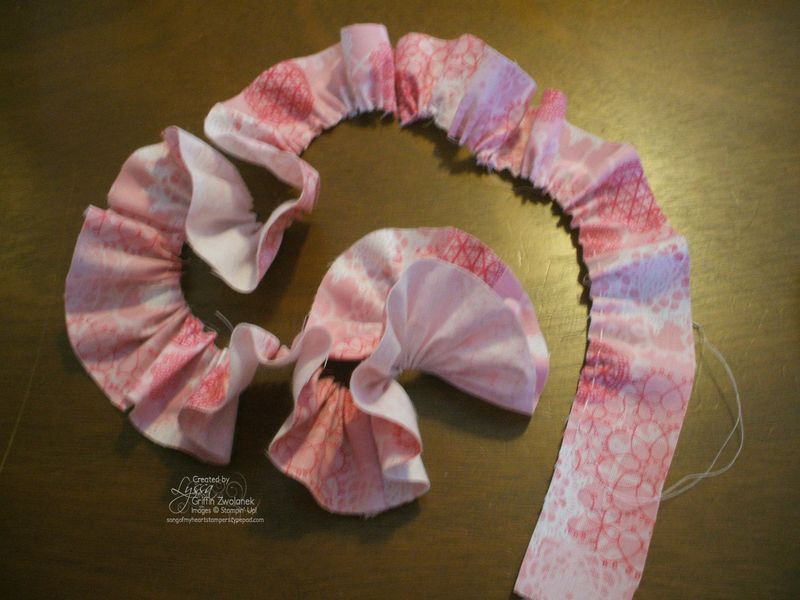
My strips were about two inches wide. I sewed the strips end to end, so I had one long piece that was about 70 inches. The length you will need (and the width, too) will depend on how big across you want the finished flower to be, but if you're just trying it out, those are good measurements to start with.
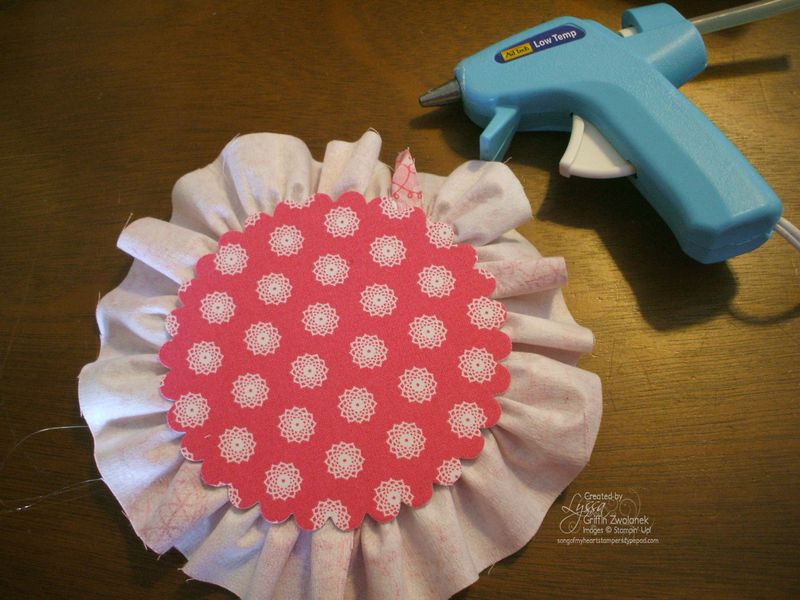
Run a simple gathering stitch down the entire thing… not too tight, and don't tie off the thread until you start winding it in the circle shape, so you can adjust the gathers where you have too many or not enough. The photo below shows it kind of laid out how it will eventually be glued down.
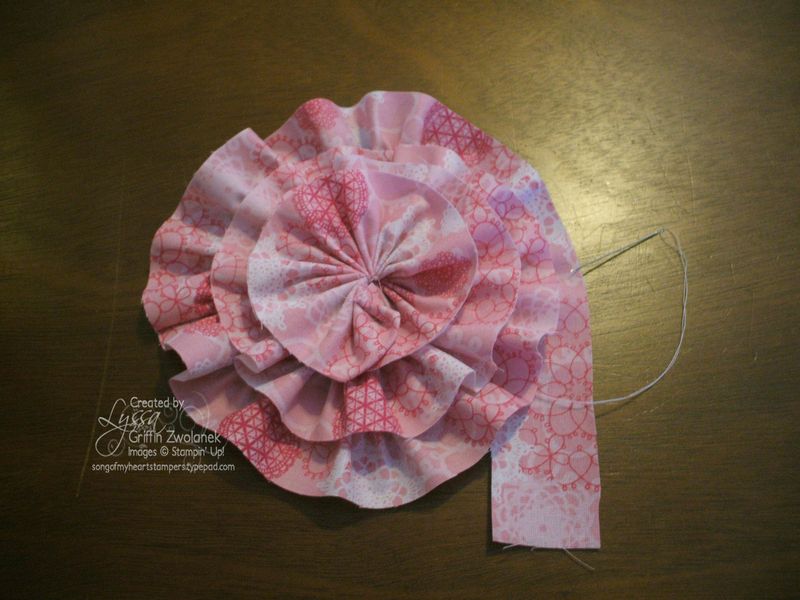
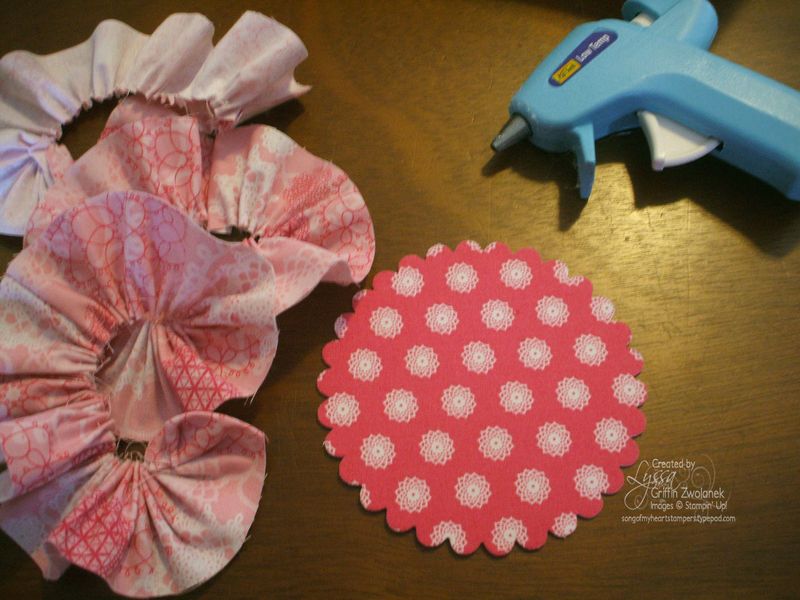
For my base, I cut a Scallop Circle die on the Big Shot, out of the cardboard that comes in a package of Designer Series Papers. I covered one side of it with Multipurpose Adhesive Sheet and Flirtatious fabric, so the flower is actually as pretty on the back side as it is on the front! Not really important, but I wanted the flower to be able to come off the tote so I can wash it when it gets dirty.
Then you just hot glue the gathered strip around and around on the circle, recreating the flower you made above. Start in the center and work your way out to the edge. The 70-ish inch strip will work out just about right to finish off by the time you reach the outer edge of the scallop circle die-cut.As you can see below on this photo of the back side of the flower, the final ruffled row will just have enough space to be glued down along the edge.
Tuck the end in underneath a ruffle to finish it off. That's it! Isn't that easy? You may want to go back and add in a few dabs more hot glue anywhere where it feels loose or doesn't lay perfectly.I added three fabric-covered brads from the Sew Suite collection, which are still available on the Clearance Rack right now if you hurry!
TIP: use the Crop A Dile to punch two holes through your cardboard backing circle, to allow you to easily insert two safety pins to secure your flower safely to the tote bag. Otherwise you're trying to force the pins through the cardboard and it ain't pretty 🙂
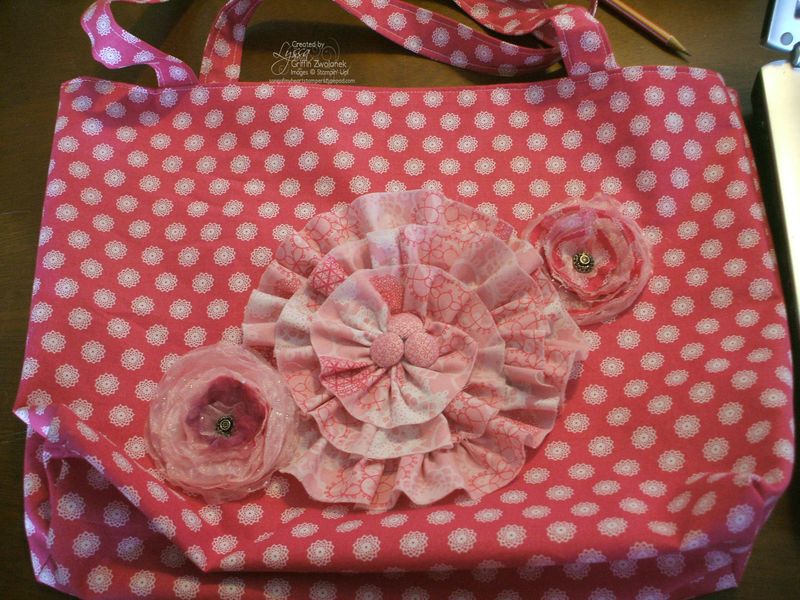
Here's the finished tote bag with the big flower pinned to the middle, and two other Big Shot circle flowers with melted edges (done with the Heat Tool, but that's another tutorial!). If you hot glue brooch pins to the backs of these flowers, that works, too, for easy removal when you need to launder it.
Hope you've enjoyed another FREE tutorial from Song of My Heart Stampers. I love sharing what I do, because I do what I love! Thanks for visiting my blog, and be sure to let your friends know that not only are my projects all free, you can also find EVERYTHING I use on them in one location, my Stampin' Up website. Click here to spend some fun time browsing, and don't forget you can get this fabric for free right now, during Sale A Bration! www.lyssa.stampinup.net




Happy, happy birthday, Lyssa! Thanks so much for this cute tutorial, too. Hope you have had a great day 🙂
Happy Birthday Lyssa, and thanks for the great tutorial
Oh my gosh Lyssa, I LOVE your bag and the flowers. Thanks for sharing the how to with us. You’re the best! Happy Birthday!
Really cute – I love your fabric and sewing projects!
Hi Lyssa! I would love to know the dimensions of the fabric you cut for this beautiful bag! It looks similar in size to our Leadership bag. I know the basics of bag construction but I would love to know the dimensions to cut. Thanks for the tutorial! By the way, I participated in your swap at Leadership! I love all my swaps and can’t wait for next year!
Liana
stampinsundevil@yahoo.com
Hi Liana! Thanks for your kind comments. I did not cut the fabric at all. The bag is made from the entire pieces of fabric straight from SU. I sewed two entire pieces right sides together, after backing one with lightweight fusible interfacing, then turned them right side out. Folded the piece in half and sewed up the sides. The bottom is gusseted by sewing diagonally across the corners, so you can make it as deep and wide a bag as you choose to sew across. SO easy–no pattern needed!
Forgot to say that yes, I originally started out planning to attempt to recreate the Leadership bag. It turned out a little larger than the interior of the Leadership bag, though, so you would want to make yours less wide.