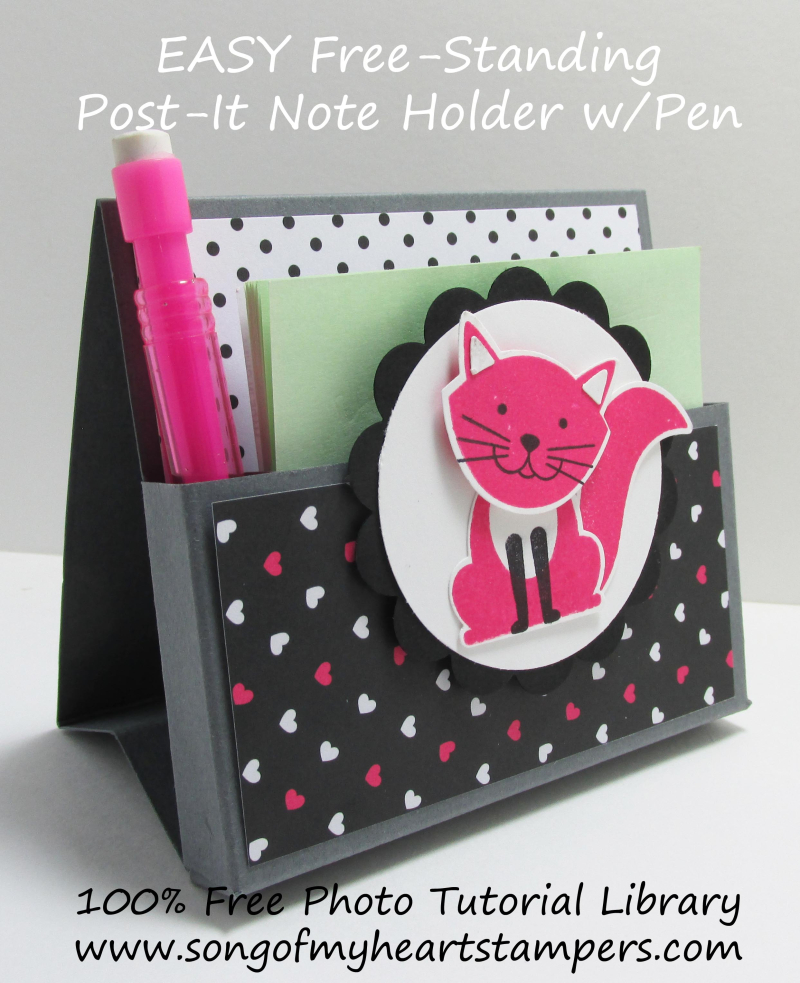
Ready for an adorable papercrafting project for your upcoming craft fair, or a quick classroom or co-workers gift for Christmas? This sweet little free-standing desktop Post-It Note Holder with Pen is the perfect little present when you just need a token but want to make something with love. I've made a quick tutorial with everything you need to make this memo pad stand in about ten minutes flat!
The measurements are easy, the scores are simple, the results amazing–let's make this today!
To begin, you'll need:
- Simply Scored board or Stampin' Trimmer with scoring blade;
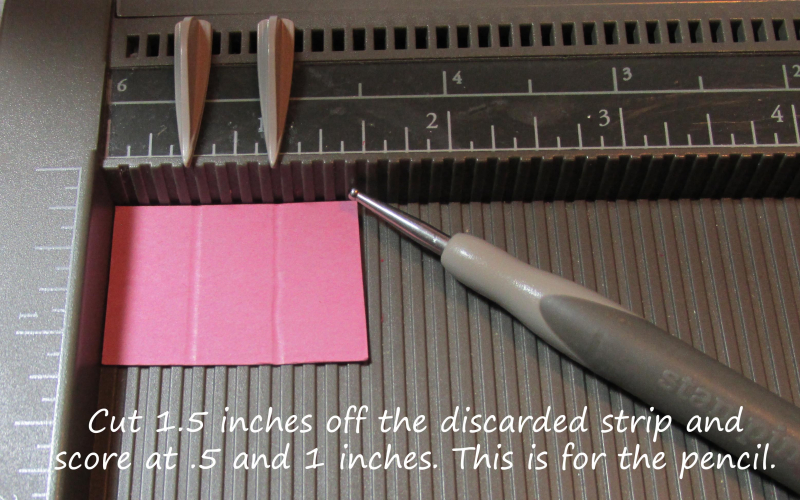
- 3×3 Post-Note pad and mini pen (Dollar Tree is awesome for these)
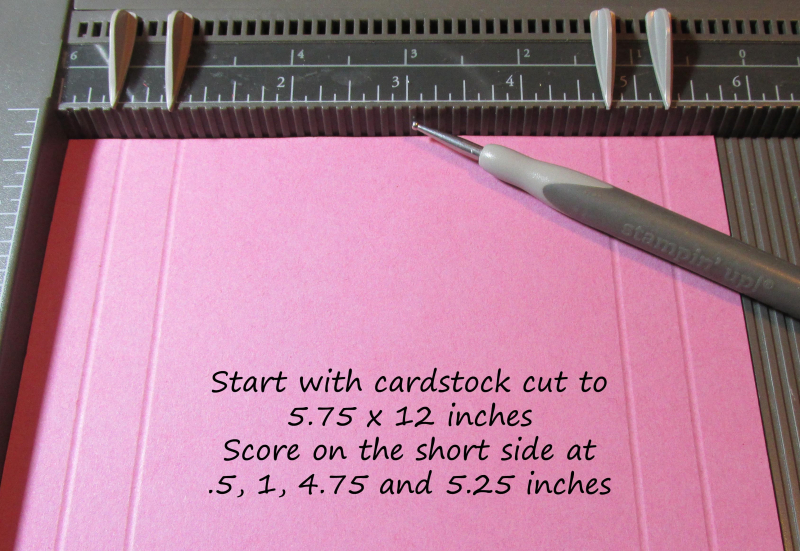
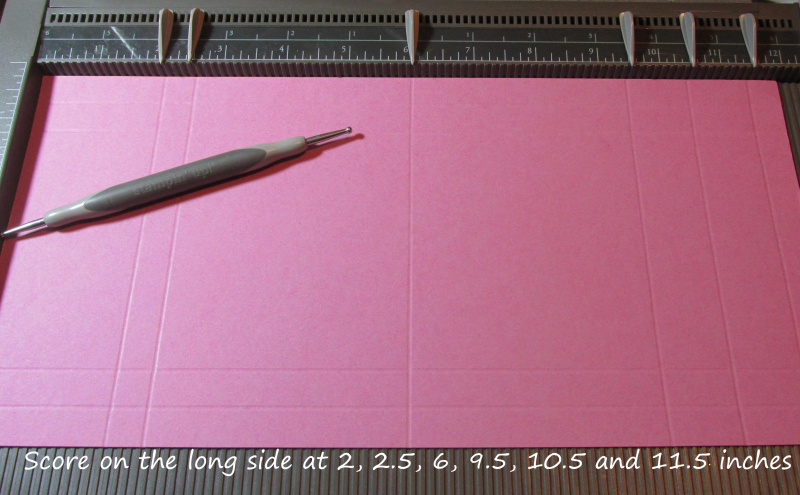
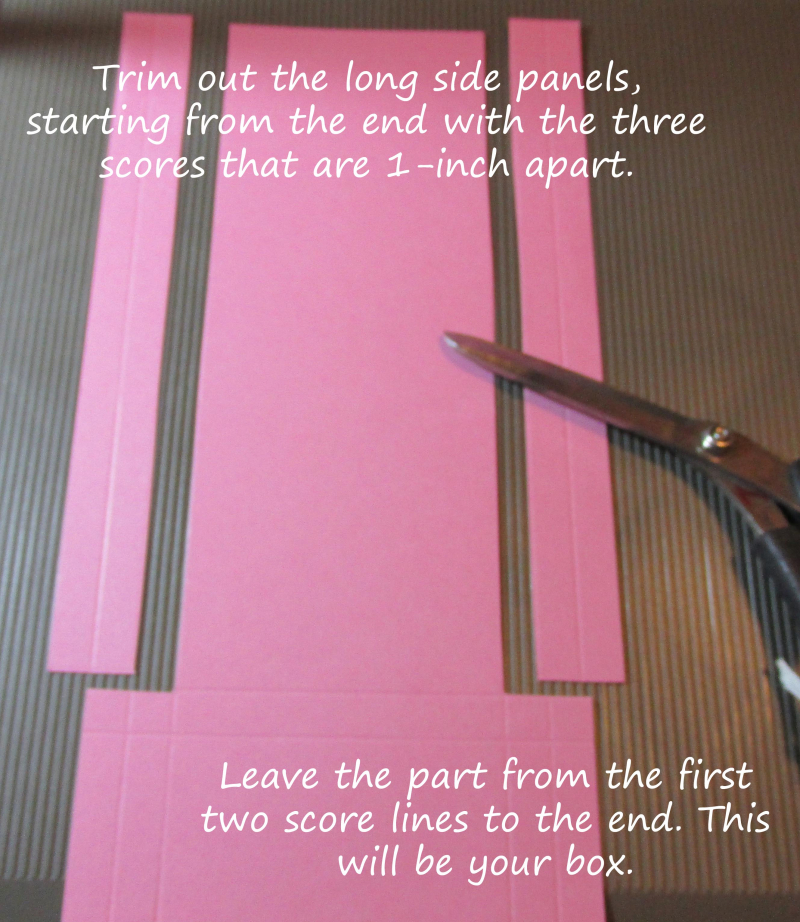
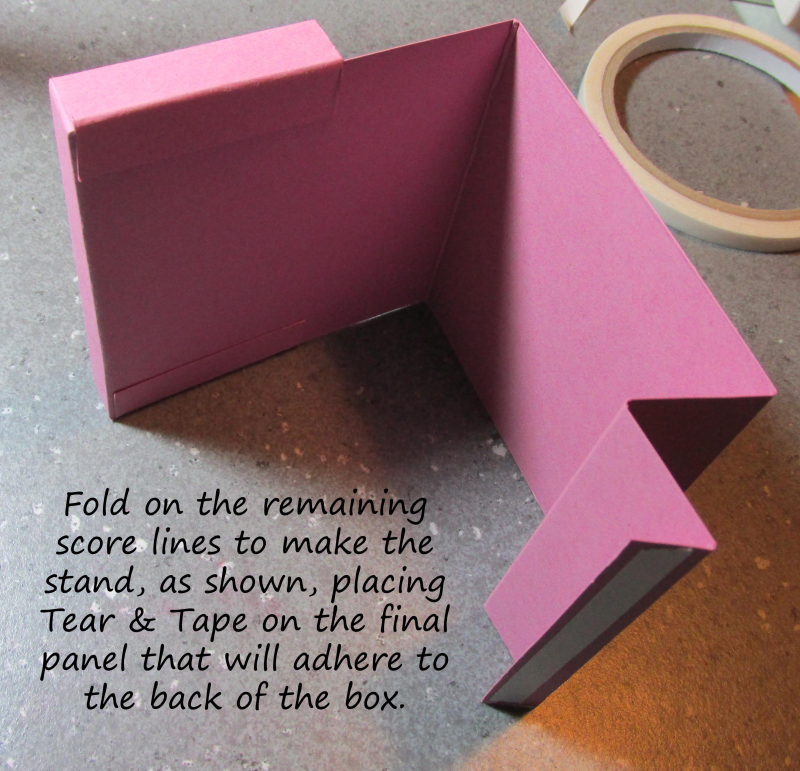
- Good-quality, sturdy cardstock (5.75 x 12 inches)
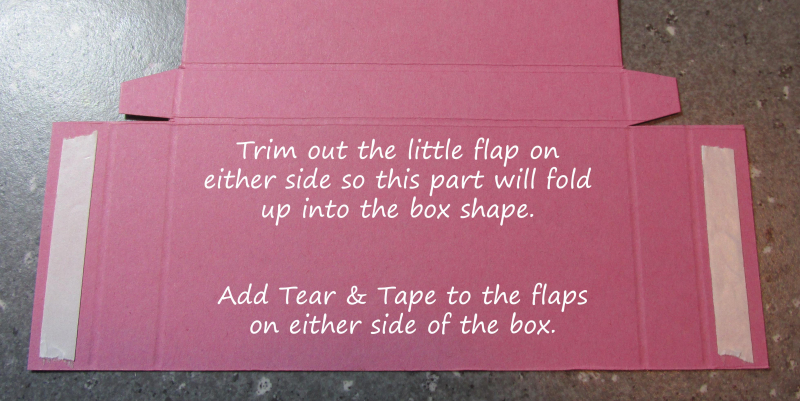
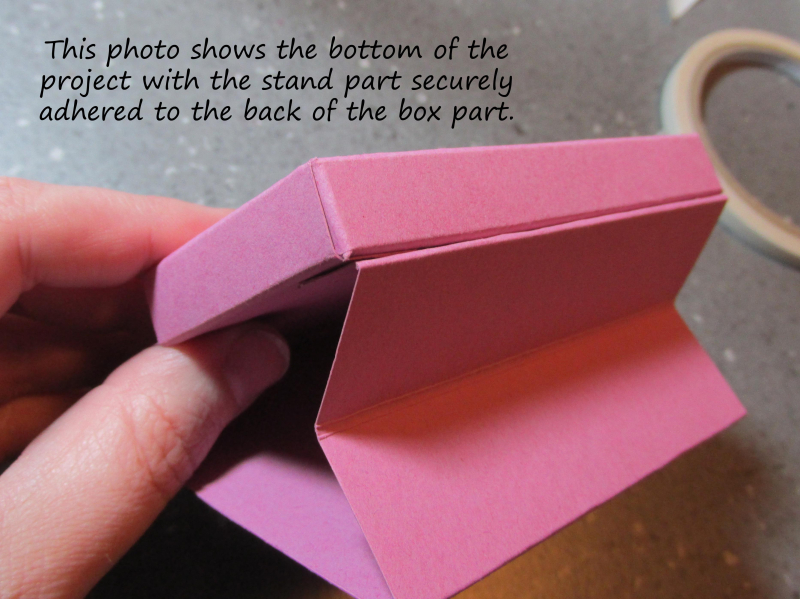
- Tear & Tape or other strong adhesive like Tombow Multi
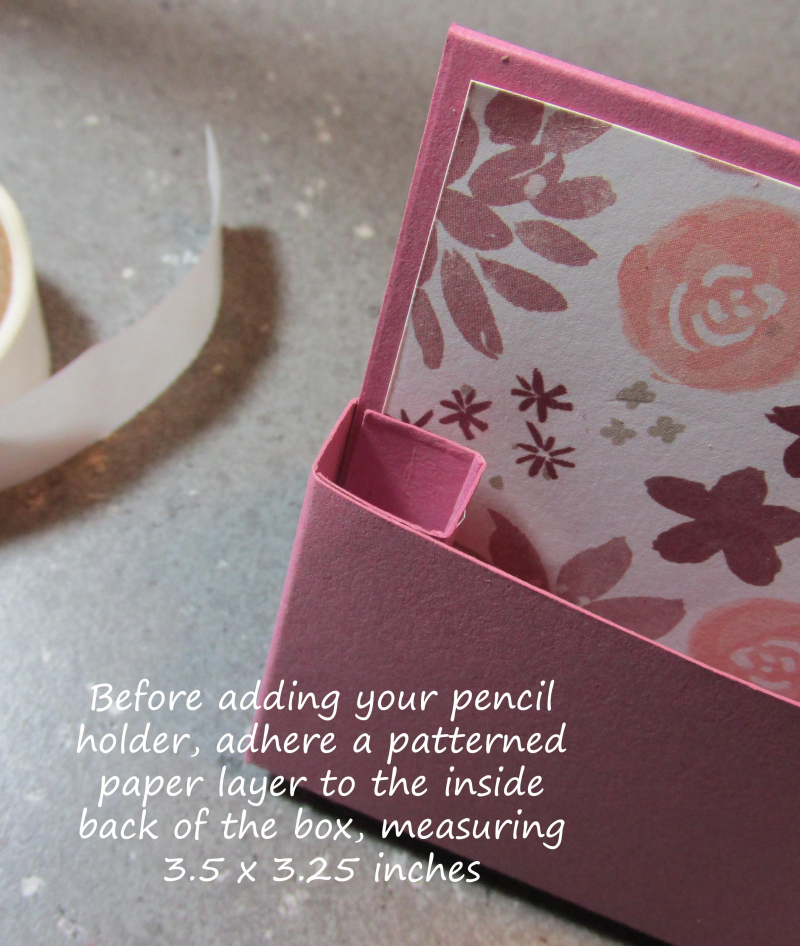
- Patterned paper, stamps, ink and embellishments as desired.
Don't have the tools you need to make your projects turn out great, every time? Shop with Lyssa! I'd love to be your Stampin' Up demonstrator if you don't already have one. Let me help you be successful and proud of what you make!
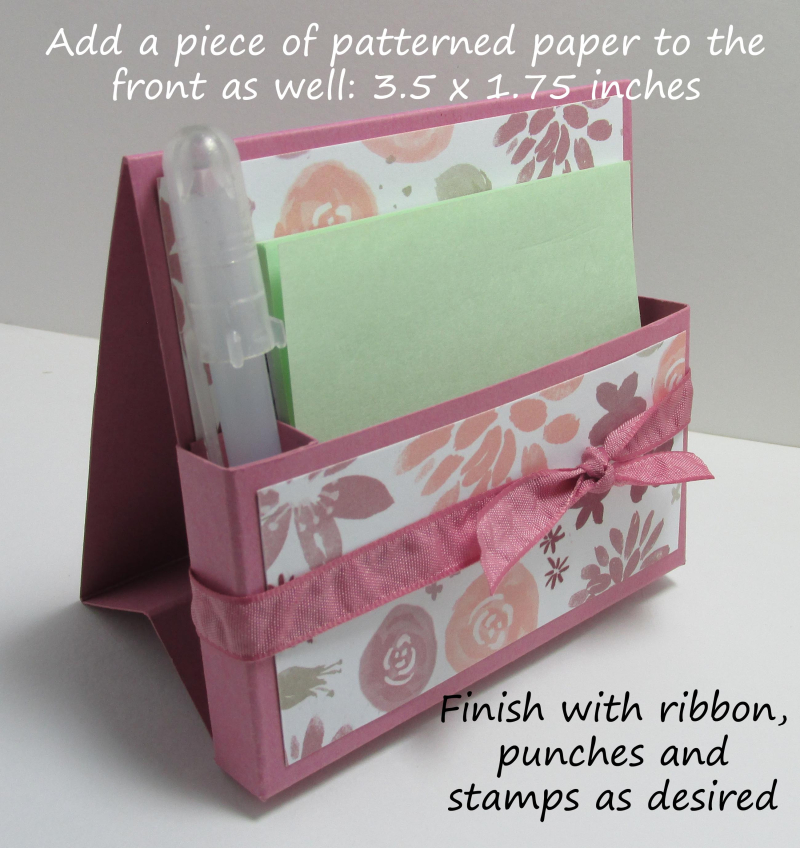
So easy, right? I know! I made 15 of these in about an hour last night, all different and SO CUTE! And it was so fun to have perfectly coordinating papers and cardstock to work with. It really does make a difference when you use quality, matching supplies. So many times it's the difference between "homemade" and "handmade." The only thing we want to look "homemade" is our baked goods, am I right? Handmade, on the other hand, is something truly special, undertaken with loving care, lots of time, and our best materials.
Good luck with your handmade projects this week! Please leave me a comment if you've enjoyed this tutorial. It keeps me encouraged and helps me know what kinds of things YOU want to see here at Song of My Heart. Thanks, friends!

Love the idea. This will be my project for tomorrow. Thanks.
Lyssa, this is so darn adorable! I will be making these for co workers for Christmas, as well as thank you gifts for my customers! I’m not a huge fan of 3D projects, but this is one I absolutely love! Thank you for sharing! Love love love it!!!
Love the tutorial!! Thank you so much!! I will be trying this soon:-)
Hi,
Where did you get the cute little mechanical pencil and the cute little pen?
Kathryn
wamfamily@comcast.net
Thanks so much for the tutorial. I think they will make great teacher gifts. I also liked the tutorial for the post-it note pad with the little pen that you showed a couple of days ago. You are so talented and your directions are so easy to follow!
Lyssa, I have the same question – where did you get the little, perfectly sized pens or pencils for this project? I want to make these!
This is so super cute! Thank you for sharing and for the awesomely outlined instructions, also! Many thanks! Happy Stamping!
Thank you for simple, precise and easy to follow instructions of a wonderful gift to make for the new year. I have stuck a tiny little calendar on the front of this versatile desk caddy.
Just what I was looking for! So stinkin cute!
Keep up the grand work!
Thank you so much for sharing–love it! I already make Post-it-note holders, but loved this one when I saw it on another blog but she wouldn’t share the tutorial. I was so excited to find another blog that shared. Thanks again because I do several craft shows and this will be great.
Love this! Anxious to try it!
Thanks for sharing it!