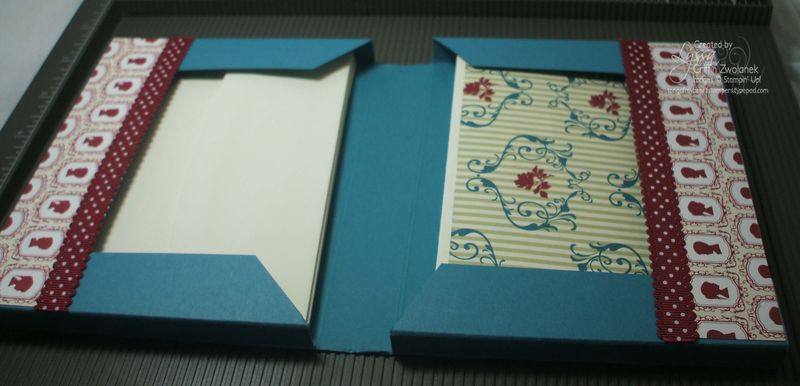
I love hand-made cardstock stationery sets, but sometimes I wish they held more cards. Here is a FREE (as always) photo tutorial on a great book-style stationery set that has two nice deep pockets. I found a couple variations online and adapted mine to use cardstock more responsibly. Don't you hate it when there's a bunch wasted? I sure do!
Let's get straight to the tutorial! I'm going to show you the basic box and then a purse variation. You'll need a 12×12 sheet of cardstock, cut to 11.5 by 9 inches. Save the discarded 3×12 strip, as we will be using it later. You'll also need the Simply Scored board, Sticky Strip, and then ribbon, Designer Series Paper, and embellishments as desired.
Score the cardstock at .5, 5.25, 6.25 and 11 inches on the long side, and 1, 1.5, 7.5 and 8 on the short side.
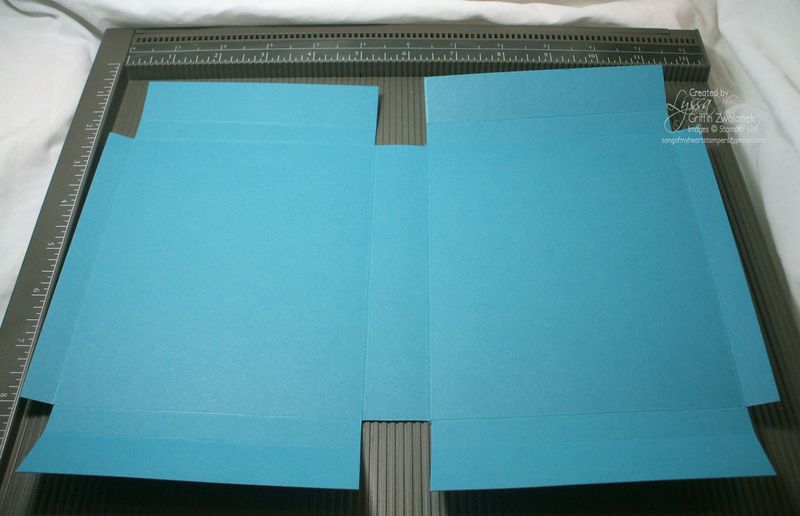
Snip to the score lines as shown above, notching out all four corners and the interior "spine" flaps as well.
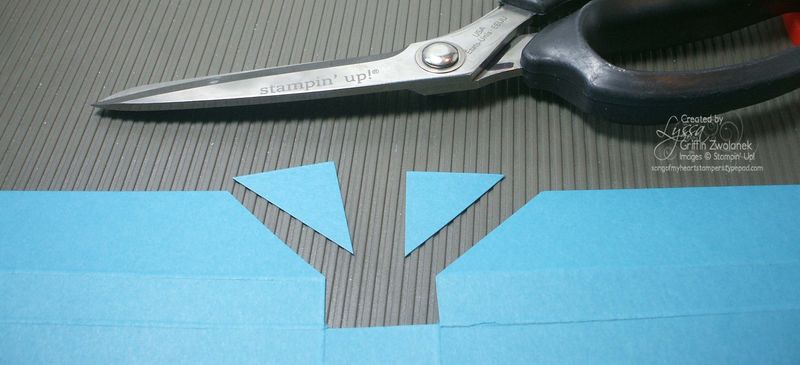
Use your scissors to cut off the corners of the insides of the side flaps, as shown below. They'll get bent up anyway, so we might as well trim them off, right? You could also use a deep corner rounder.
Take the 12×3 strip you cut off the original 12×12 sheet and trim off 1 inch from one long side, leaving you with a two inch by 12 inch strip, which you will cut in half at six inches. Score both of those 2×6 pieces at .5 inches down their length.
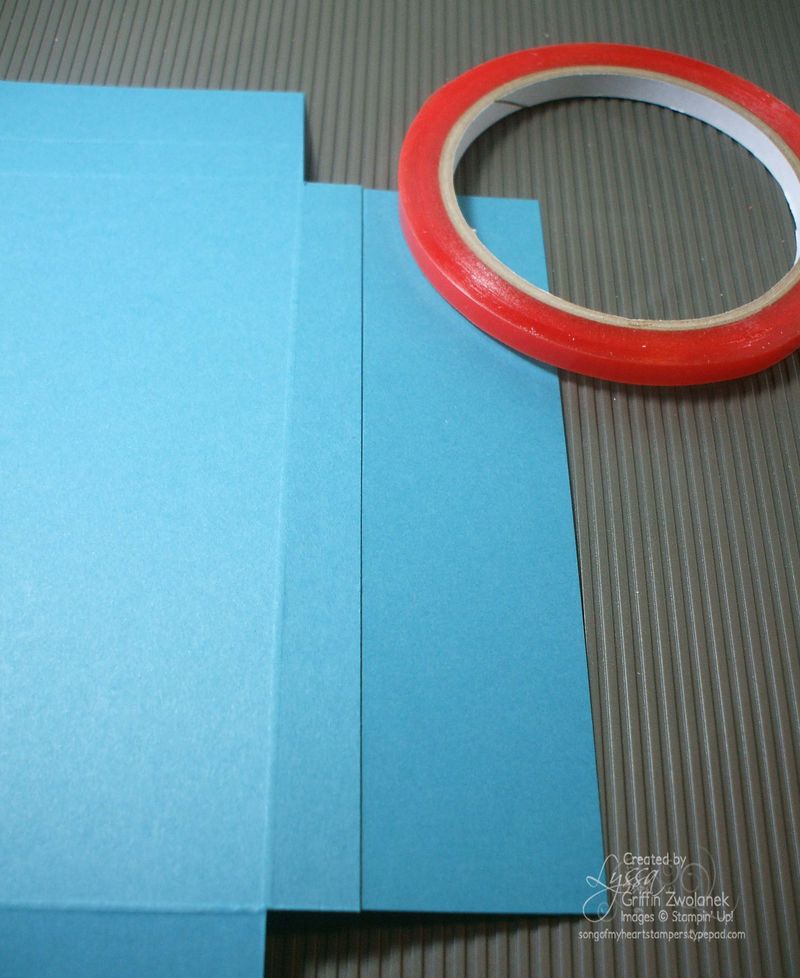
Then attach those two pieces to either end, on the little half-inch flaps, using Sticky Strip. This makes the flaps just enough longer that the cards remain more securely inside the book–especially important if you are doing the purse variation.
Fold that flap you just added up and fold the two side flaps over it, securing with Sticky Strip. or under it, as I just noticed is what I actually did in the photo below. Oopsie.
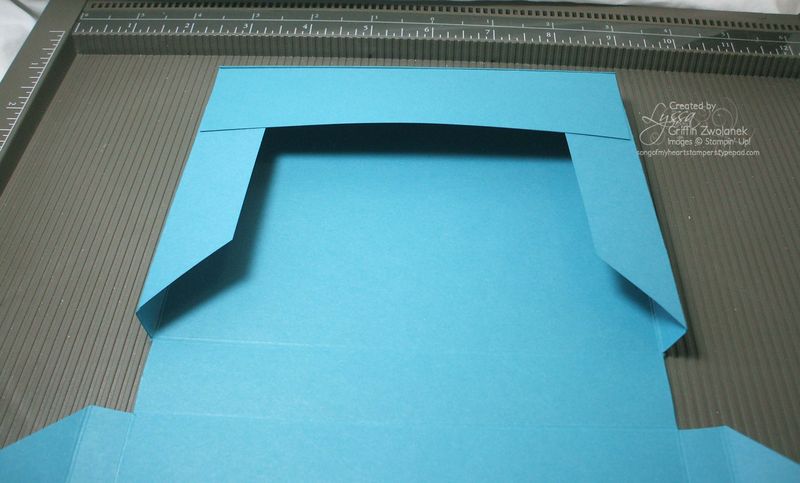
There's one pocket. Now repeat with the other side, and you have the second one. Fold the center scores to close the "book."
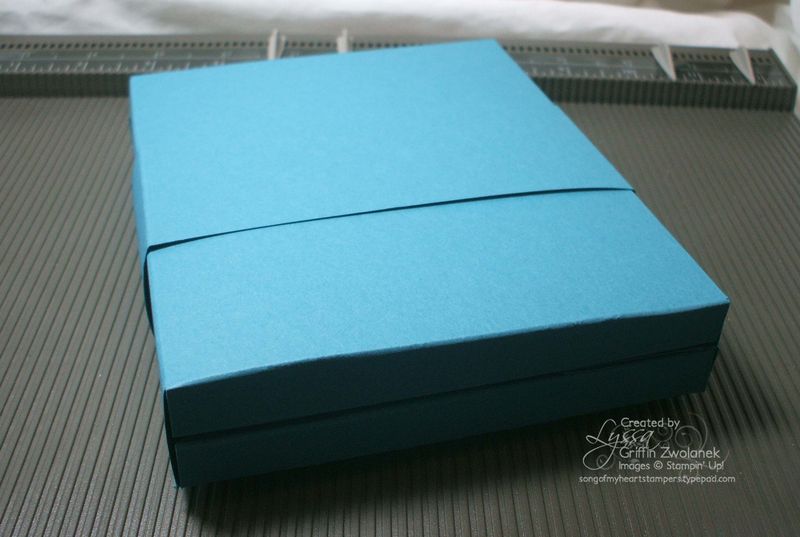
I secured mine shut with a belly band. You could also use a French closure or simply attach ribbons to tie it shut. The belly band basic measurements are 2×12, scored at 4.75, 5.75, 10.5 and 11.75.
That's it! Super easy, huh? I'd show you the finished, embellished outside of mine, but it is a gift for someone who might see it here, so no such luck!
Purse Variation: use the leftover 1×12 strip and score at half inch from either end, attaching to the "spine" of the book with Sticky Strip.
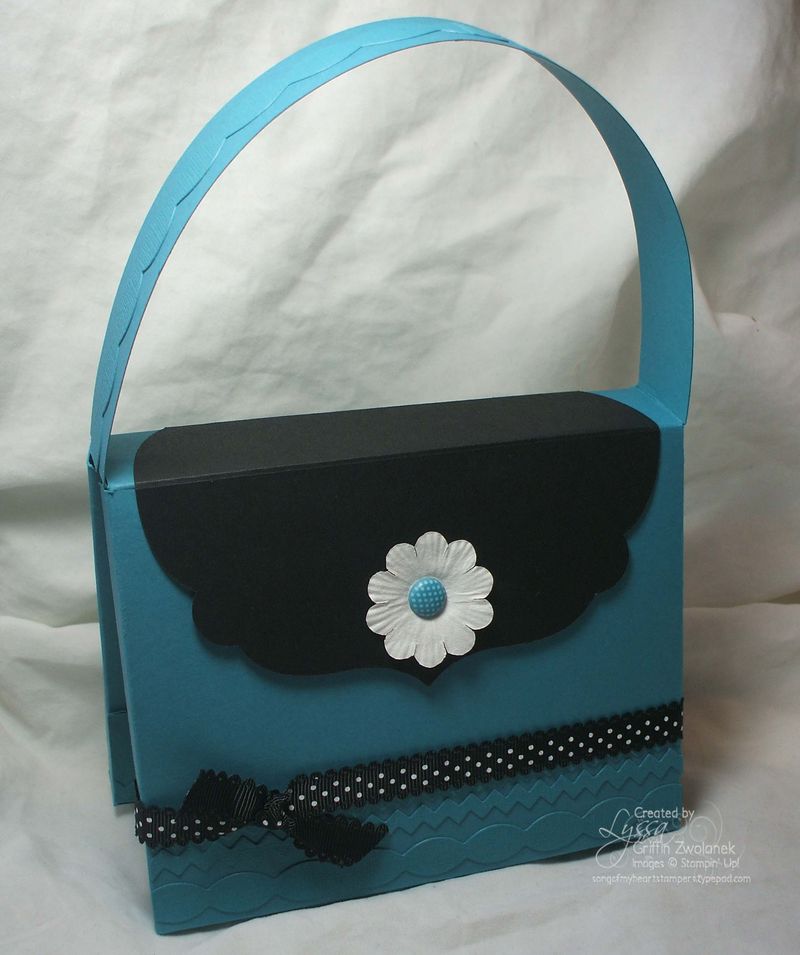
The lid is for ornament only, as the book opens from the bottom. Don't worry, the cards stay put in their nice deep pockets! If you're worried about it, though, you can add some ribbon ties to hold them in place with a cute little bow. To make the lid, die-cut the largest Labels Collection Framelit with your Big Shot, and score at 1.25 and 2.25 inches down the length, as shown below with those super useful Place Markers for the Simply Scored. Attach with Sticky Strip.
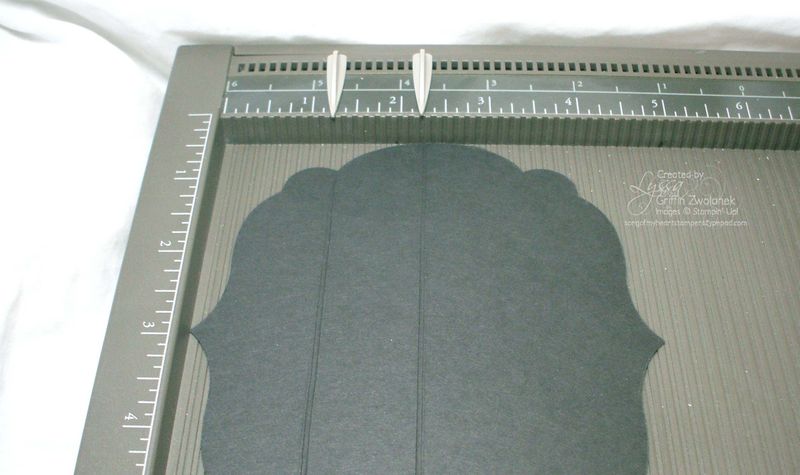
Don't have a Simply Scored YET??? What are you WAITING for?? Order yours today by emailing me or shopping online at www.lyssa.stampinup.net And because it's Sale A Bration, getting yourself a new tool makes a lot of sense, because you get free reward choices for every $50 spent. EVERYTHING you see on my blog is available through Stampin' Up. Sounds like it's time to have yourself a little book party! Call me!
Thanks for visiting Song of My Heart Stampers! Be sure to check out my Photo Tutorial section for tons more great ideas on all sorts of techniques, projects, and random cool stuff I've been enamored with lately. Unlike many places you visit these days, ALL Song of My Heart tutorials are 100% free. No bait and switch, no hidden fees, no subscription charges! I feel very strongly about that! If you appreciate that, please leave a comment, as that's what keeps me encouraged and posting.
And, if you ask pretty please with sugar on top, I even take requests from time to time. : )




Love it! Thanks for all your work sharing this project with everyone.
Lyssa, thanks SO much for taking the time to write this up and photograph this! It’s just beautiful!
Susan, aka Soozie4Him
As a fellow demo, thank you for all that you do! I come here often for inspiration. I enjoy your positive outlook, so refreshing! Thank you again!
Lyssa …I totally agree with you that tutorials should be shared at no cost and GREATLY APPRECIATE the fact that you do that. I get somewhat irritated when I see some ideas I like only to find that that some demonstrators charge a fee for them to let you in on how they made it. I seriously don’t believe that they paid for all the instructions to learn some of these things themselves.
Thanks soooo much for sharing.
Love the tutorial, Lyssa! Thanks for shaaring another adorable project!
Thankyou so much Lyssa.Really appreciate the time and effort you go to. Love checking out your blog. You are such an inspiration.
Lyssa, you are awesome! Thanks for sharing your talent and ideas with us! I so appreciate it!
Thanks for all you do. I enjoy following your blog, and you also inspired me to buy the simply scored when you were posting different projects a few months back–the simply scored never did much for me until I saw the lovely projects you had posted. Dana
Thank you for so many GREAT ideas and especially thank you for sharing them at no cost. I have paid fees for “great” ideas that did not measure up, so I think you have cured me from doing that. Our craft is all about sharing and I’m glad to have found you! Keep Up the magnificent work!!
I love your great ideas and even more that they are FREE! This stationary book is just the project I have been looking for. Thanks for sharing!!
You are so talented!!! Such an inspiration 🙂 Thanks for your free tutorials, they are so awesome!!
Lyssa, thank you so much – you are a jewel and I’m one of you biggest fans for all the info you share on SCS.
Stamphappy1650
Lyssa, yours is the only blog I do check every day 🙂 I truly appreciate that your tutorials are ALWAYS FREE. You are the embodiment of the saying “Copy And SHARE Everything – CASE”.
Thank you so much! Someone’s been asking me to make her some note cards, and this will be PERFECT – just the thing I was looking for!
Thanks so much, Lyssa! I have been trying to figure out a folder version of my card box design; thank you for taking the time to design, photograph and share your tutorials! Crossing everything we get the Simply Scored and Framelits in Australia too 🙂
I love your blog and your projects. Thanks for continuing to share them with clear instructions and photos! You are a great inspiration to me.
Fabulous Lyssa – this is a lovely project I you are a darling to do the tutorial too. X
Thank you for the wonderful tutorial. You did such an excellent job! 🙂 Linda
Love this Lyssa, and thanks so much for sharing your tutorials!
Thank you so much Lyssa!
Lyssa – this is wonderful – thank you for your inspiration
Hi Lyssa, Thank you for your great tutorials. you are a Sweetheart, I love to see what you are doing. you are awesome. Mary
Wow, you make really beautiful stuff. So glad I found this blog. Thanks for posting your talent for the rest of us to copy.