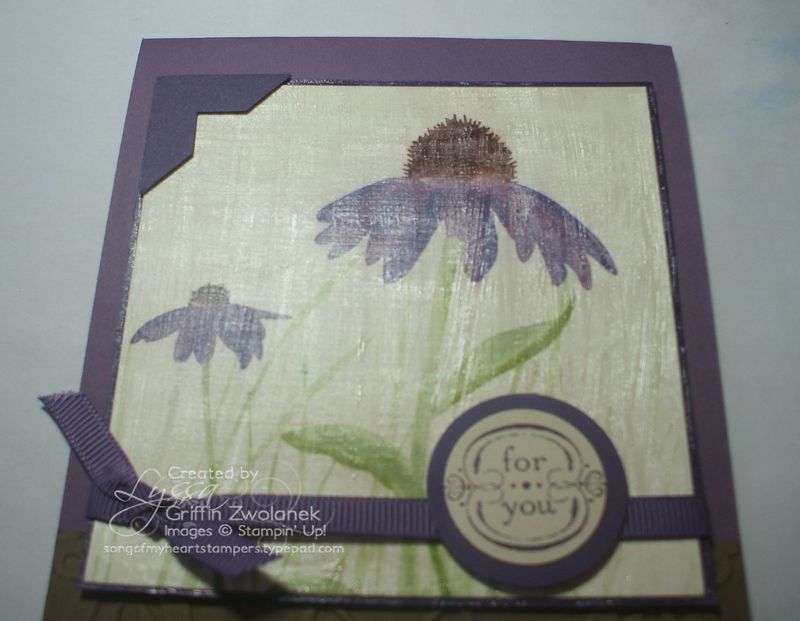
Had a bright moment the other day and invented a new technique using my super-fave product, Crystal Effects. Remember how there was no question what I was going to show when they asked me to present at Regional Conference back in April? Crystal Effects! Use the search box on the left hand sidebar to look for more amazing techniques using this product. WOW IN A BOTTLE, I'm tellin' ya!
I call this particular technique Faux Canvas, because your finished piece looks like just it was hand painted on canvas when you are done. The best part is, it takes literally minutes to dry, so it can be demo'd anywhere to anyone! All you need is a stamped piece, Crystal Effects, and an old toothbrush.
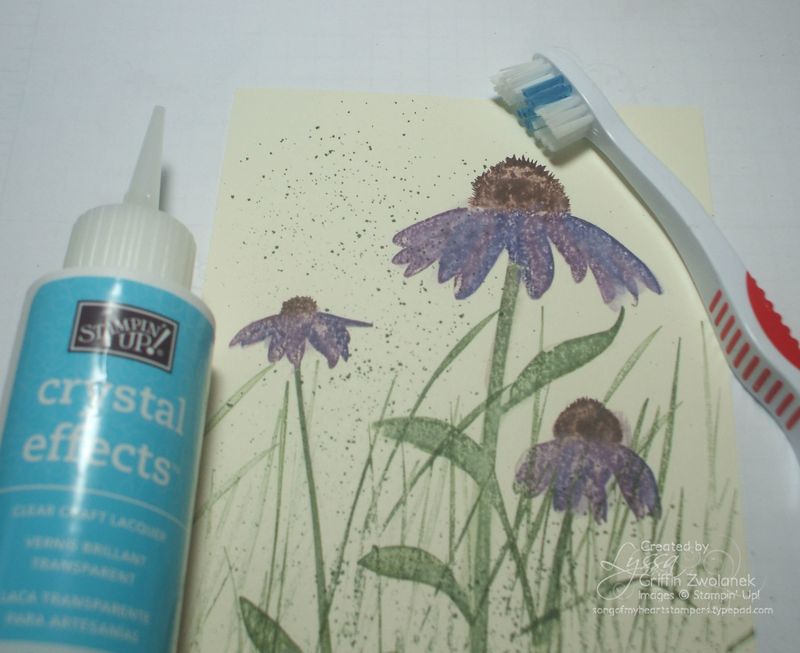
Here we go! I used the coneflowers and grass stamps from Inspired By Nature, inked with Perfect Plum, Concord Crush, Always Artichoke and Chocolate Chip markers. Then I used the Color Spritzer tool and a spattered some Always Artichoke dots, too.Any stamp that looks hand drawn or hand painted could be used.
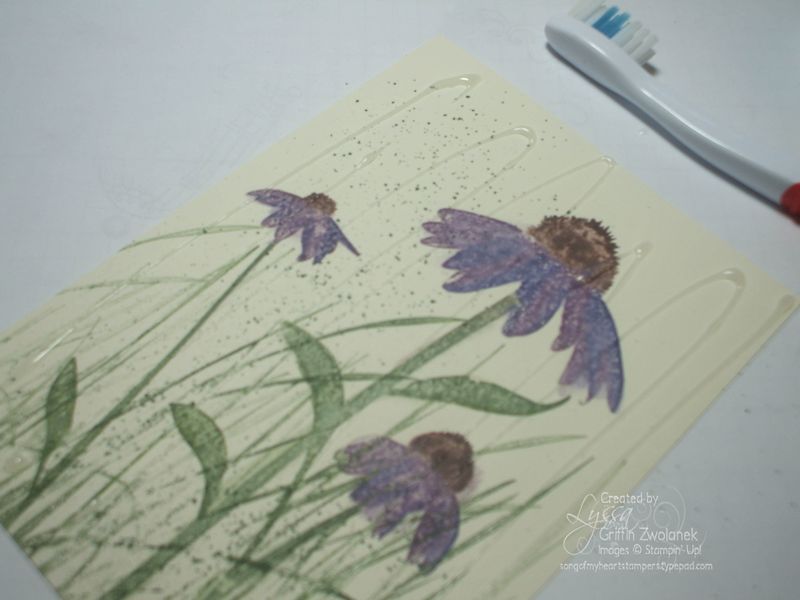
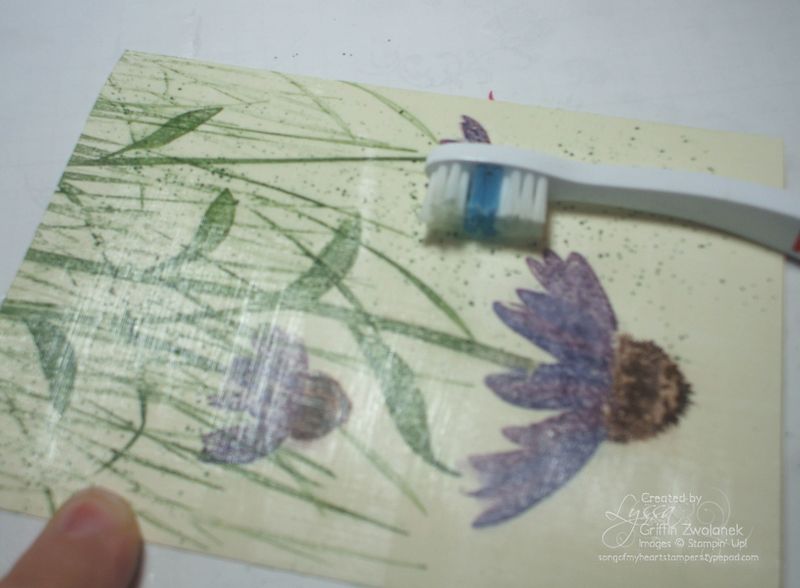
Here's the messy part! Apply Crystal Effects in several big passes all going the same direction (mine are going up and down). See how little it takes? Don't squeeze out giant globs, ok?! Then work fast so it doesn't have time to dry like that, and brush the toothbrush lightly and rapidly in the same direction, up and down, spreading the Crystal Effects all over the card.
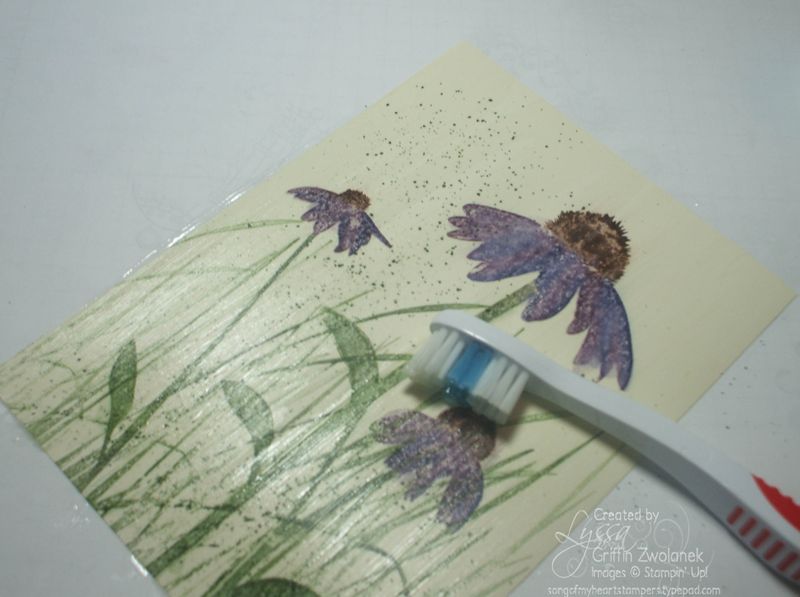
As soon as it gets spread out that thinly, it begisn to dry very quickly, so your toothbrush will leave brush strokes in the Crystal Effects–that's good! We want that. Make sure your paper is entirely coated with a THIN coat of CE, with all strokes going the same way. 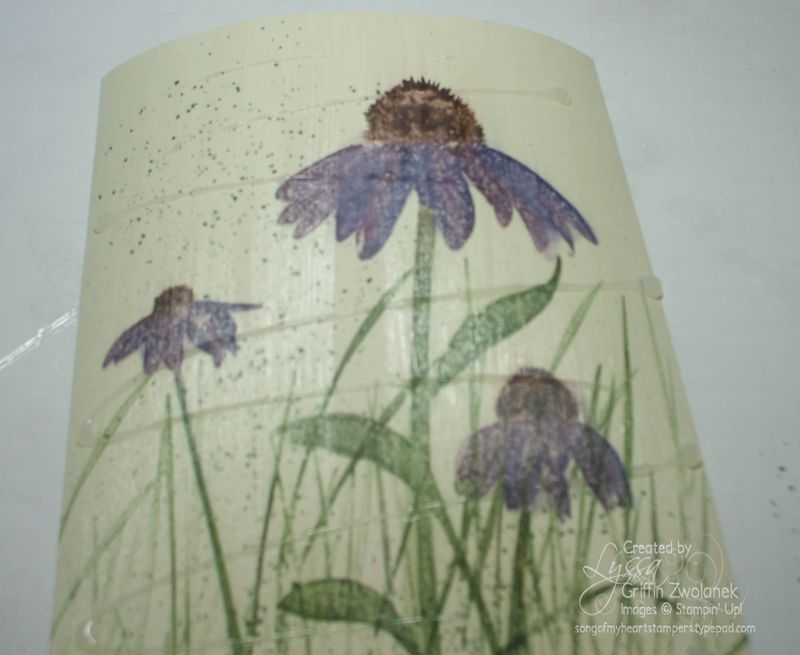
Then we're going to do the other direction. Spread the same, scant amount of Crystal Effects running across the card from side to side this time, and then quickly start brushing the same direction, side to side. In case you're wondering, this is all much easier than it might sound, by the way!
See how you can see the strokes in both directions, as the new layer gets brushed across the already-drying first layer? You wind up with a woven look that resembles–tada!–canvas! Here it is all done and still wet. 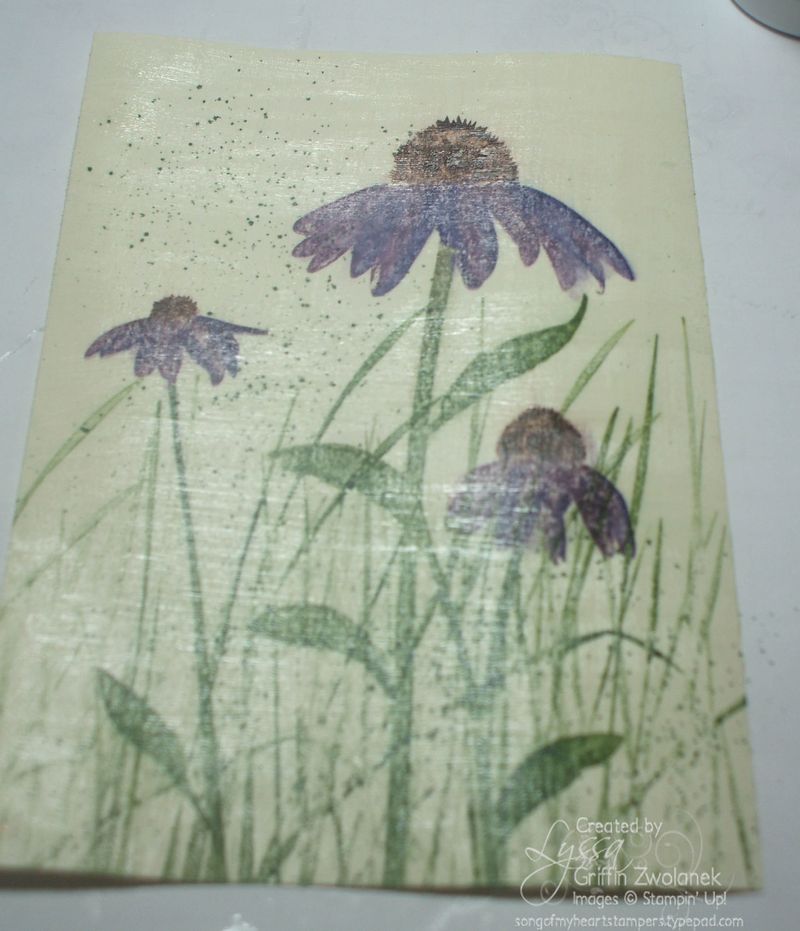
It should be totally dry in five to ten minutes, unless you used way too much Crystal Effects. It might buckle a little bit while drying, but it will remain amazingly flexible and can easily be adhered flat to your project. You can also tack it down with some Dotto removable adhesive if you don't like getting your fingertips messy.
Wash your toothbrush out right away, and your hands if you got any on you, because this stuff is really something… ask me how I know! Or you can just chuck the old toothbrush if there are an abundance of those useful items in your house.
This is one of those techniques that really must be seen in person–so dig out your bottle of CE and give it a go. I guarantee you'll like the results. Happy stamping!


Amazing as usual! Would you believe I lost my BRAND NEW CE at the last retreat – good thing I’ve already ordered another!
What a great idea. I love your card. Am going to try this technique for sure. TFS
Janet
what an amazing idea! SO cool! TFS.
Lyssa, you rock! I love this technique. You are definitely the Crystal Effects Queen.
I have soooooo gotta try this technique. Thanks for the simple and easy to follow tutorial! Bookmarking this for sure! Hugs xxaxx
Awesome technique, gorgeous result!
Absolutely Awesome idea, Lyssa. You did a great job explaining this process by breaking it into easy steps. Supurb!!!
Barbara Story formerly from down the road in Columbus.
AWESOME!! i havent looked at ur blog for awhile (gasp, i sorry) and wow.. ur so amazing lyssa! this is definetly a creative technique and just awesome!!!