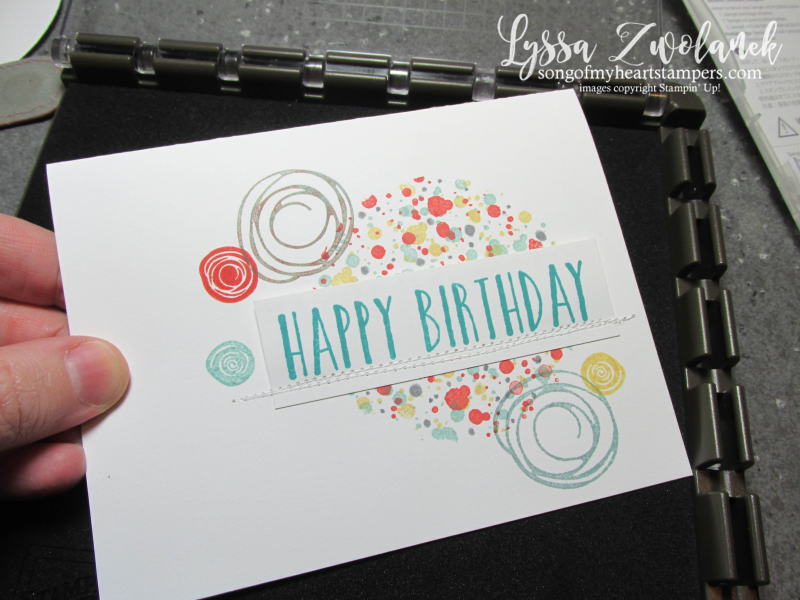
Gail told me about the cutest technique and as soon as I got the visual, I had to run home and try it. I love the look! You don't have to have a Stamparatus for this tutorial, but it does help keep the layers in place as you stamp, I found.
To begin, you'll need to gather:
- a spatter-style stamp (mine is from Swirly Bird; Gorgeous Grunge works, too)
- three or more colors of coordinating ink (mine are Smoky Slate, Calypso Coral, So Saffron and Pool Party)
- a sentiment stamp (mine is from Perennial Birthday)
- A plain card base (5.5 x 8.5 inches)
- A piece of heavy cardstock the same size as the card front (4.25 x 5.5 inches)
- A large circle die-cut or punch, at least 2.5 inches in diameter
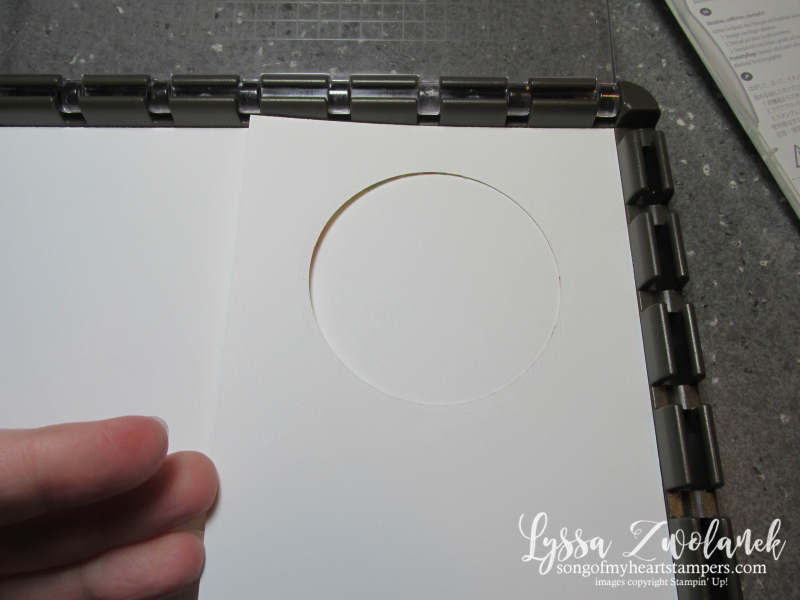
Start by punching or die-cutting the large circle in your card-front piece. This will be your mask or stencil. I positioned mine to be slightly above center, in the middle of the upper 2/3 of the card.
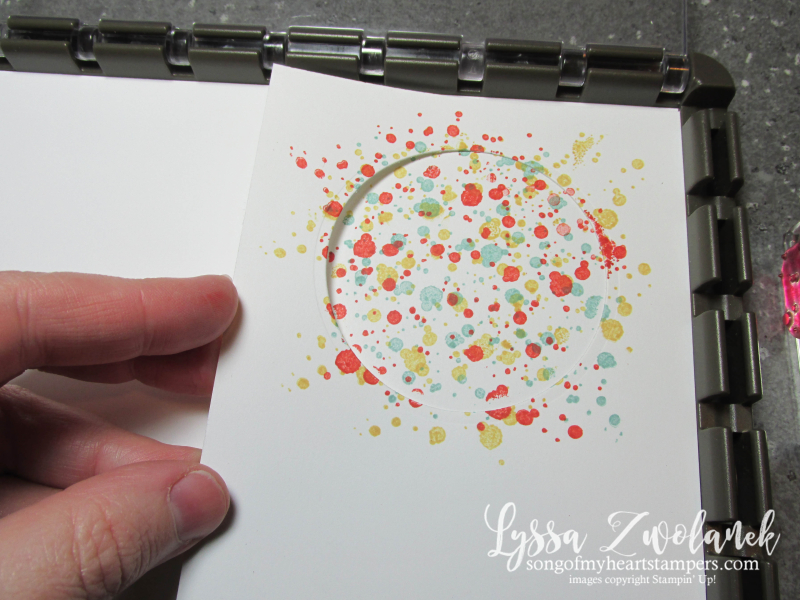
Lay the mask you just made on top of the cardbase. I found it helpful to use the edges of my Stamparatus to line up the corners and then keep the mask in place with magnets while I stamped.
Use all three colors of ink, cleaning between colors, to stamp random splatters all over the exposed circle inside the mask. Make sure you stamp right up to and off the edge. Give it a moment to dry, as you just laid down a LOT of ink in a very short time period.
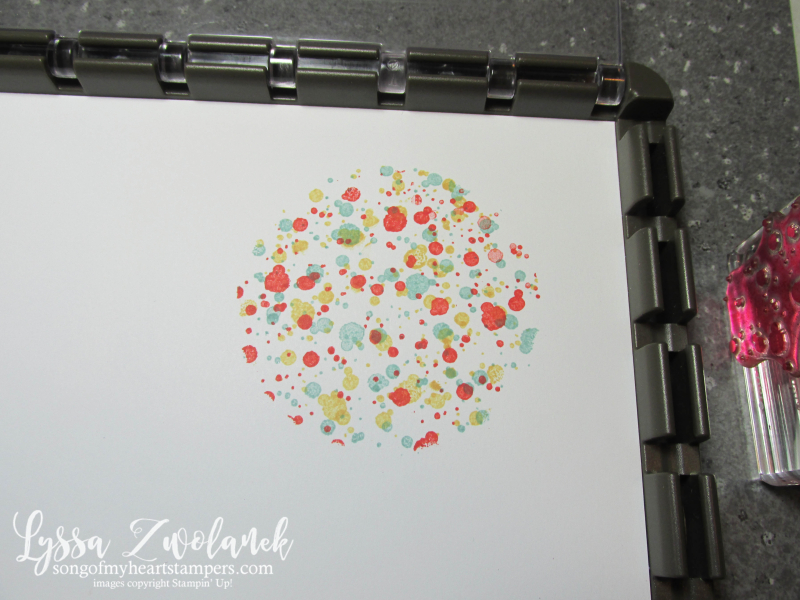
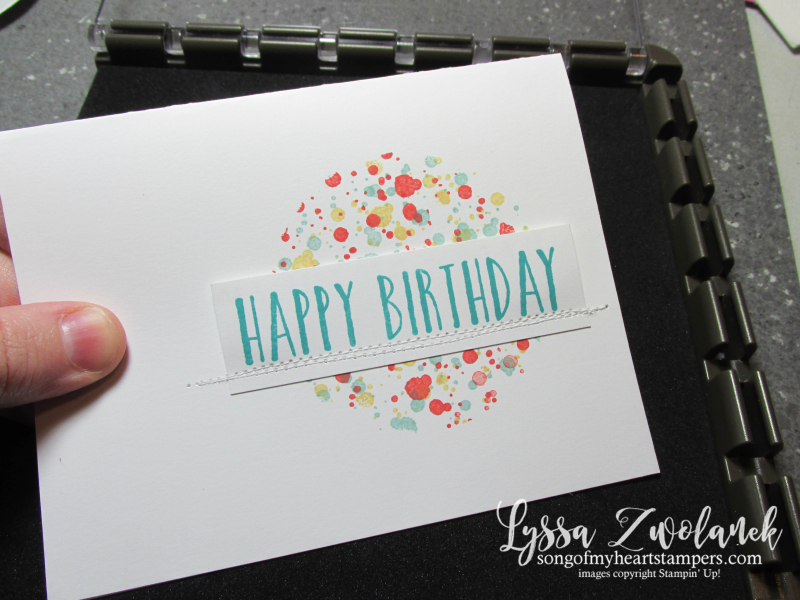
When you remove the mask, it should look like this:
Finish card as desired. You can use the same mask for many projects, allowing it to dry if it starts to get soggy. I happened to have my sewing machine out this week for some mending, so I took advantage of the opportunity to sew on a bunch of cards at the same time as I love that look.
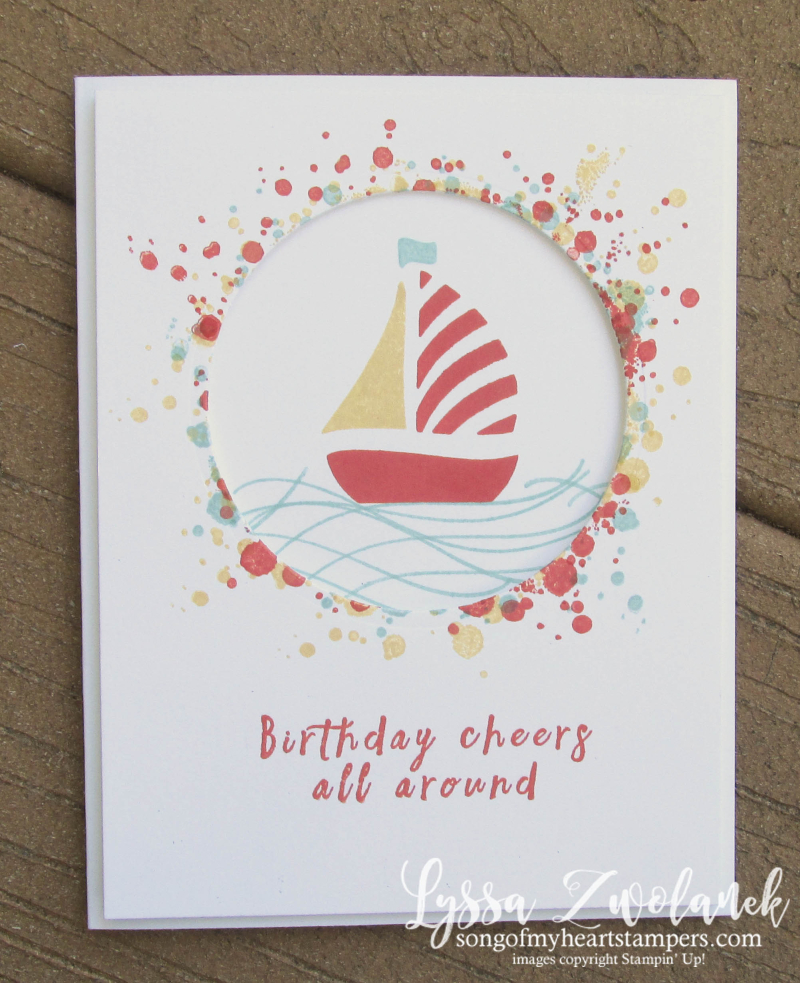
If you like, when you're finished with the stencil, turn it into another card! It was too cute to throw away and it made a fun frame for my little "first birthday" sailboat card.
There you have it–super simple but very WOW technique you can do right now with supplies you have on hand. If you need to order, I sell everything shown here. Just click to browse my online Stampin' Up Store!
Thanks for stopping by Song of My Heart today–I don't take your eyeballs for granted! Please click "like" or pin this tutorial, or leave a comment–that kind of feedback helps me know what you want to see more of in the future. Thanks!



Both cards are awesome! I will have to try this neat technique.
Love the tutorial and the little sailboat card is great!
The sail boat card is darling. What a great way to use the mask! I’ve got to try this technique.
Such a great idea and really cool using the mask on another card
Love these cards and techniques! Thank you!
fun
What a fun technique! Thanks for sharing this Lyssa!
I love this idea, very clever, and such cute cards. Thanks for sharing!!
What a super fun idea!! I can’t wait to try it, thank you so much for sharing the technique. I can think of all kinds of fun ways where this technique would add a wow but still keep cards flat for mailing.
As always, this card is adorable and so quick ‘n cute! Right up my alley.! especially love using the “mask” as a layer on an add’t card. Talk about a “Two for one deal! So cute, I will be trying this technique for sure!
absolutely love both cards! wish I could go home from work right now and make them! Great tip using the stamparatus with the magnets for that too. thanks for sharing!
WOW. Great idea. I will try this technique soon.
Thanks for your inspiration.
I found also wonderful cards with the set flowering fields and made a similar card with a link to your blog.