Last week it was my delight to make a card to congratulate my handsome history professor on being accepted for the PhD program at Faulkner University! We are all so proud of him. The kids are excited that Daddy's going back to school (never mind that he never left; he's been teaching non-stop since the year after he graduated). I don't think the kids realize this means that for the next five to seven years, all his free time is taken, though… and that there will be adjustments to their chores, accordingly! But it's a sacrifice we are willing to make.
I am so grateful to Mike for putting his dream on hold while I built the Song of My Heart website and team over the last decade. It will be my joy to support him as he tackles this exciting project! Remind me I said that when I get complainy and forgetful, hey? : )
So anyway–a really great card was in order, obviously! I used the Watts of Occasions lightbulb-themed stamp set with the "I think you're brilliant" saying on the front, but it was a pretty clean and simple card and needed some KA-POW. So I made a quick pop-up add-in for it, and it was so easy and fun I had to share with you guys. Let's how to make it!
You'll need:
- Whisper White cardstock strip
- Simply Scored or other scoring tools
- strong adhesive like Tear N Tape
- any regular card base
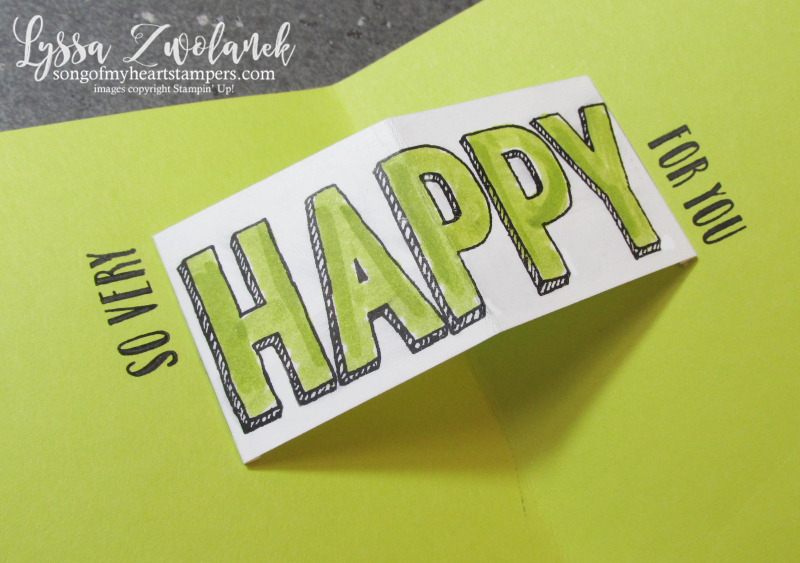
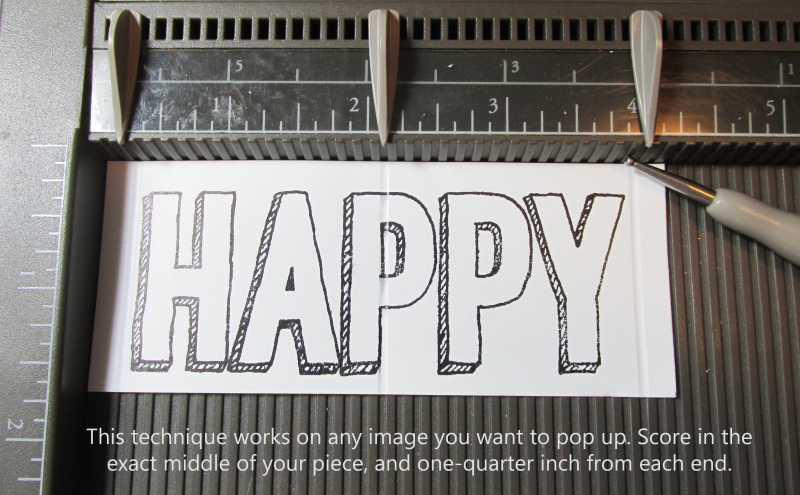
Notice I didn't list any measurements for the white strip. That's because your pop up can be any size your word or saying is, up to eight inches long! I used the Happy Celebrations stamp set with the giant word "Happy," which meant my word fit well on a piece of cardstock that was 4.25 inches long by 1.75 inches tall.
Once you have your word or saying stamped on a cardstock strip that's the correct size for it, you'll be scoring it at 1/4 inch from either end, and exactly in the middle. On my piece, that meant scoring at 1/4 inch, 2 and 1/8th inches, and 4 inches.
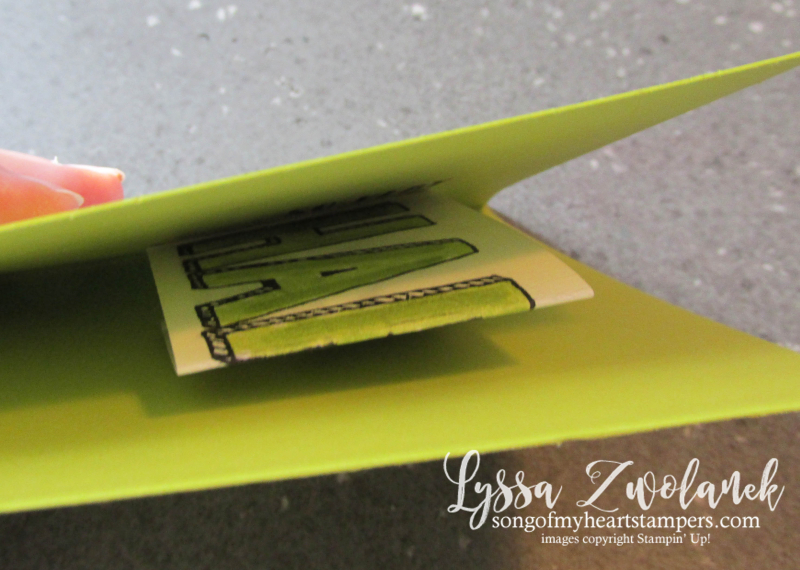
Fold the two quarter-inch flaps back and the center score forward. It will look like an upside-down V with little pigeon-toed "feet."
The quarter-inch flaps are the only part that will attach to the card base. Practice positioning it before you use any adhesive; when the card is closed it should not be seen at all. It can be anywhere on the inside of the card, as long as it's not too close to the opening edges. I tend to do mine in the upper area of the card, to leave room for writing at the bottom
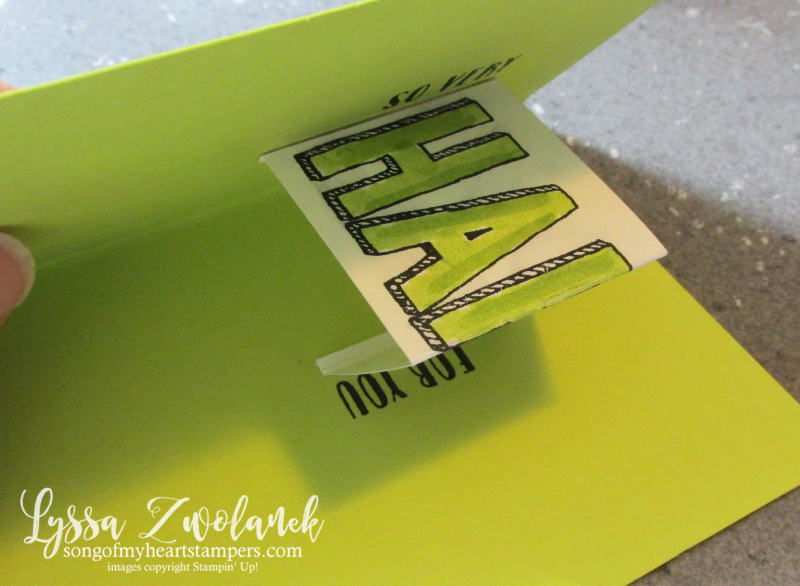
Once you know where you want the banner positioned, adhere it to the back inside of the card. Apply adhesive to the other end and carefully close the card and press flat. It will automatically adhere to the front inside of the card in the exact position it needs to be in. Nifty! Once the banner is in place, you can stamp around it like I did, to finish my sentence on either end of the word "happy."
You can see that this technique works with a longer word or sentence, too, as long as the strip is not so long (folded in half) that it would poke out of the edge of the closed card. So grab some different stamps and give this a go! There's almost no card out there that couldn't benefit from a fun, unexpected little pop-up surprise inside. And when it's THIS easy, why not?
Thanks for stopping in to check out today's mini photo tutorial (and hear me brag on my hubby just a little bit!) If you enjoyed this one, here is another pop-up banner tutorial video I made a while back, that uses cuts made in the card base itself to create the banner. No extra pieces needed. Cool! I also have instructions for an easy pop-up party invitation, and of course my current fave quick pop-up, this gorgeous Triple Butterfly card.
Fun is "popping up" all over! Happy Stampin'!


Congratulations to your sweet hubby! What a fun card – thank you for the mini tutorial. I’m excited to try it with different sized sentiments based on your awesome tips.