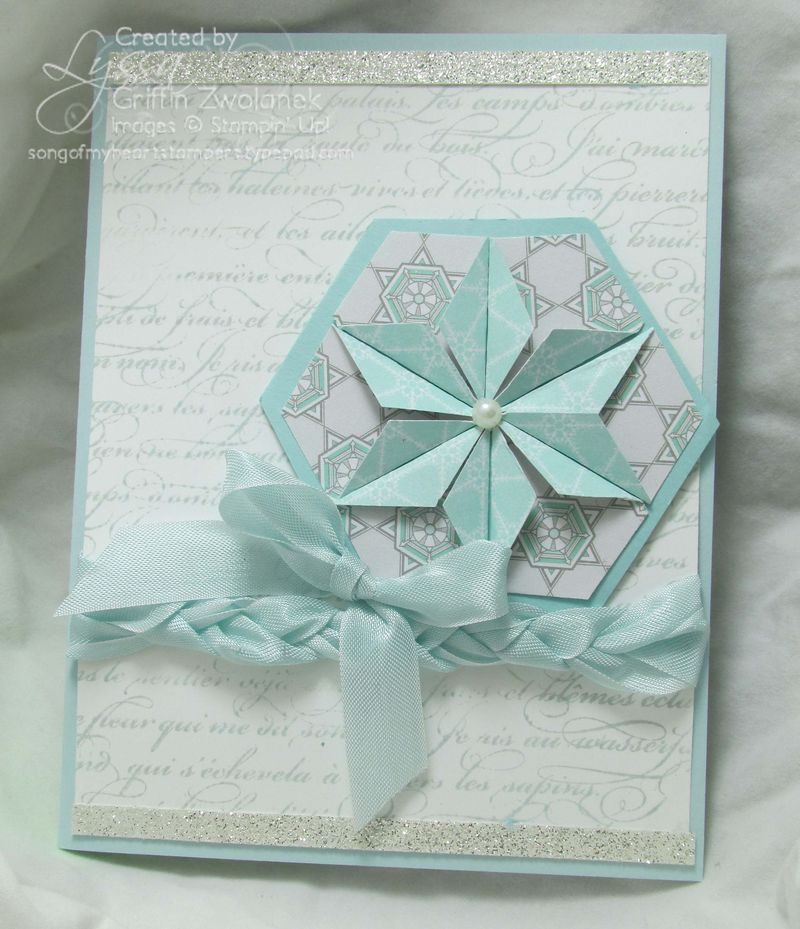
I can't quit thinking about the hexagon punch star fold technique! So as soon as I got into my stamp room today, I made a couple of Christmas samples with it, and snapped a few quick pics to help guide you as you try this adorable fold as well. If you love my star fold idea and plan to use it in your crafting, please leave me a comment–it would mean so much to me! Your comments keep me posting!
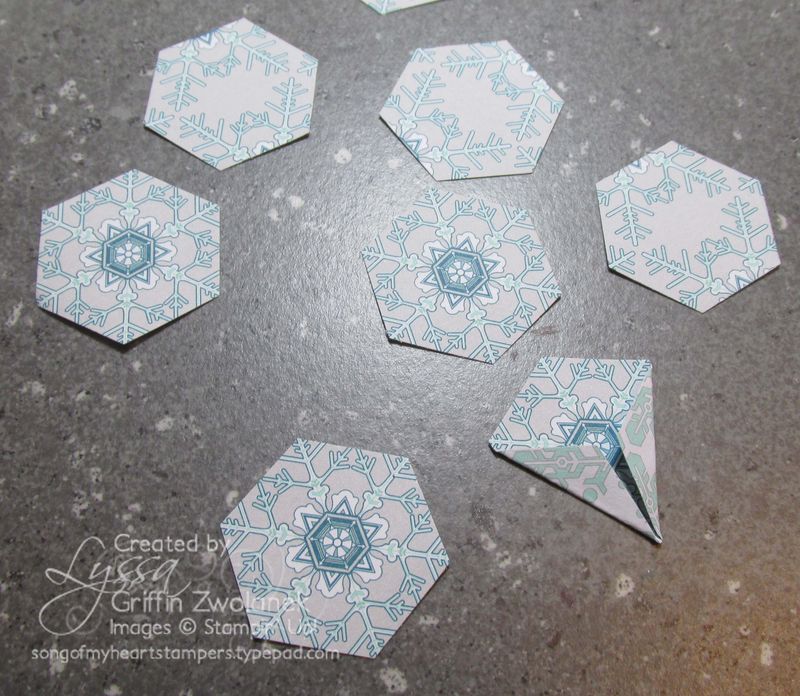
I think the thing that appeals most to me about this technique–other than the great star that is formed in the center, of course–is that it only takes six hexagon punches. So you can make this fantastic-looking focal point from literally SCRAPS of paper. Anything you can get six coordinating punches from, you can make a star fold out of!
You're going to fold all six punches into the "kite shape" seen on the right in the above photo. Now, I even Googled "names of common geometric shapes" and "kite shape" is what they are calling this. So- no fancy term for this fold. It is similar to the "dahlia fold" except that ours is made with hexagons instead of circles.
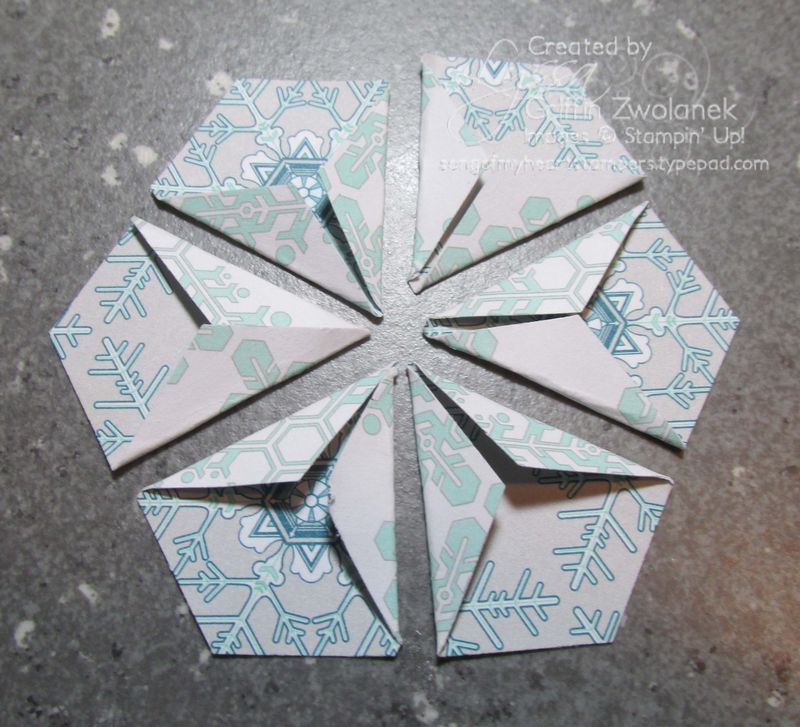
The great thing about geometrics is the nice straight lines… I can't believe I said there was a great thing about MATH… but there it is… right there in print. Anyway, after you've folded all your pieces into the kite shape, when you put the six punches side by side, they reassemble into a single hexagon, with a gorgeous star in the center! It's like magic! Or… math.
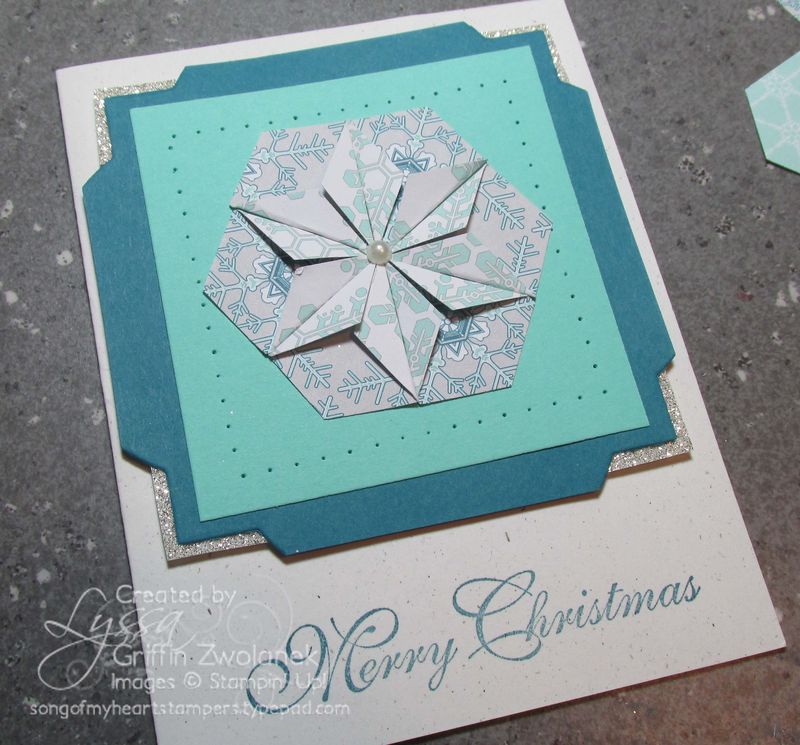
Then you can use your stunning focal point on any sort of card or tag or scrapbook page. Ready for a bonus tip? I know some of you saavy papercrafters are wondering how I did the corner treatment on the mat on this card. It's the largest of the nesting Window Frames Framelits for the Big Shot, with the roundy humps trimmed off flat. Then I added a small square of Silver Glimmer Paper behind the edge of the interior corners. Gotta have a little bit of glam!
Ok! Supply list follows. I can't tell you how it would make my day if you placed an order with me for any products you might need, if you don't have a good local demonstrator who is taking care of you right now. I'd be honored to help you with any and all papercrafting needs! And if you're local to me and would like to visit our monthly demo stamp night as my special guest, we're going to be making star fold cards in November for one of the free Make N Takes. Email me for deets! zwolaneks@att.net


Very nice and great that it uses scraps. Cute!
LOVE, love, love this!! Will be using this on my gift card holders this season. Thank you for the great post!! ~Shawn Marie O’Connell
beautiful! you are amazing!! thanks for sharing your discovery – my Christmas card club ladies will love this card.
Oooo… What a pretty result from such a simple technique! Gotta try this myself. =)
What a lovely idea! I must try that technique
Can’t wait to use this on my projects. Very simple yet dramatic! Thanks as always Lyssa!
Lyssa you rock! Thanks AGAIN for sharing and inspiring us.
Stunning!
Just got the hexagon punch. Glad to have another way to use it. Really like the first card – will probably be CASEing it soon. And the way you figured out the corners from the windows framelit – very cool. Thanks for sharing!
WHOA!! Love it!!! I’m gonna CASE for my Calendar Club girls for sure! Thank you SO much for always sharing your ideas FREELY. Love you!!!
I love this idea, Lyssa! I am envisioning a poinsettia made with this technique, maybe even a couple of layers made with different sizes of hexagons. I’m off to play! Thanks for the inspiration!
This is gorgeous! Thanks for sharing. I’m going to make some of these.
Beautiful! Love the magic of a simple fold making something that looks complicated!
I am a new stamper and the hexagon punch star cards are just beautiful. Can’t wait to look at your whole blog. Thanks!
Super cute idea!! I think I can even handle it. I am usually such a clutz when it comes to folding things! Shall give this a go!!
How fun and pretty! I have to try this! I would love to see how the poinsettia would turn out. I hope she shares it with you/us! This will be interesting to try with different papers. Thanks for the fun idea!
So pretty!
Wonderful technique!!! Very cool card. Gotta try this one!
All of your tutorials are just awesome and really inspire me. This technique looks really neat and I will be trying it soon.
Such a sweet technique! Thanks for sharing the tutorial. I love the braided ribbon on the first card. Your projects are always so inspiring!
Thanks so much for the tute Lyssa. What an awesome idea & beautiful card. I love that you centred the dsp patterns for a totally symmetrical look.
Inky hugs, Di
Lyssa, My Mojo has left town and I was looking for something different. Thanks to you I found it. Can’t wait to try it. Thanks for the tutorial.
Beautiful card and wonderful idea I can’t wait to try it. Thanks for sharing.
Thanks so much for sharing this idea! The first card is stunning! Planning to incorporate it into my framed Christmas samplers for an upcoming club and class.
Gorgeous card, TFS!
I plan to try this out….thank you for the instructions.
Great card! I will be doing this!