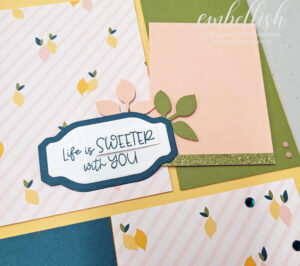
 Click on the photo to enlarge!
These cute little albums make wonderful gifts for a dear friend or a grandparent. The size makes it perfect for wallet-sized photos or short and sweet journaling. You can add or subtract pages without a problem, and customize it to suit anyone’s personality. And it takes less than an hour from start to finish! The double-sided paper is what makes this project possible! It’s also the perfect place to experiment with Hodgepodge Hardware.
Supplies:
1 —12×4 cover strip, double-sided designer paper, 6 —4.5×3.75 pages, double-sided designer paper, 1—strip of coordinating ribbon or fiber, 1/2 sheets of two coordinating color cardstock, Various pieces of other coordinating color cardstock, 1— Hodgepodge Hardware label holder, 4—antique brass brads, 1 four inch piece of Sticky Strip, 1/16th inch hole punch, corner rounder punch, scissors, SNAIL.
1. Cut one inch off the end of the long cover piece. Score the cover piece at 4 (front flap), 9 (back cover), 10 inches (page holder spine). Fold into album shape. Attach the extra inch (you previously cut off) backwards to the front flap.
2. Arrange the pages in the order you would like, coordinating colors as much as possible. Then, score the left side of each page one inch from the edge. Punch the two right hand corners with the corner rounder.
3. Holding all your pages together in order, punch completely through all the layers using the hole punch template as a guide to placement.
4. Use one of your punched pages as a guide to punch the coordinating holes in the cover. Then, attach all the pages to the cover using two brads.
5. Use Sticky Strip to hold the page spine to the back cover.
6. Attach your Hodgepodge Hardware label holder to the front cover of the album using the remaining two brads. You may wish to use cardstock scraps to cover the backs of the brads inside the cover.
7. Tie your ribbon or fiber as shown in the photo.
8. Using the coordinating colors of cardstock provided, cut out picture mats, tags, decorative strips, or punch-outs to embellish your album.
9. Stamp as desired to personalize. Everyday Flexible Phrases has a variety of words that fit nicely within the label holder, or you can write in the date or the recipient’s name.


That looks great and so easy. I will have to try it. Thanks for sharing. Sarah