 Some of you have been on the fence about getting into embossing, and this is the perfect time!!! There will not be a sale like this again, so take advantage of the deal and you'll have your supplies in time to make Christmas cards and presents.
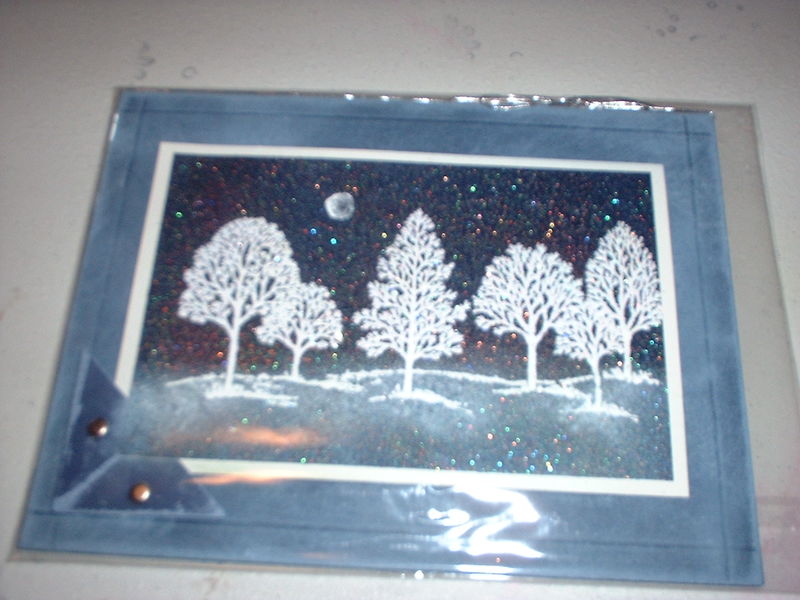
This is a card of mine that was featured on the display boards at the Stampin' Up national convention in 2008. It is actually embossed twice–once with white and once with Iridescent Ice–then dry embossed with lines using your paper trimmer and scoring blade. The moon was added with the white gel pen just on a whim right before I sent it in to SU. Enjoy!
Instructions for Winter Nightscape Card
Measurements: 5.25×8.5 card base (Night of Navy), 3.25×2.75 Night of Navy rectangle, 3.5×3 Whisper White rectangle, scraps of Night of Navy.
Stamps: Lovely as a Tree, Sincere Salutations
Inks: Versamark pad, Craft White pad.
Accessories: dimensionals, silver cord, silver brads, Photo Corners punch, sponge, heat tool and Powder pals, Winter White EP, Iridescent Ice EP, scoring tool.
1. Fold the Night of Navy cardstock in half to form card.
2. Stamp the line of trees using Versamark on the rectangle of Night of Navy. Emboss with Winter White EP.
3. Use the stipple brush to cover the entire focal point piece with dabbed Versamark ink. Sprinkle Iridescent Ice EP over the entire thing and shake of excess. Emboss with the heat tool (careful—this EP can burn easily).
4. Adhere the focal point to the white mat using plenty of SNAIL, as sometimes embossing can warp the cardstock.
5. Score lines in a grid around the cardfront, using either the scoring blade in your paper trimmer, or the bone folder.
6. Punch a photo corner out of scrap Night of Navy.
7. Antique the card base and the photo corner using a sponge and Whisper White Craft Ink. Sponge ink on the grass to simulate moonlight on snow.
8. Adhere the focal point to the cardfront. Add silver brads to the photo corner and adhere to bottom left corner of focal point.
9. Adhere the white parchment paper to the inside of the card and stamp desired greeting using Night of Navy ink.
10. Tie a bow of Silver Cord around the fold of the card.


This is lovely! Blue is so peaceful and appropriate. Thanks for the super tutorial too. What a beautiful card.
I love the idea to use a stipple brush to apply versmark ink and Iridescent EP to make a wintery scene! Very pretty card! TFS!