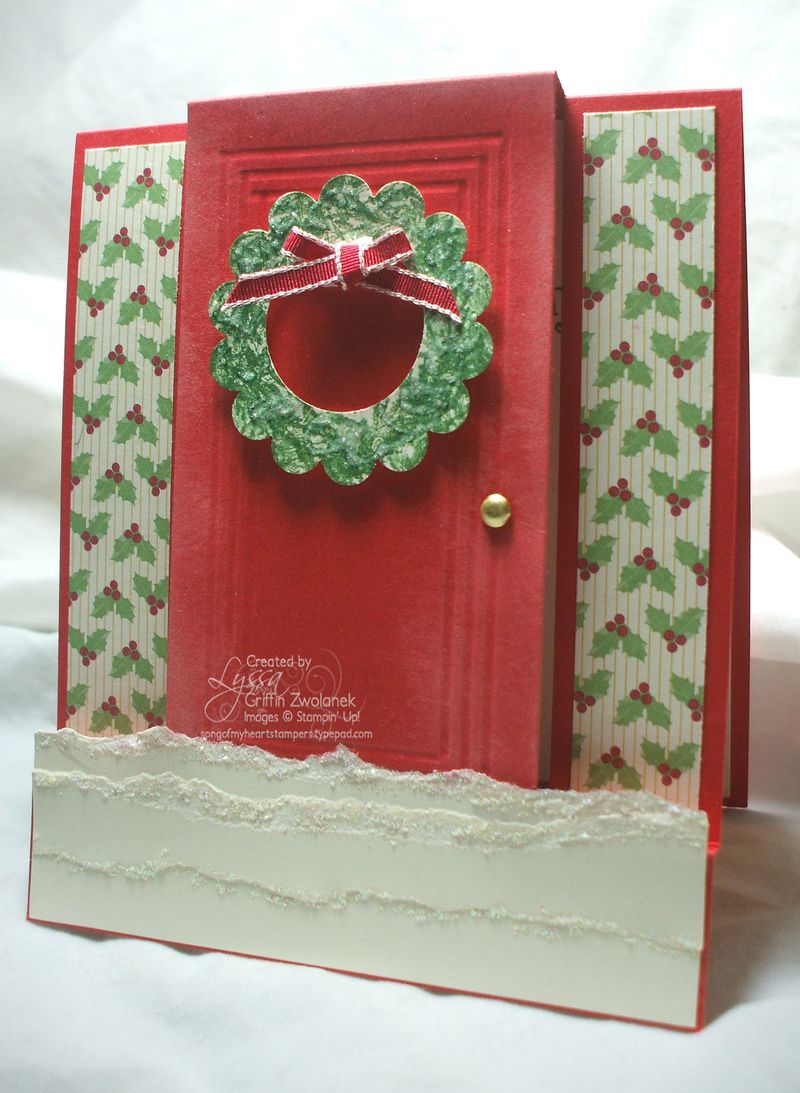
I hope you're enjoying the 2011 SOMHS blog series, "A Simply Scored Christmas." I am in love with my new tool. My projects look so professional when I use the Simply Scored, and mass-production is a BREEZE with the exclusive place markers and other great features of this tool. Today I'll show you how to make this easy step-out card that looks just like a front door–perfect to decorate with a wreath and glittery snowbank. This card is even cuter in person–I hope you try it!
To start, you'll need your Simply Scored, a 4.25×10.5 inch piece of cardstock, and your Paper Trimmer; and stamps, ink, punches, "doorknob" brad, Dazzlin' Details, etc, to embellish. Score your card at 5 inches on the long side as shown.
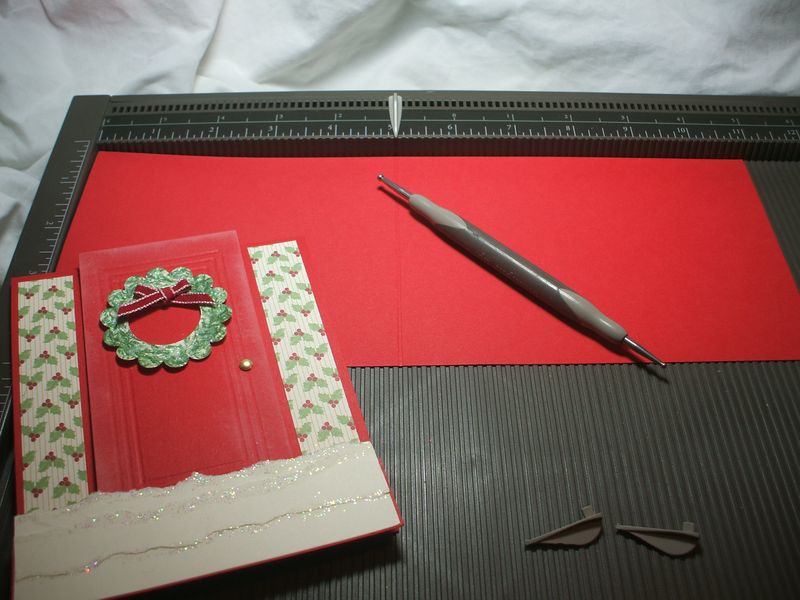
Next, pull out your Paper Trimmer and line the long edge with the one-inch mark. You are going to make a slice from the five-inch score you just made, down to the 9.5 inch mark.
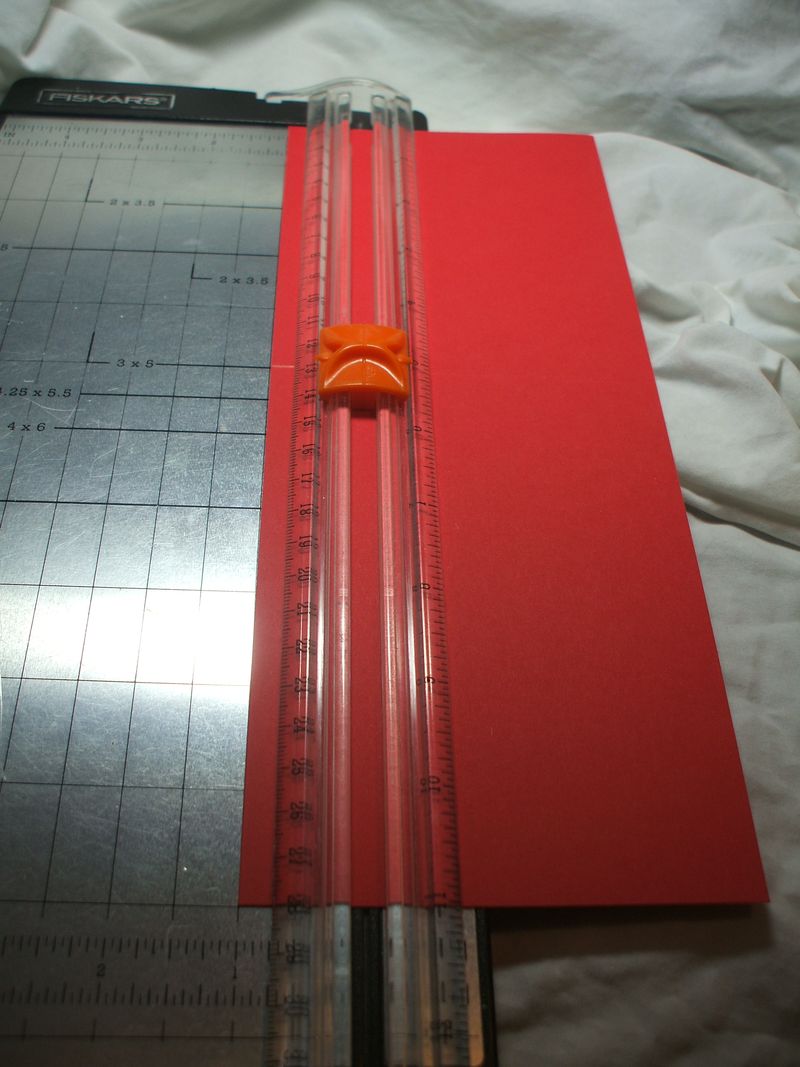
Then flip your cardstock and make the exact same cut down the other side, lining it up with the one-inch mark and slicing from 5 to 9.5. It should look like this when you are done:
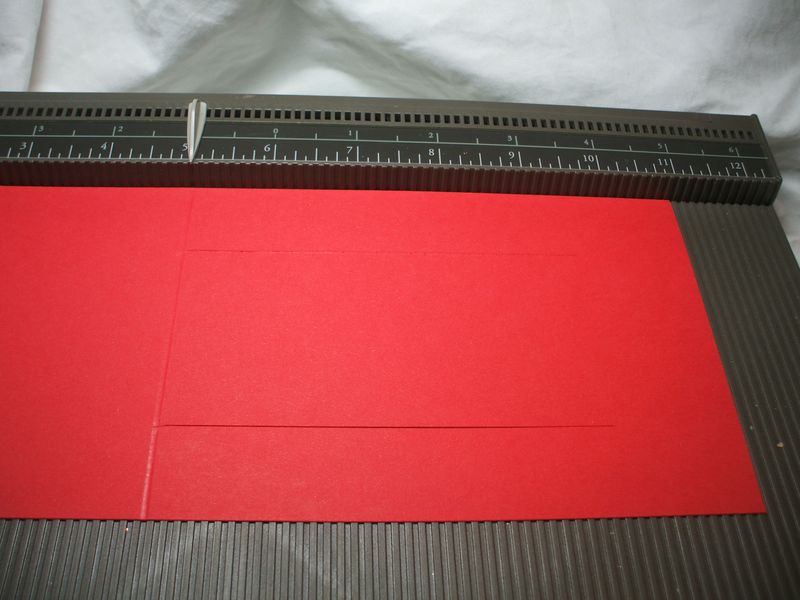
Put it back on the Simply Scored with the cut part to the right.
The next part is the only tricky thing about this card. I have mis-scored here a dozen times due to simple inattention, and it's aggravating! So learn from my mistake and pay attention to this part! It's not hard to do at all, it's just easy to forget and score in the wrong spot.
STEP 1: You're going to score at the 5.25 mark ONLY on the "door." Not on the "walls."
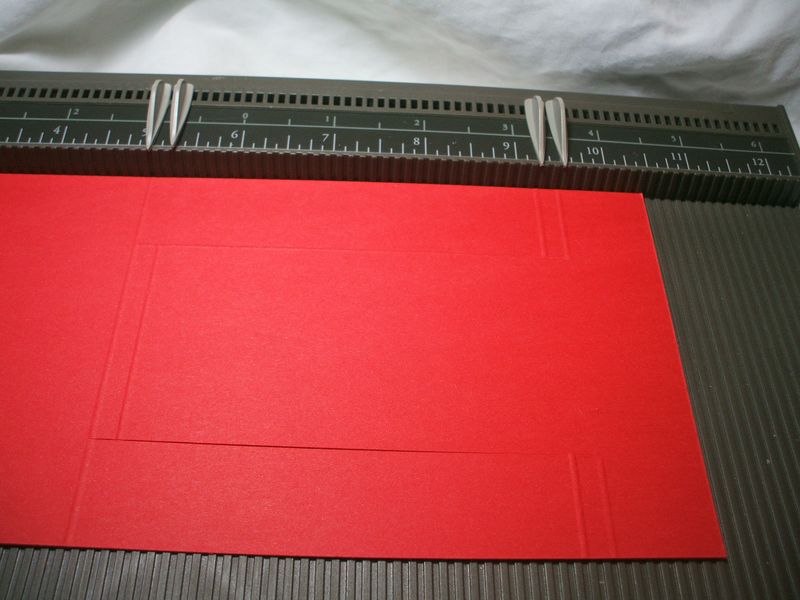
STEP 2: score at 9.5 and 9.25 ONLY on the "walls." Not on the "door." The correct scoring is shown below–see how the top of the door is scored, but not the wall–and then at the bottom fo the door, the walls are scored, but not the door?
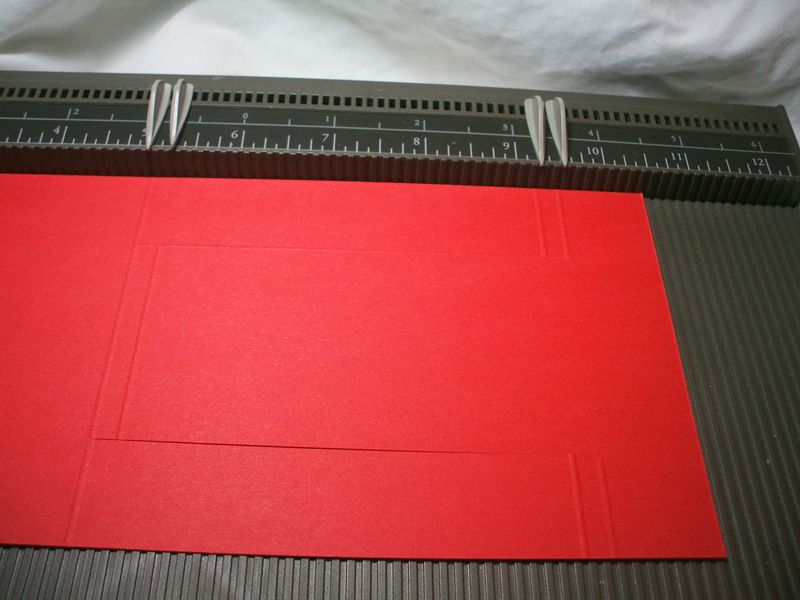
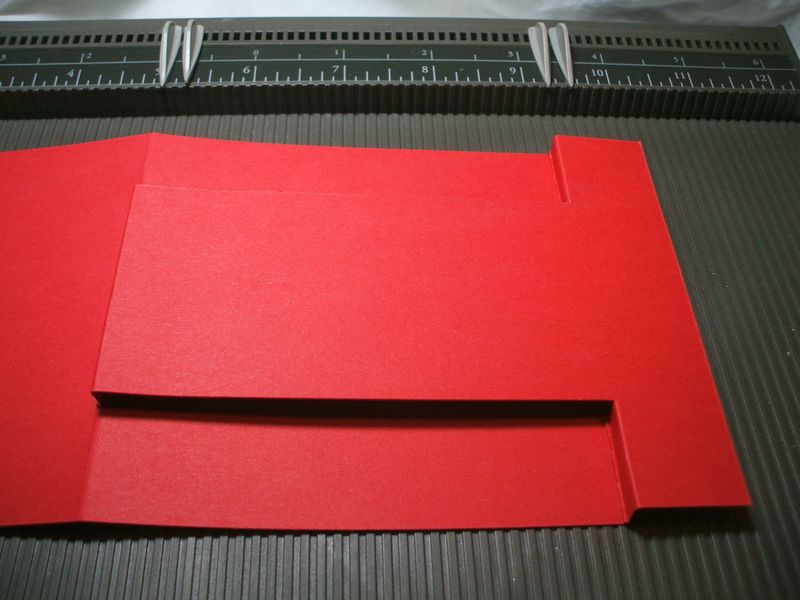
Whew! We're done with the slightly tricky part. Now just fold back that 5.25 inch score towards the 5, and the 9.5 back towards the 9.25, and you can clearly see the "door" pop out from the "walls." I scored additional marks to suggest door panels, and I really think that adds a lot.
Now you can get down to decorating! And be sure to subscribe to my blog in your favorite reader, or bookmark me, so you can find your way back for more FREE photo tutorials like this one, all featuring the Simply Scored board. There will be a new tutorial every day until December 15th!
Check back in tomorrow for a surprising Simply Scored box made with a little help from the Movers & Shapers die for the Big Shot. And as always, you can find EVERYTHING I used on this project on my shopping website, www.lyssa.stampinup.net.


I really need that tool! Is it pricey?
Hi Ruth! It is $29.95. It’s the best on the market, IMO. Lots of special features and none of the downsides that some of the older boards have. SU really did their research on this one!
Lyssa, this just knocked my socks off! (Now my toes are cold, lol.) “Pinning” this for future inspiration. TFS!!!
This is one of the most amazing Christmas cards I have ever seen!! You rock! I am loving the tutorials.
I love, love, love your beautiful front door!! Very cool! Thanks for sharing the instructions and inspiring me to give it a try!
Your tutorials are fantastic! Thanks for sharing!
OMG, This takes the cake in originality! Totally fabulous card!!!!!!
This just went on my Christmas list.:-) Thanks for sharing, Lyssa!
Great idea! Thanks for sharing. I will have to try this soon 🙂 New follower.
Jani
Hello!
This is a wonderful and creative project! I love it! Thank you for sharing the tutorial! Wishing you a happy day!
Hugs,
Barbara Diane
WOW!!!!!!!!!!!!!!!!!!!! I have GOT to try this. Your tutorials are fabulous. I’m so thankful for your generous sharing of them for free – thank you so much!!