Welcome to the blog series, "A Simply Scored Christmas!" I am delighted to have you along for these fun photo tutorials featuring the awesome new Simply Scored tool from Stampin' Up. This is the 10th in a series of 15 tutorials, ending on December 15th, 2011.
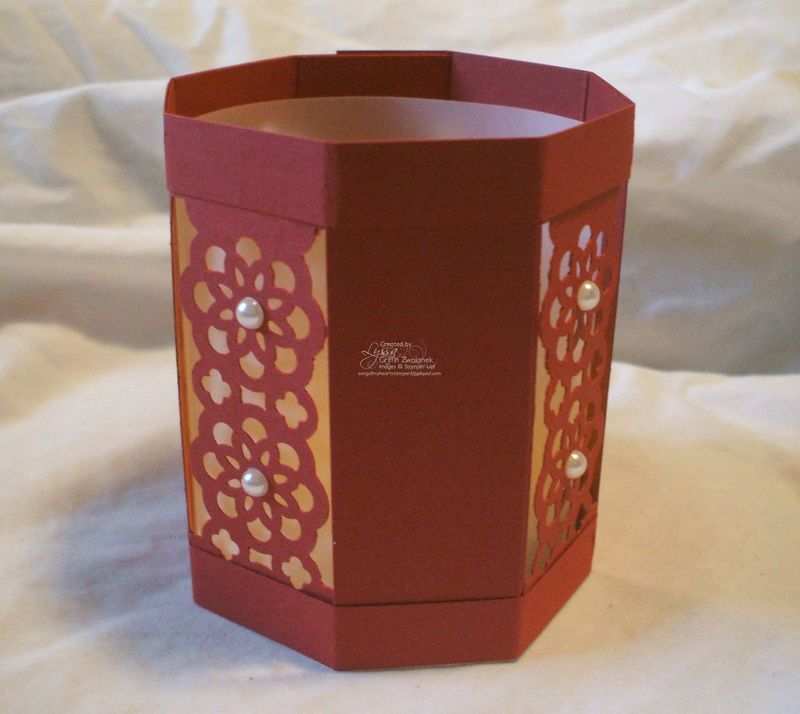
Today we're going to make this fun little votive lantern I originally designed for my Convention 2011 presentation featuring the Flirtatious product suite. I never got around to posting instructions for it, and I have been asked several times to do so–I guess this is finally it! If you love that Flirtatious suite as much as I do, be sure to check out the archives for August 2011, and my last blog series, "31 Days of Doilies."
These are super quick and easy to put together and will be useful for a huge variety of decoration situations, from weddings and showers to banquets, Christmas and much more!
I'll take a moment to stress that this is a flammable, paper lantern, and only good quality fake candles should be used with it, or you should use a glass insert that is at least 3.5 inches tall so that no cardstock is exposed to flame.
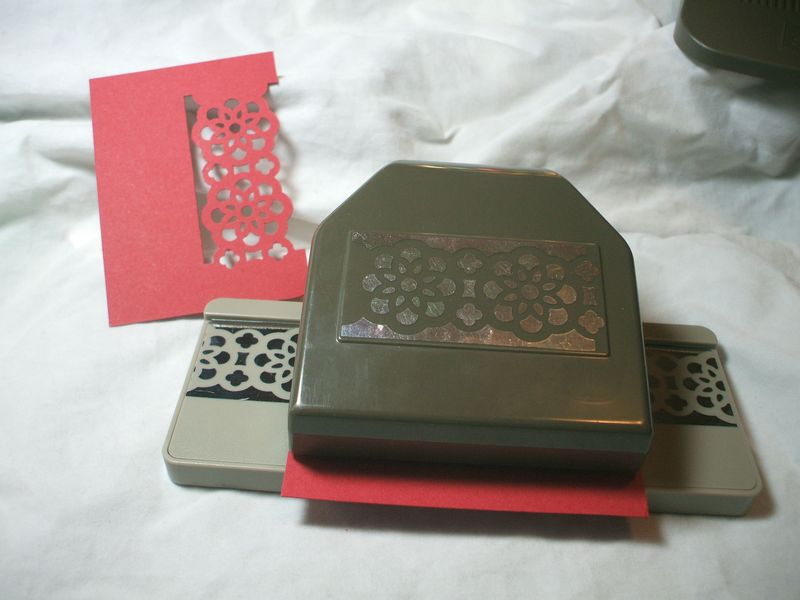
To start, you'll need four piece of cardstock measuring 3.5×2.5, and two half-inch wide strips that are 11 inches long; Sticky Strip, the Lace Ribbon Border Punch, your Simply Scored tool, and any embellishments you want to use.
Punch the Lace Ribbon Border punch once directly in the middle of the right hand long sides each of the four panels, as shown above.
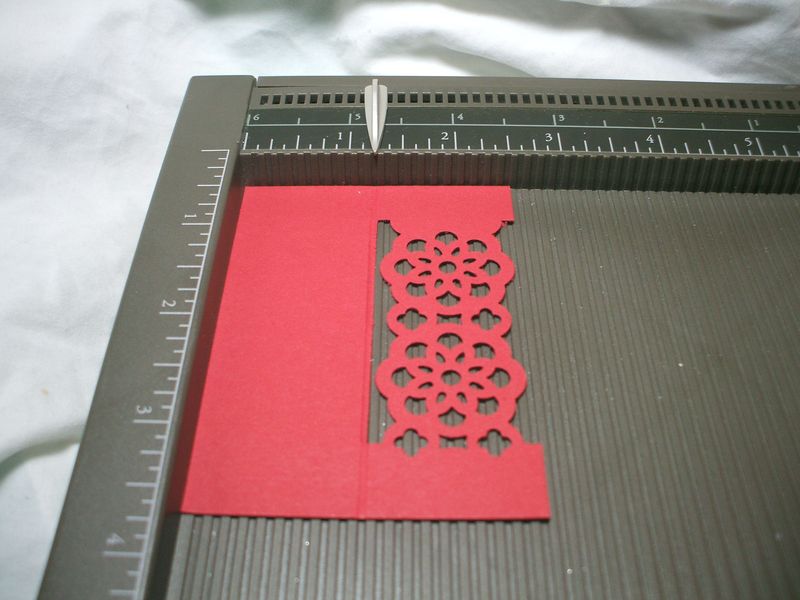
Next, score each panel at 1.25 inches on the short side, as indicated by the place markers above.This will allow the holder to curve around naturally as opposed to bending or cracking.
Then, lay out all your panels in a line with the punched edge on the right.
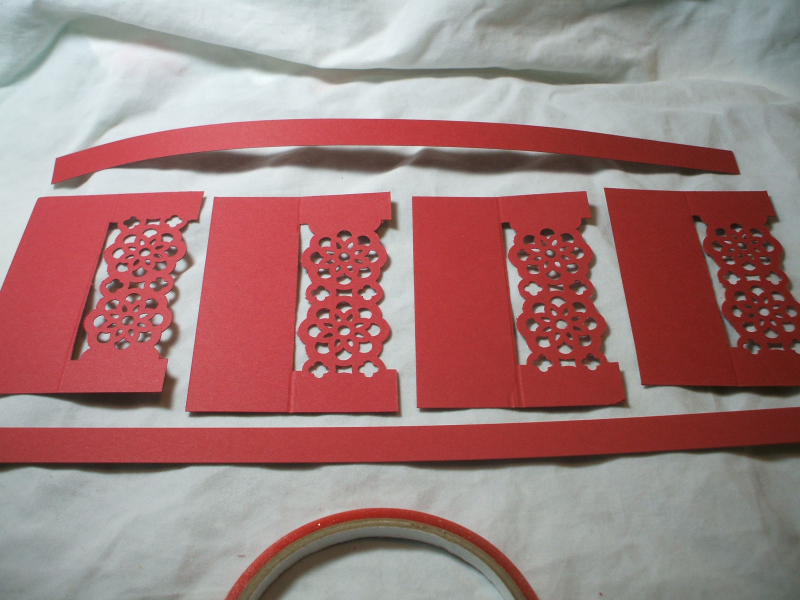
Butt the panels up directly alongside one another. Put Sticky Strip down the length of the two long strips of cardstock, and attach along the row of panels, top and bottom. It should look like this when you are done:
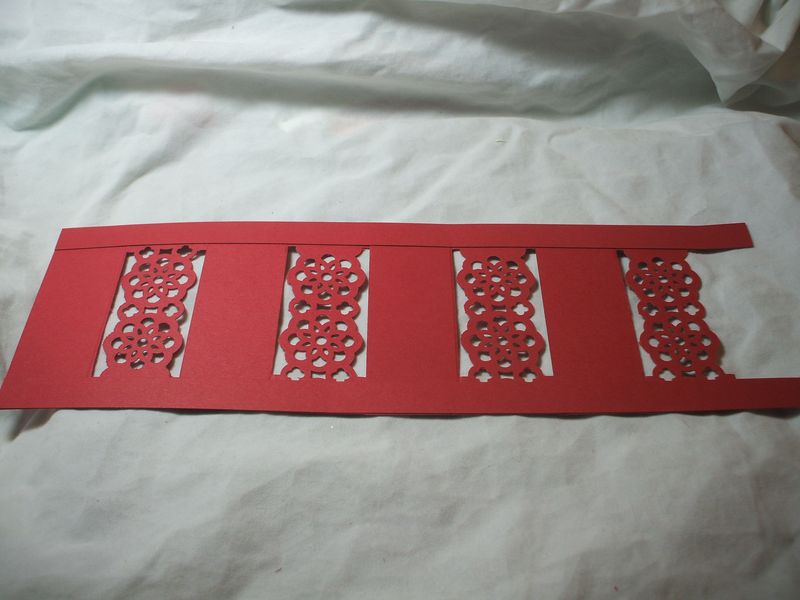
If you need to transport the candle holders to a location such as a wedding reception, leave them flat like this and they will take up vastly less space than if you finished them off. You can put a little of the red backing tape from the Stick Strip back onto the place where it is exposed on the tabs.
Otherwise, use the little tab ends with their Sticky Strip to wrap around to the other side and finish your candle holder.
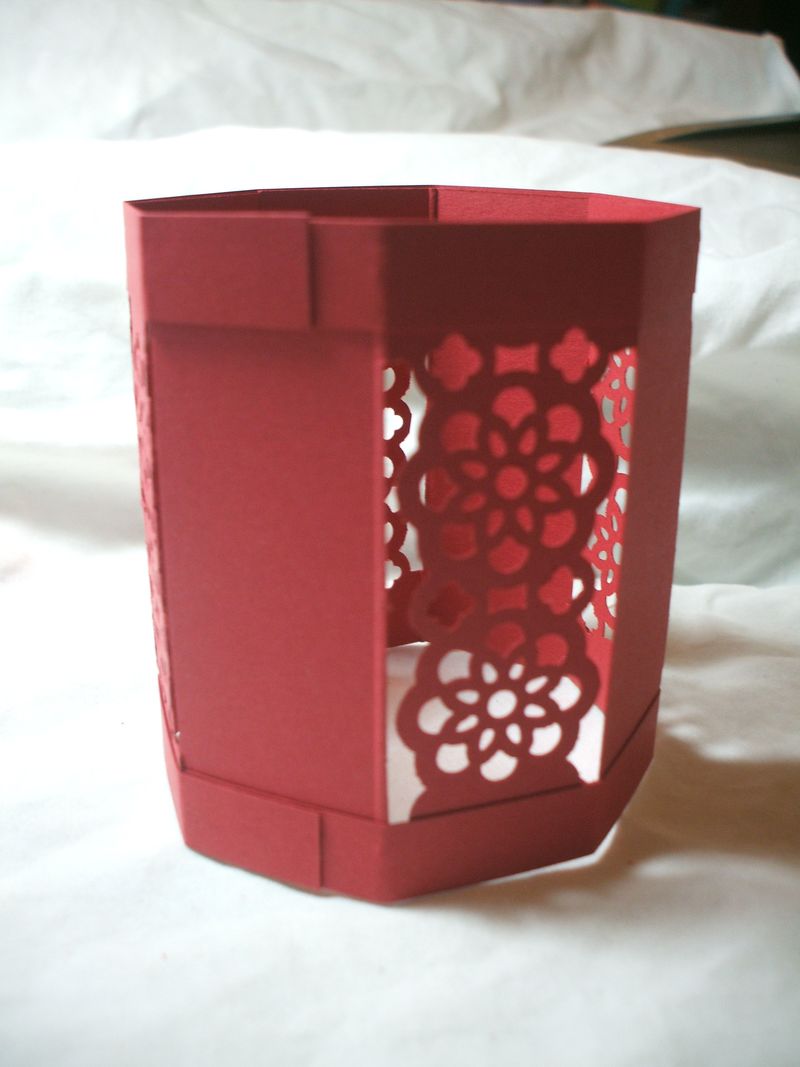
Embellish as desired. If you use faux candles, the sky is the limit–you can use ribbon, glitter, rhinestones, punches, Mice Flakes–anything you want, but I like the simple prettiness of the Lace Ribbon Border punch for most occasions. I usually do cut a liner of vellum for the inside, to diffuse the fake candle light and make it look more realistic.
NOTE: you can technically use the Lace Ribbon Border punch on both right and left sides of each panel, but be aware that does lead to a weaker, less sturdy lantern (and more work if you are mass-producing). Super pretty, though!
Thank you for viewing my blog today, and I hope you will check back often for free Stampin' Up ideas and paper crafting inspiration. If you are a demonstrator, feel free to take a look at my demonstrator motivation and inspiration blog (link on the top bar) for business inspiration, too. It, too, is free, just like all my tutorials. Love what you do and share what you love!




These are gorgeous! You are amazing! You know that, right?