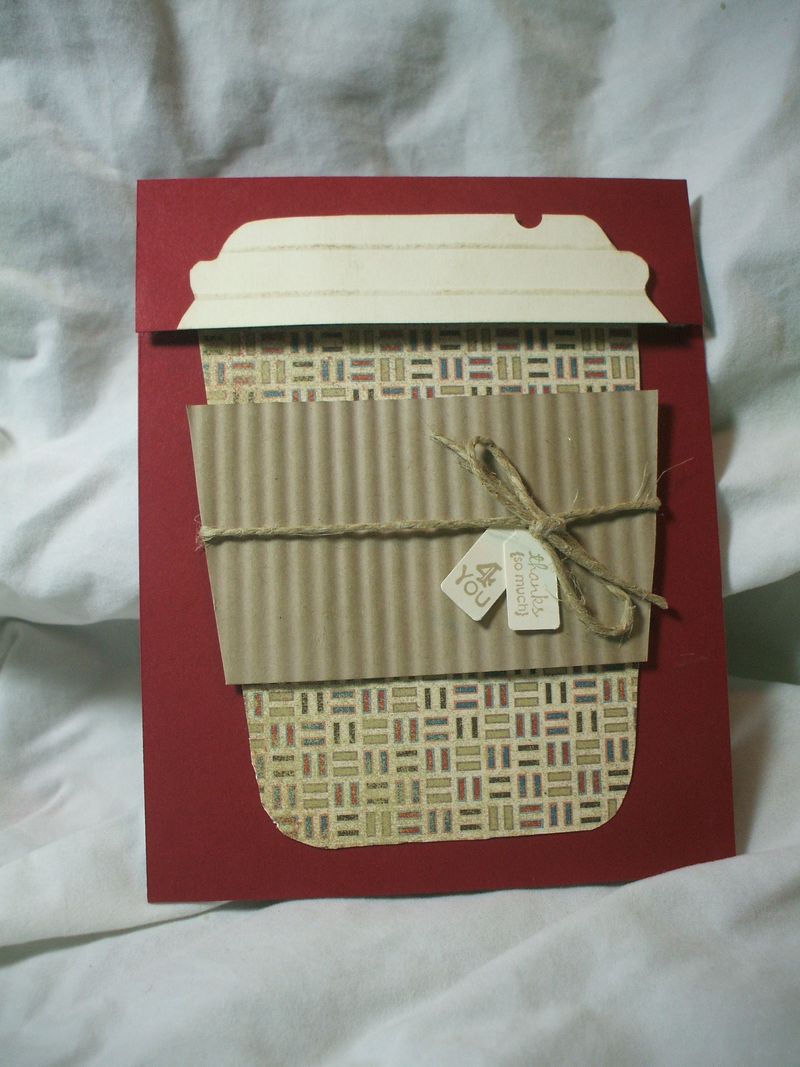
Welcome to the 13th photo tutorial in my December 2011 blog series, "A Simply Scored Christmas!" Today's super-cute mini tutorial featuring the Simply Scored scoring board from Stampin' Up comes from a project by my downline Jane B.–thanks, Jane!
I forgot to take a photo of the card when it is open, but the top of the coffee cup flips up to reveal a gift card inside the cup. How cute is that? Coffee lovers will "flip" over it!
To begin, you'll need a 4.25×11 piece of cardstock, Designer Series Paper for your cup, neutral cardstock for your cup cozy and lid, Sticky Strip, and the Simply Scored tool; plus stamps, punches, ink, twine and whatever else you want to decorate it with. The Paper Crimper is fun but if you have the Simply Scored you can use that if you don't own the crimper.
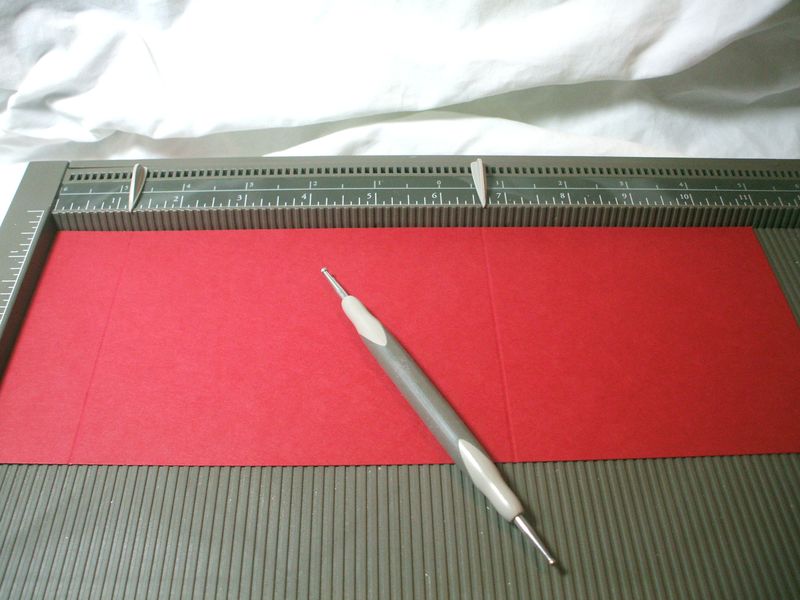
Score your cardstock at 1.25 and 6 and 5/8 on the long side, as shown here by the Simply Scored place markers, which are exclusive to this board and available only from Stampin' Up. Get the skinny on this awesome tool here: www.lyssa.stampinup.net/Simply Scored
Use Sticky Strip to make the pocket, and put a self-adhesive Velcro tab on either side of the top flap. Jane also put a dimensional inside her pocket before she closed it up, so that the gift card would not slip down to far and be hard to get out. Smart girl!
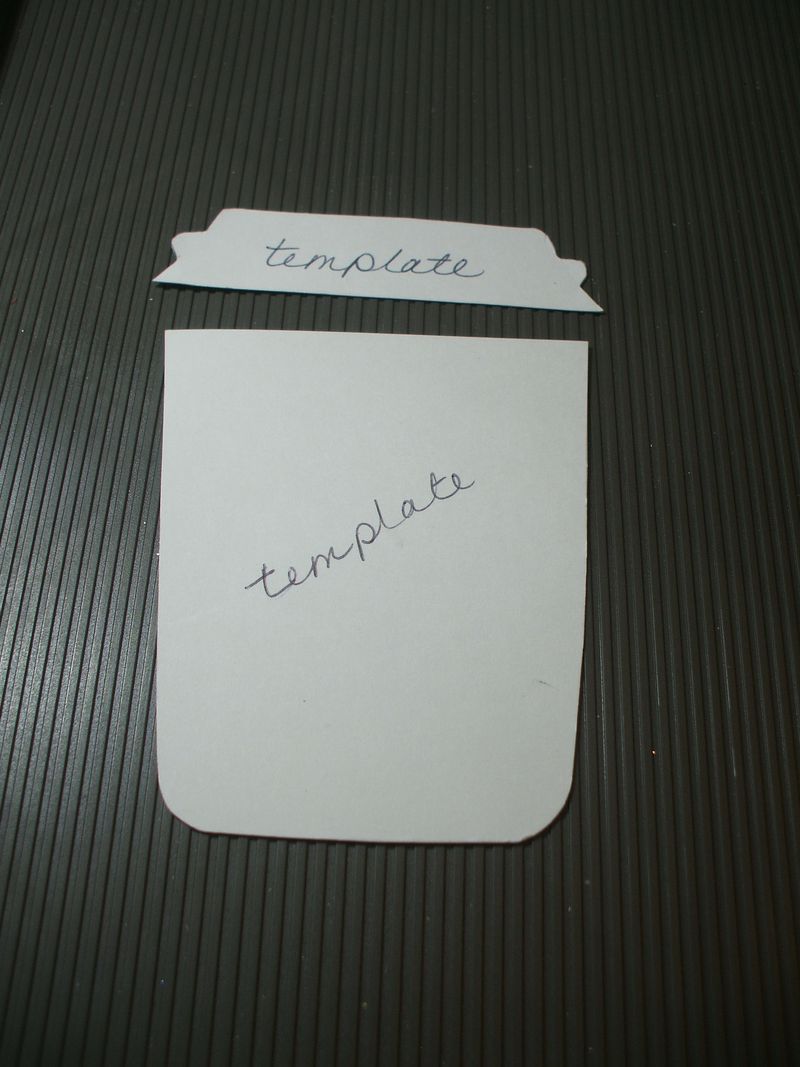
Cut a cup shape from Designer Series Paper (Well Worn, item #122359) and a lid from Very Vanilla, Whisper White, or Basic Black. if you know you'll be making more than one of these cuties, you might want to cut a more permanent template to use, from something sturdy like the cardboard backing from our Designer Series Paper packs.
My cup is embellished with Hemp Twine, a crimped strip of Crumb Cake cardstock, and the Tiny Tags set punched out with the Jewelry Tag punch. I also used the Jewelry tag punch to notch out a little sipping hole in the rim of the cup.
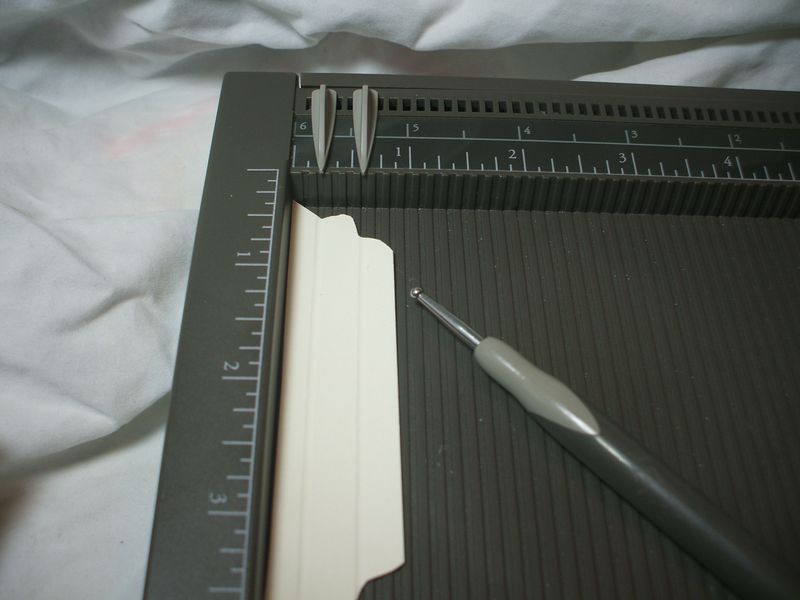
Scored your cup lid at 1/4 inch and 5/8 inch as shown above, which really adds dimension. Another wonderful perk of the Simply Scored board is that, unlike other popular older scoring tools, it has lines every 1/8 inch, so no matter where on the board you need your small measurements, you've got them.
Add your cup lid to the upper flap, and the cup body to the lower pocket of the card, and you're all set! Go out for a mocha and pick up some gift cards to your local independent coffee shop to give as last-minute gifts this Christmas.
There! isn't that cute? I know I'll use this idea over and over again. I hope you are getting lots of ideas from this tutorial blitz, and if not for right now, then tuck them away for later. When the series is all done after the 15th, I will make a compilation of links in a single post and then you can bookmark it so you don't "lose" the ideas, but all my photo tutorials are always free and always available under the link in the menu. Enjoy!




great project! You have been posting so many great projects that you have been featured in my inspiration blog post almost every day! Would love to see you design for Craft Project Central with me!
Sorry, Kim, I barely have time to keep up with my own blog, let alone design for anyone else! I also feel strongly about not charging for my tutorials, as I see CPC does. But thank you for the honor of being asked! I appreciate it.
Hi Lyssa! As I sit here sipping on my mrning Starbucks….this is SO fun!! Wat a great idea for a gift card holder for the holidays. Such a fun project! Thank you for the inspiration and for the details. Have a great day! 🙂
Lyssa ~
Your Simply Scored Christmas series is AWESOME!! I can’t wait to visit your blog each day to see what you’ve come up next. I want to thank you for the level of instruction you provide. All I can say is WOW!!
I was wondering if you could provide the approximate dimensions of what the cup and lid should be. I am going to try to create a template as you did … and it would help to have measurements to begin with.
Thanks again for your TERRIFIC series!! You are a real GEM!!
Judy
lifesabeach32940@cfl.rr.com