The other night I FINALLY sat down to play with a new toy I've had for months!!! My jar of Gilded Leafing has been staring accusingly at me since I bought it way back in December. Well, it's March, and here we are–success!

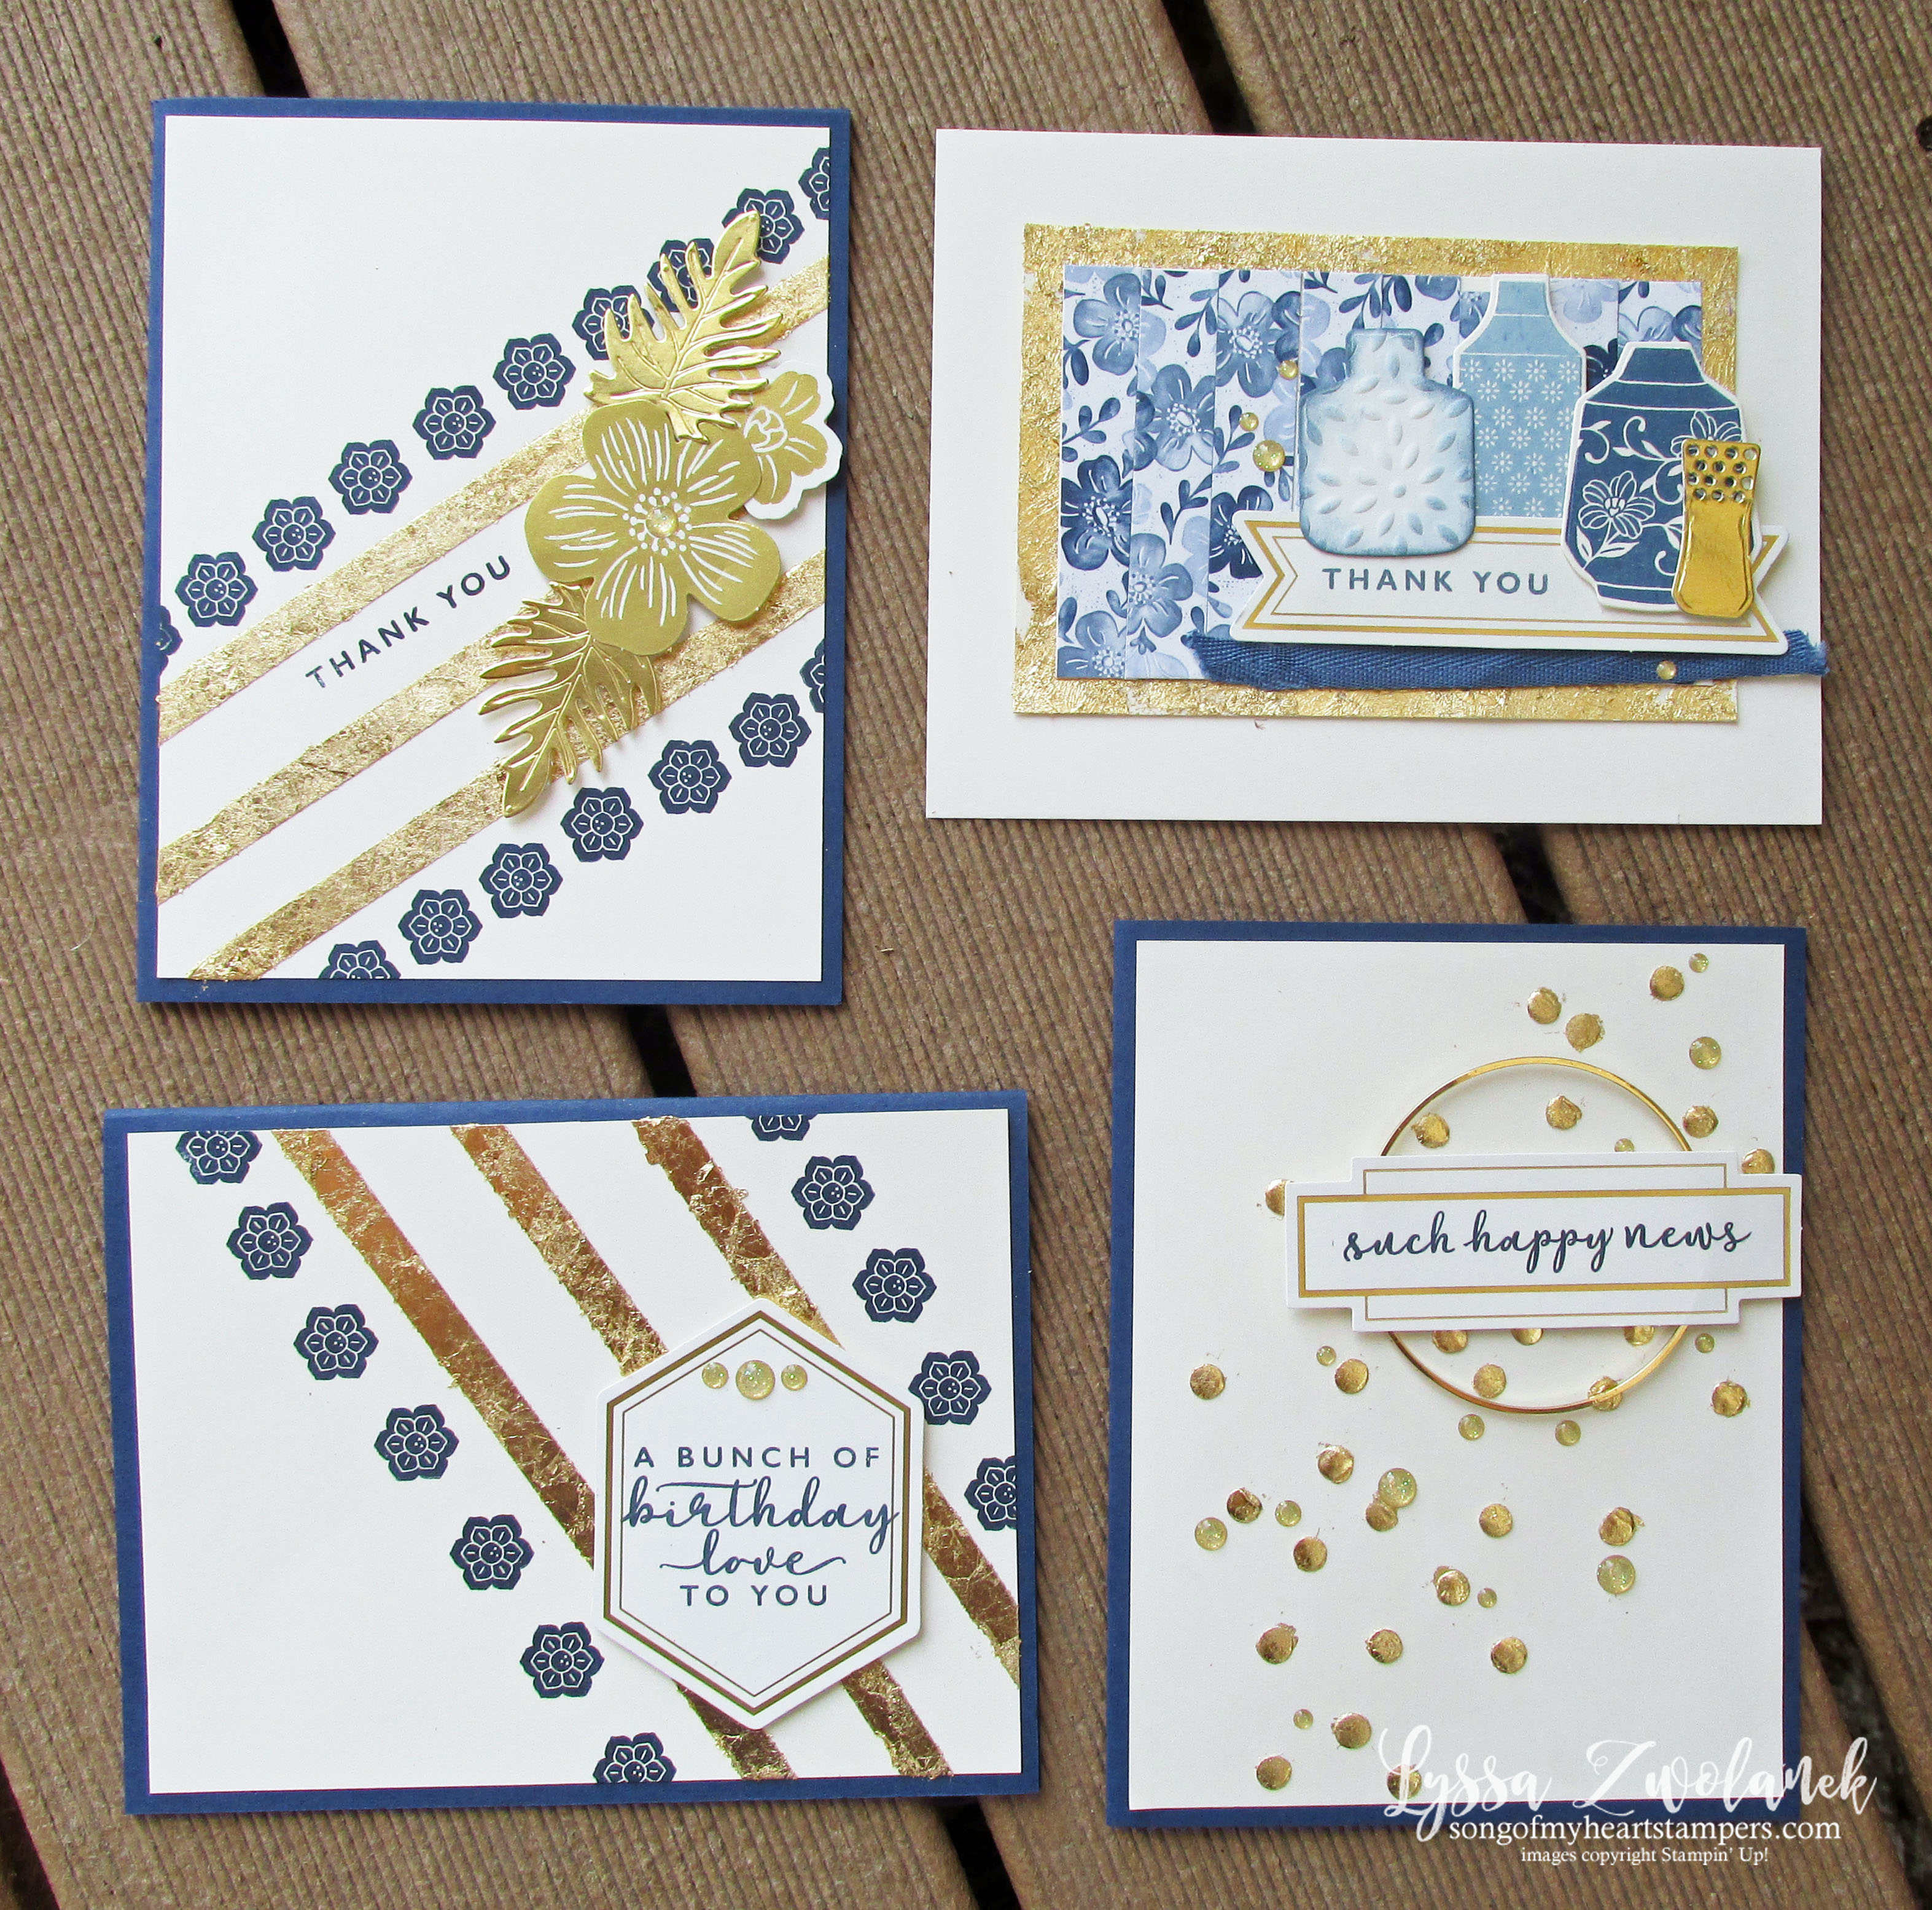
I had one sample made up, so we started there live on Facebook (go BIG or go home, eh?) and then just experimented with different common adhesives and how they work (or don't work) for using the gold leaf. It was super fun! And now here I am as promised to share what I made out of the pieces we worked on. The cards all use the retiring Boho Indigo product medley and Night of Navy ink and cardstock.
Watch the process–it's actually really easy! Plus I share some clean up tips.
We had the best luck with Tear & Tape and making nice straight diagonal lines. You can easily do borders or stripes, too! This is by far the easiest and least messy way to use gilded leafing.

Look at the shine on this one! For this card, we just brushed liquid Multi glue all over a piece of cardstock with a paintbrush, then applied and buffed off the leafing. It was fun and a little messy! My best tip here was to use disposable paint brushes so you don't have to try to clean up the glue afterwards.

We also experimented with glue dots and they worked great as well! A little bit boho as glue dots are not necessarily perfectly round, but that kind of adds to the handmade charm. My tip here is to firmly press the glue dots onto the paper while still on their backing. They'll be less likely to pull out of shape when you peel off the backing.
There you go! Three fun ways to use Gilded Leafing. Snag yourself a jar on your next order and add some pretty intense shine to your wedding and anniversary cards this spring!

