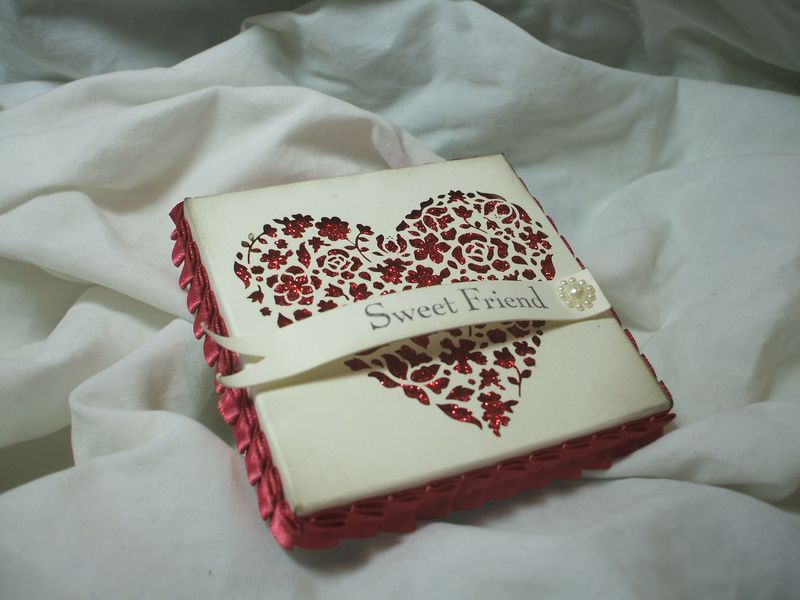
Got a little sneaky peeky for you in today's photo tutorial! Welcome back to "A Simply Scored Christmas." If you are just joining us, please look back beginning with December 1st, 2011, to see all the posts in this fun new blog series. Today is Day 14 of 15, so we're almost through! And I have to say I will be glad to have this accomplished–it may have been a bit over ambitious to do a blog series in December! But I hope you'll come back tomorrow to see what I chose for our finale!
The sneak peek item we're going to be using today (well, in addition to the gorgeous pleated riding Hood Red satin ribbon I have already shared previously) is the new Designer Cuts cards and envelopes set. This is a gorgeous set of two different laser-cut designs on Very Vanilla, with wonderfully luxurious Blushing Bride envelopes to match.They are just stunning. I tell you, if I had my wedding invitations to do over, I'd use these!
I took one of the designs and made a little Slim Box with it and today I'll show you how easy it is to make a box from any regular sized A-2 card.
Here's the two designs that come in the set. I just threaded satin ribbon through the one lace border design and it was so pretty I'm not sure I'll do anything else to it! But we're going to use the lovely laser cut heart design for our Slim Box.
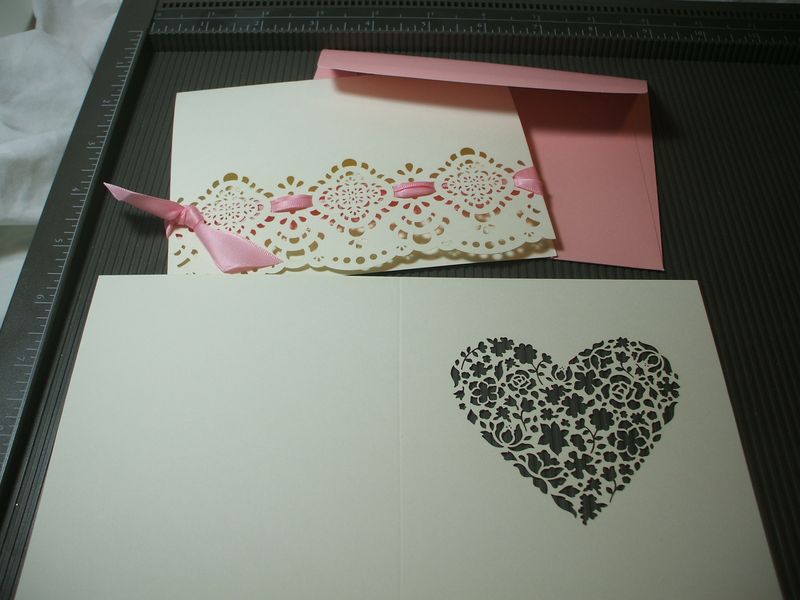
To begin, you'll need the Designer Cuts card set (or another 5.5×8.5 card that has a laser-or-die-cut front panel); your Simply Scored tool, Sticky Strip; and stamps, ink, ribbon, Designer Series Paper, etc to embellish.
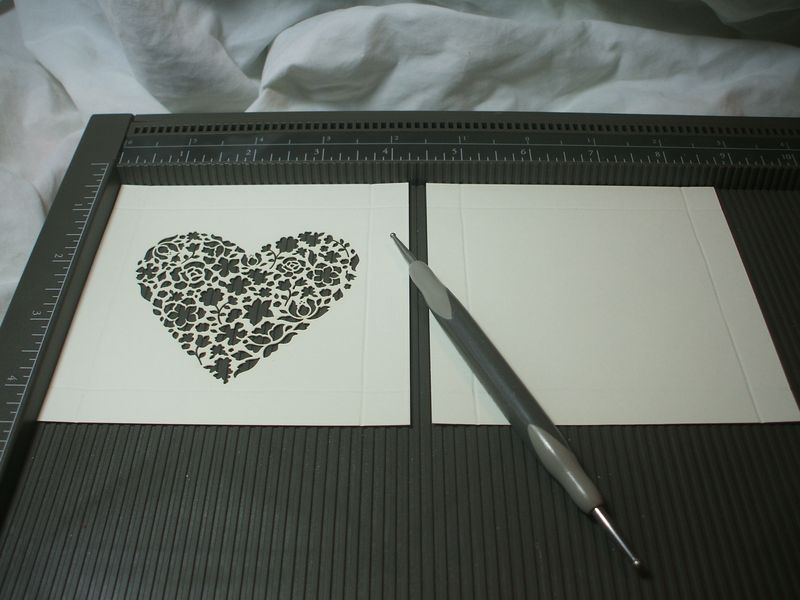
Cut your card in half on the scored line (this is 4.25 inches). Then, cut those two halves down to 4.25 square so you have two identical squares, one with the laser-cut in the center. If you are recycling a used card and can only use the front, cut yourself a piece of coordinating cardstock that is 4.25 square.
Score at 1/2 an inch from all four sides on both pieces, as shown above. The box is just half an inch tall, hence the name "slim."
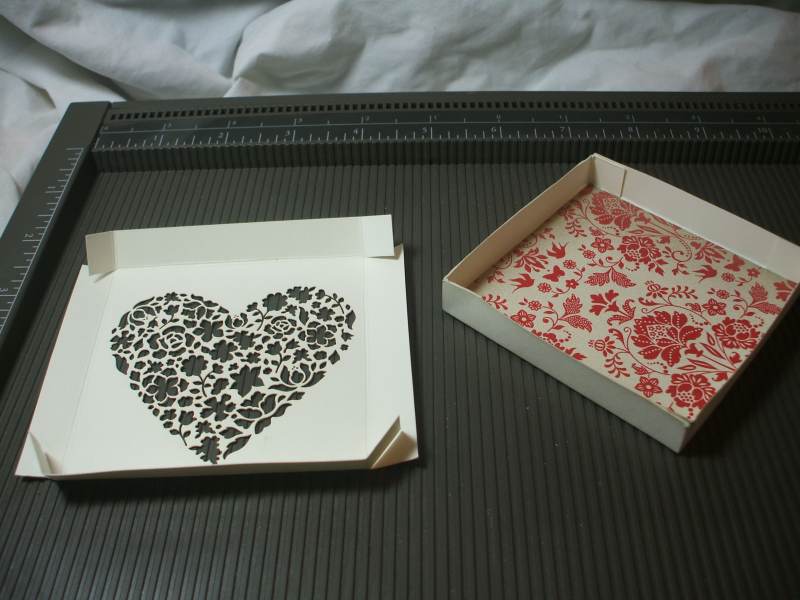
Snip up the corners to the fold line and use Sticky Strip to assemble the base first, then the top, holding it on the base as you make it so you know for sure the lid will fit the box.
I lined my box interior with Red Glimmer Paper on the top inside, to show through the laser-cut heart. You could also just leave it open, for a peek at the contents inside.
For the bottom interior, here's another sneak peek. This is one of the Sale A Bration Designer Series Papers that you can earn for free during January through March! Gorgeous designs–AND–SQUEE!– there are matching embellishments and stamps. S'all I'm sayin'.
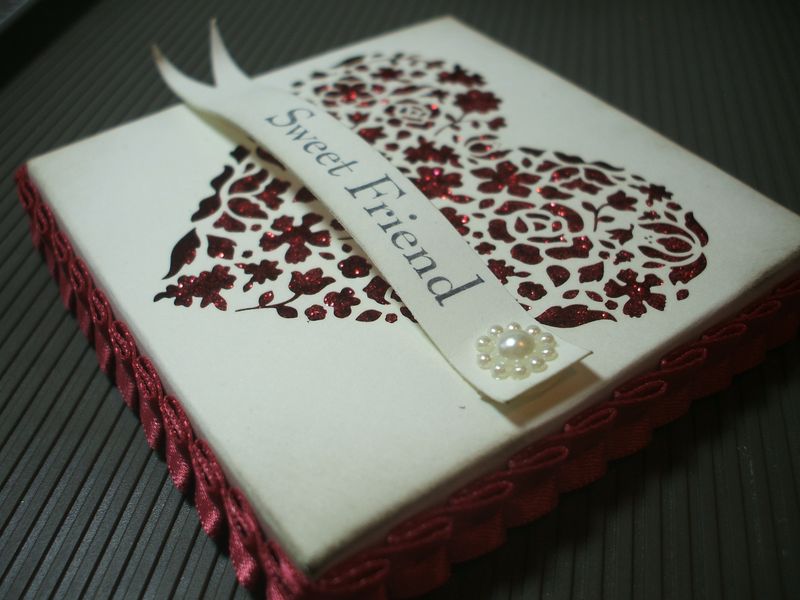
I finished my Slim Box off with a stamp from You Are Loved, page 40 in the 2011 Holiday Mini Catalog, and a little pearl decoration. One pearl is never enough! I started with the largest pearl in the Basic Pearls set, and using my flat-tipped tweezers, added the smallest pearls all the way around the perimeter. I always add a drop of Crystal Effects when I'm done, which slides down into the grooves and ensures the baby pearls don't migrate anywhere.
You are going to LOVE the 2012 Occasions Mini Catalog, and it falls during that magic time of year, Sale A Bration. Be sure to book your party ASAP as my calendar is getting dangerously full! I'd hate to have to turn you down because you waited to long and now we can't squeeze you in! Let's get you and your girlfriends together to restock your supplies after the big Christmas crafting rush and see what is fun and new for 2012.



Very pretty and such a neat idea!
WOW! You are so amazing! Love this!
Wow, nice touch with the pleated ribbon around the box. Great ideas!
Gorgeous!