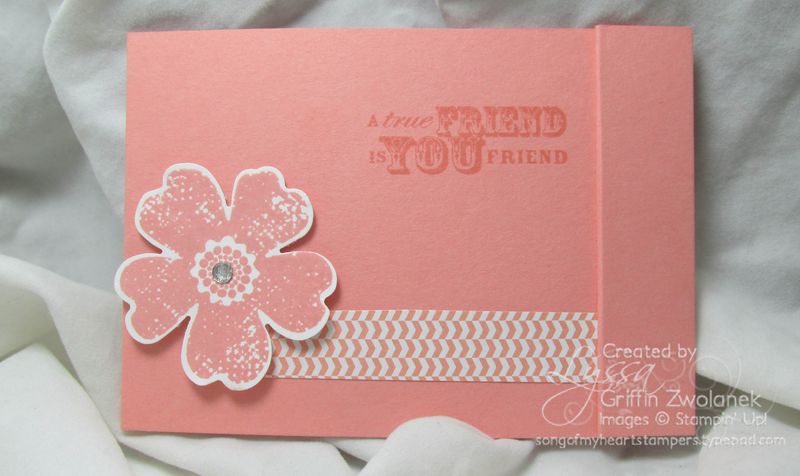
I have a cute and QUICK project to share with you today! As always, the tutorials at Song of My Heart Stampers are 100% free, no strings attached. If you'd like to show your appreciation for all the sharing, please leave me a comment and totally make my day! And if you don't have a Stampin' Up demonstrator and would like a free Idea Biook & Catalog or would like to place an order for anything you see on my blog, click here: www.lyssa.stampinup.net
I don't know about you, but I LOVE getting and giving gift cards! They are so handy, and I always feel like the person I give them to can get something they really want. However, they're a little impersonal, so I like to dress them up with a great card or holder. Today I want to share a super easy matchbook-style gift card holder that you make with a single strip of paper.
Ready to start? To begin, you'll need a 3×12 inch wide strip of cardstock, your SImply Scored board, the Decorative Label punch, Sticky Strip or other really good adhesive, and stamps and ink to decorate your finished holder.

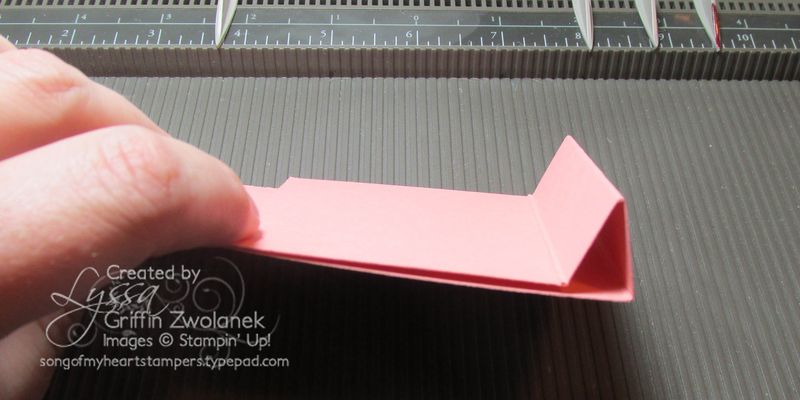
Score your cardstock strip at 3.75, 8, 8.75 and 9.5 inches the long way. Then fold the end with the three scores as shown below, folding back on itself.
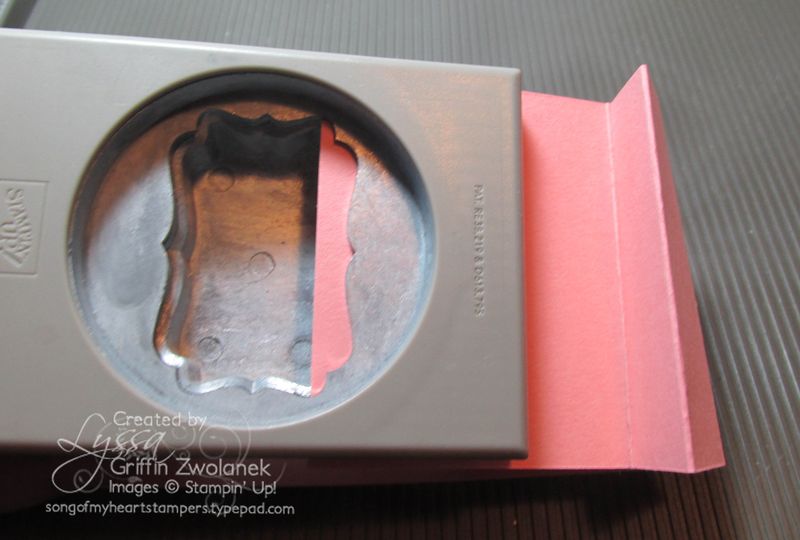
Before you do any adhering, you'll want to notch out the end of the strip so that it's easy to grab and slide the gift card out of the pocket. I used the Decorative Label punch, to make mine fancy, but you can use any good-sized punch to notch out an oval or circular area for the same purpose.
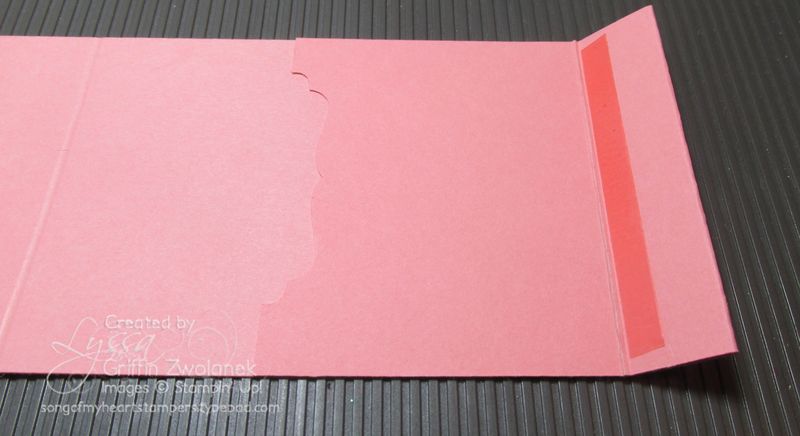
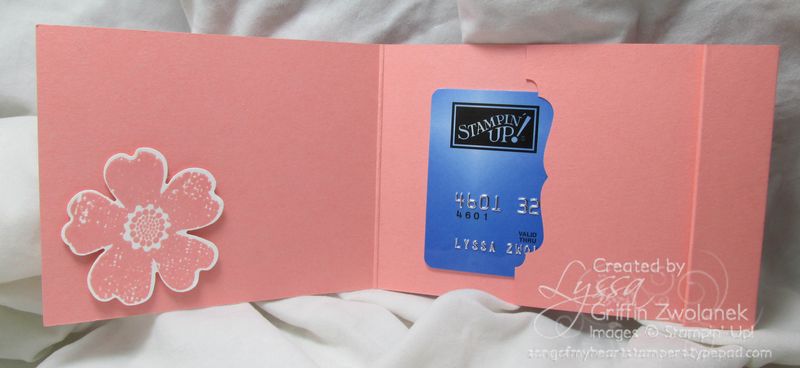
Use Sticky Strip or other really strong adhesive on top and bottom of the pocket (not shown), making sure to leave the left hand notched edge open wide enough for the gift card. Snug is good–too tight is not! Then use a line of Sticky Strip to fold over the little scored flap (shown above), making sure not to put it too close to the edge, because that's where your holder's cover is going to slip into to hold the whole thing closed.
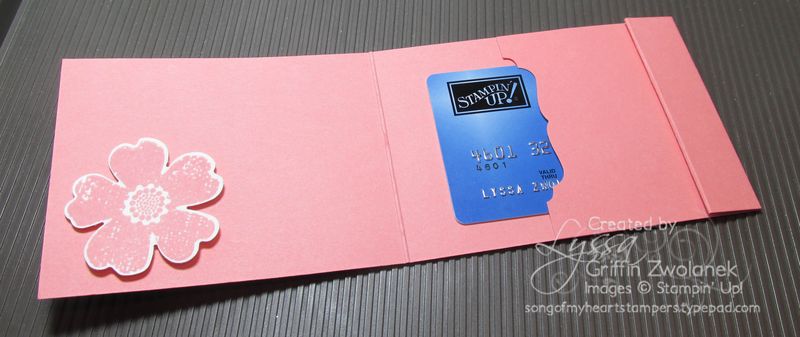
Here's the inside of my holder, with all the steps completed:
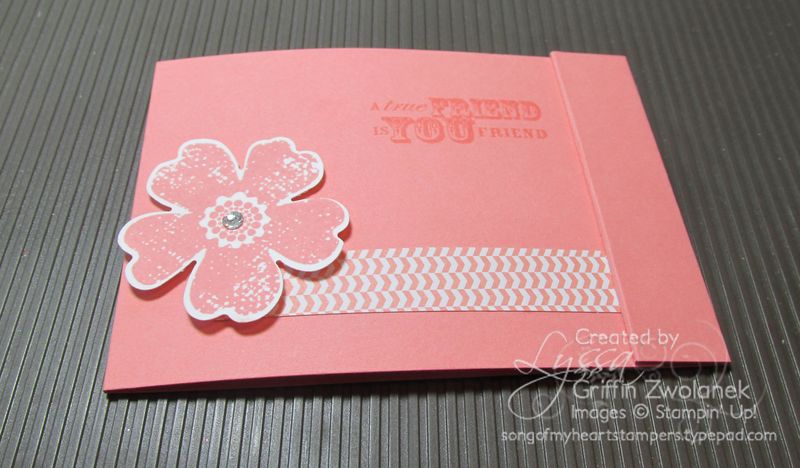
And the outside, with the cover closed and tucked into the matchbook-style tab:
That's it! I told you it was easy! You guys know I don't do complicated. Life's too short : )
Now I have two hints for you:
- You can make an envelope that is exactly the right size for this puppy, using the new Envelope Punch Board. That thing ROCKS! If you don't have it, you're gonna want it, so call me.
- The pocket will also fit thin, flat candies like Ghiradelli's. If you have any in the house. Or if you had some in the house, but they mysteriously disappeared while you were photographing your tutorial.
Now, leave me a comment if you LOVE free tutorials, and I will magically produce another one tomorrow!


My favorite part of this? “You guys know I don’t do complicated. Life’s too short.”
It’s true.
And I do LOVE the tutorials. LOTS. I find them very helpful.
Thanks for all of your time…and sharing.
As a demonstrator I’m always looking for different gift card holders for my own use and to use in classes. Love this one. Thanks for sharing
I so much appreciate photo tutorials! With a video, I have to watch several times to get measurements correct, then there’s no picture to go with the measurements. With a photo tutorial, I can save to a Word document and file in my Card Projects folder.
Thanks again
Exactly the reason I do mine this way, Judy! Thanks for your feedback.
You made this look so easy. Can’t wait to give it a try. Love your tutorials. Thanks for sharing your talent with us.
Thanks for the tutorial. What is the trick to line the pansy punch up with the flower shop flowers. I haven’t successfully been able to line it up. Thanks!!
I love your tutorials! They are great! The fancy little edge on the opening is a cute touch.
Thanks for the free tutorials, I love them.
Lyssa, I not only love tutorials…I love YOUR tutorials. I don’t do complicated either. Thanks for another great one.
Wow, I just love it, love it. I am sitting down just a few minutes and making my Matchbox
Love this little matchbook gift card holder! so quick and easy, and much CUTER than the default ones you get at the store when purchasing the gift card. 🙂
Thanks!
Jenny
OOPS! Posted on the wrong day!! Not enough caffeine! Anyway, thanks so much for such a fun and useful idea. Can’t wait to try it! And a big thank you for sharing so freely!!
Perfect timing! I have a gift card to send for my newest little nephew. I was going to make something today to hold it and now I know what it is I will make! Thank you for your free tutorials, Lyssa. They are MUCH appreciated!
Me, me! I love Lyssa’s always free, always useful tutorials 🙂 Thank you for sharing – you are my “online mentor” 🙂
LOVE LOVE LOVE your tutorials! You are such an amazing woman to share them with us. Thank you for doing so.
This is a great card! I love being able to do different types of “gift card” cards.
Hugs!
Thank you for sharing. This is a quick and easy gift card holder.
Your tutorials ROCK!
After back surgery, all your wonderful ideas are keeping me company. I’m adding this one to me list of fun tutorials to try.
Thanks for sharing!!!