If you're just joining us, welcome to Song of My Heart Stampers' new blog series, 31 Pages In 31
Days! Every day during the month of August, I'll be posting a single or
double page scrapbook layout for your inspiration. I am running a
Scrapbooking Summer School on four consecutive Thursday nights in
August, and I've issued them a challenge–complete thirty-one pages in
just thirty-one days, and they'll receive a bonus pack of Designer
Series Papers at the end of the month!
YOU CAN PLAY ALONG with us by challenging yourself to complete
thirty-one pages, too, and posting your progress here on Song of My
Heart Stampers. I also have set up a 31 Pages in 31 Days Facebook group, where you can even post pictures of your pages to inspire and encourage others who are taking the challenge, too!
Each week in August will have SCRAPPER'S BLOG CANDY given away to one
lucky winner from the week's comments here at the Song of My Heart
blog. You can comment once on each entry with that has the cute little
"31 Pages in 31 Days" butterfly banner that I created in My Digital
Studio. Congrats top Debbie D, winner of last week's drawing!! This week's giveaway is a new In Color pack of 12×12 cardstock and ribbon sampler! Leave a comment by August 17th to enter.
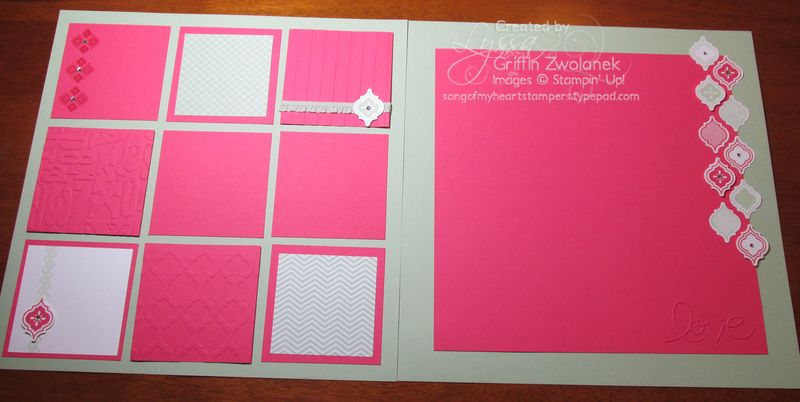
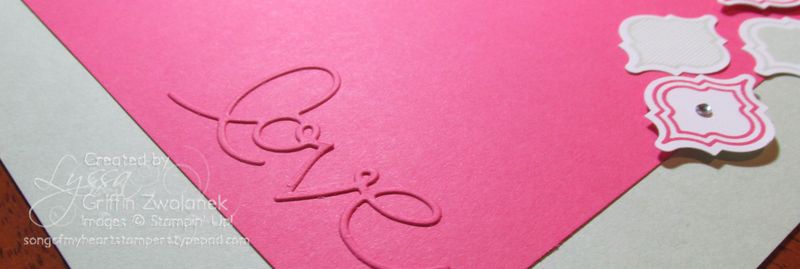
Yesterday I promised you more Expressions Thinlets love and some tips! Here I am to deliver as promised, with this "love" page that my Scrapbooking Summer School girlfriends will be making tomorrow night. They are going to love it!!
Ok, here's my tips for getting the Thinlets out of the dies. These are so detailed and delicate, it COULD be a real pain to get them out–except it isn't!
- First, these exclusive Expressions dies that Sizzix designed for Stampin' Up have been designed with strategically placed access holes, so you can use the Paper Piercing Tool to poke the cardstock out.
- Secondly, since you're probably going to want to back these die-cuts with Multipurpose Adhesive Sheet anyway, which is by far the simplest way to attach such a delicate piece–save the waxy paper backing that's left after you apply the MPA to your cardstock or foil paper.
- Create your Big Shot "sandwich" as follows: Magnetic Platform (or regular platform with the tabs closed); clear plate; cardstock with sticker backing; leftover waxy paper backing, word side up; your Thinlet; and then the final clear plate.
- After you roll your sandwich through the machine, you will find that it cut all the way through to the sticker backing, and the waxy paper backing allows the whole thing to slip cleanly out of the die. I didn't even NEED to poke in the access holes to get it out!!!
- If you don't have the Multipurpose Adhesive Sheets yet, you can use waxed paper from the kitchen, or in a pinch you can use a clear envelope or other cellophane, too.
- Just FYI: the Magnetic Platform is currently on backorder and cannot be ordered. I will let you know as soon as the item number is turned back on! Best invention EVER!
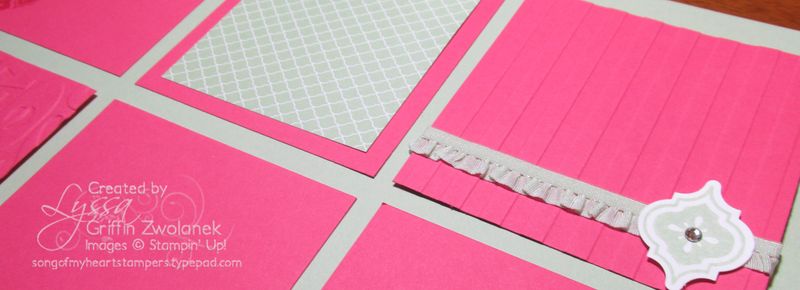
So those are my Thinlet tips, and now we'll get back to today's page! This layout can hold 10+ photos, or just a handful, depending on whether or not you use smaller photos in the decorated squares or layer them over the embossed squares. it's one of the most versatile layouts you will ever find!
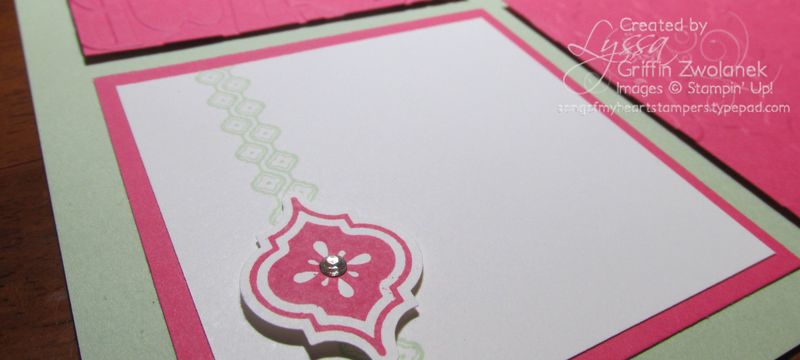
I used a crisp, summery color scheme of Pistachio Pudding and Strawberry Slush with Whisper White, and the super-sweet combo of punch and coordinating stamp set in the Mosaic Madness bundle.I used not one, not two, but THREE different embossing folders as well, so there's lots of texture going on here (Stripes, Modern Mosaic, and Alphabet Press.) Our embellishments are Pistachio Pudding ruffle stretch trim, and lots of Basic Rhinestones for bling.
The 31 Pages in 31 Days Facebook page is HOPPIN' with IDEAS right now as memebrs have started to post their pages. Some have even completed their homework challenge from last week and shared that! You are welcome to join us–I promise to approve your membership : )
Stick with me, kid… we're going places!! If you don't have a Stampin' Up demonstrator, I would be honored to be yours! Just let me know if you'd like a 2013-14 Idea Book & Catalog mailed to you free of charge–email your address to zwolaneks@att.net.I am a no pressure sales person–all I do is put out gorgeous stamping and scrapbooking inspiration using products that you will find irresistible and feel compelled to order! No arm-twisting needed! And if you're interested in representing a company that creates fabulous products that practically sell themselves while you play with your friends, let me know. I welcome any and all new team members, wherever you may reside in the United States.
See you tomorrow for another ah-MAZE-zing Thinlets page, that's all about Christmas. Thanks for stopping!


Interesting color combo! Can’t wait to make these! 🙂
I love the layout design. The color looks really intense though. I’ll check it out tomorrow night to see if I need to tone it down a bit. I love all the little added details on this page.
The color is not nearly so bright in real life : ) It is extremely hard to photograph 12×12 pages, let alone a two-page spread.
I absolutely love this layout!!! Would you be able to share the dimensions of your squares on your left page? Thank you Lyssa!
Thanks for the tips on the thinlets!
Love the colors and layout.
Sure, Avery! I always try to cut to maximize the paper. They are three and a half inches square. The Pistachio Pudding patterned papers were cut to 3×3 squares and the white journalling box was 3.25 square. Hope that helps!
Love the colors and layout but the strawberry is almost reddish, berry nice color indeed!
It’s actually not red at all. I’m sorry this lighting is throwing everyone off so much. I promise it looks really adorable in real life. : )
Summer school has been so much fun Lyssa and I love the pages we’ve made so far, especially this one. Thank you! I’m looking forward to the next 2 weeks.
This page really looks great “live”. The love thinlet is so subtle – works well with the layout.
Thank you Lyssa!